Wi-Fi extender/repeater

How a Wi-Fi extender/repeater work and do you need it?

If you’re stuck in a space where Wi-Fi waves don’t reach, you may be tempted to open holes in your home and layout some Ethernet cables. However, a Wi-Fi extender is the fastest and most excellent way to extend the distance of your wireless network. In this article, we will explore Wi-Fi extenders, what they do, and how to use one.

[td_block_ad_box spot_id=”custom_ad_2″]

> Check out: Top Best Video Conferencing Software for 2020

What is a Wi-Fi Extender?

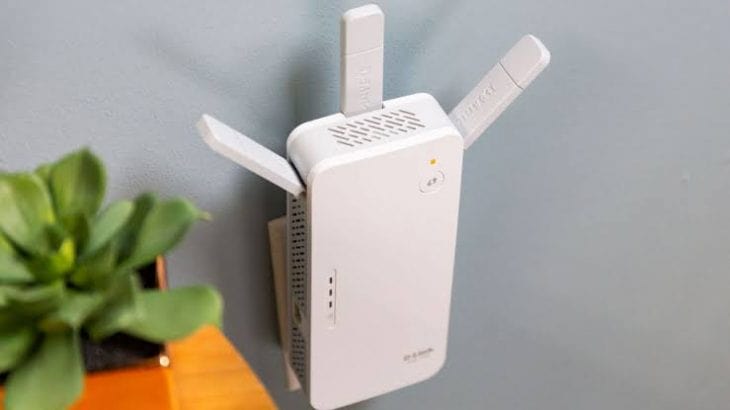
Wi-Fi extenders are sometimes called “repeaters” or “boosters” but the purpose is the same. A Wi-Fi extender stands between the wireless modem (router) and your computer by exchanging messages between them.

Of course, the way the Wi-Fi extender connects depends on the model. Generally, they are connected to the router initially in order to know where to transfer the internet. The extender must then be connected to a power source, an outlet between the router and the computer.

Once the extender is set to work, it creates its own Wi-Fi network where other devices connect. When you connect a device to it, all traffic passes through the Wi-Fi extender. When it receives traffic from the computer, it automatically passes it to the router where it was initially connected.

Use Wi-Fi expanders to cover long distances

In its most basic function, a Wi-Fi extender serves as a mediator for your computer and router. For example, if your computer is too far away from the router it will receive a weak signal that is displayed with a line in the Wi-Fi indicator. However, at the point where the repeater receives the signal, it can have average power, with two or three lines.

Before you buy an extender you should first try some things. Your signal may be weak due to router positioning. First, make sure they are in a good position. You can also modify the router itself by changing the channel to see if the signal will get better. You can also try changing antennas.

If nothing solves the problem, then you should try a Wi-Fi extender. Before you buy such a device, first check the old electronic devices for a router. Some of them can also serve as Wi-Fi extender. If even this method fails then you need to purchase a Wi-Fi extender.

What is a dual-band Wi-Fi extender/repeater?

While searching for Wi-Fi extenders, you’ll find some with names like “dual-band.” A device with this label means they cover the 2.4Ghz and 5Ghz bands. The 5Ghz band has higher traffic speeds than 2.4Ghz but the latter reaches higher distances and penetrates walls more easily. Dual-band extenders/repeaters are also good for the convenience of many devices. Some devices do not work at 5Ghz as for example a budget smartphone only operates at 2.4Ghz.

What do the numbers in the Wi-Fi extender/repeaters labels mean?

Where does a Netgear N300 Wi-Fi extender differ from a Netgear N600? The answer is simple. The N300 can transmit traffic at a maximum speed of 300Mbps while the N600 at 600Mbps.

The higher this number, the more traffic the Wi-Fi extender/repeater can transmit. If an extender has only one band, for example, 2.4Ghz, the maximum speed it can transmit is 300Mbps. If there are two bands, the speed will be higher. For example, a dual-band Wi-Fi extension N750 can transmit 300Mbps on the 2.4Ghz network and 400Mbps on the 5Ghz network.

sources/ makeuseof.com

> Check next: How to delete a Gmail address and Download the Data

So what do you think about this? Let us know your thoughts in the comments section below, follow us on Twitter and Facebook for more news and updates.

neoAdviser

[td_block_11 category_id=”3″ limit=”1″ td_filter_default_txt=””][td_block_ad_box spot_id=”custom_ad_3″]
change your Apple ID password-min

How to change your Apple ID password (iOS 10.3 and up/MacOS)

Your Apple ID gives you the ability to connect to your Apple account on some devices, new and old, wherever you are. But this accessibility has a cost, security. The Apple ID password addresses this concern by asking you to set it every time you use a new device. The security measure in question can sometimes be compromised by compromising your sensitive personal data and information. If you want to make your Apple account more secure, then you can change your Apple ID password.

[td_block_ad_box spot_id=”custom_ad_2″]

> Check out: How To Change/Update Your Outlook.com Account Password (Updated)

Here’s how to change the password on iOS 10.3 and up

To change the password on your iOS 10.3 and up device, just simply follow the steps below:

  • Open the Settings app
  • Click on your name
  • Select the “Password and Security” option
  • Click on “Change Password” at the top of the screen. This option has a blue hyperlink.
  • Enter the new password
  • Click “Change” or “Change Password
  • Log in to your account again using the new password

> Check out: How to search for specific words in a YouTube video

How to change your MacOS Catalina password

  • Click the Apple icon in the top left corner and select “System Preferences
  • Click “Apple ID
  • Select “Password & Security
  • Click “Change Password
  • Set the password you use to log in to Mac
  • Double-enter the new password and click “Verify

How to change your Apple ID password for your browser

  • Open the browser and go to the Apple ID page
  • Select “Change Password
  • Enter the current password
  • Enter the new password twice
  • Click “Change Password.”

> Check next: How to block YouTube ads quite simply

So, here’s how to change your Apple ID password. Hope you found this article useful. Let us know your thoughts in the comments sections below, follow us on Twitter and Facebook for more news and updates.

neoAdviser

[td_block_11 category_id=”3″ limit=”1″ td_filter_default_txt=””][td_block_ad_box spot_id=”custom_ad_3″]
Memes As A Marketing Tool

Memes As A Marketing Tool – The advantages And The Disadvantages

Memes have become an integral part of our social fabric. Irrespective of our age or background, memes have become a part of our conversations, be it with friends or colleagues. Witnessing their tremendous growth, they are often adopted and used for advertising campaigns, social media, and events by organizations of all levels.

Memes serve as a strong marketing tool because they connect with an audience and add a tinge of humor to the brand, making it seem more approachable. However, the grass is not all green. Just like any marketing approach, there are some cons to meme-based marketing.

Let us now thoroughly understand the pros and cons of this method of marketing.

[td_block_ad_box spot_id=”custom_ad_2″]

Advantages of Using Memes in Brand Marketing 

Exposure 

Memes are a part of viral marketing. They are created to reach out to a large audience.  If you are a brand that is venturing into the digital space, a quick way to gain popularity would be by creating engaging memes regarding your products or services.

However, the memes should be produced with brand guidelines in mind. Memes are a great way to connect to your audience if your target audience comprises of teenagers and young adults. However, you should steer clear of this marketing tactic if your audience comprises of just middle-aged adults.

Familiarity and Empathy 

As memes are based on pop-culture, they allow the brands to gain the empathy of their audiences. Memes connect brands with their audiences on a very personal level. They are a successful technique because they allow brands to be less in-your-face with their marketing and more like a sitcom or television show with characters that are familiar to the viewers.

Trend-Setting 

Memes are catchy and funny, and they easily capture attention. This makes them go viral. The primary motive behind using memes in digital marketing is to grab the attention of the viewers.

Memes are trend-setting techniques as not many companies do it. So, if your organization does it, it automatically becomes a cooler alternative when compared to your competitors. Although, unless done cleverly, this form of marketing can categorize your brand as an imitator rather than trend-setter.

Sharability

Memes are a form of quick communication. They do not hold viewers’ attention for long. However, if done correctly, they deliver their message to a large number of people with minimal efforts.

Memes get propagated easily because they are highly relatable. Friends and peers share it with each other, making them highly successful. Therefore, brands looking to reach out to a large audience within a short span can do so by delivering their marketing messages through memes.

Disadvantages of Using Memes in Brand Marketing

Legal Rights 

Memes are usually made using a snapshot or a video clip from a popular event. While they are usually considered as a tool for humor, brands venturing into this marketing technique should tread carefully. It is important to research the rights to all social memes before leveraging them into advertising or branding.

One wrong step could derail your entire ad campaign and cost your company a fortune. The hack here is to ensure fool-proof research before attempting this strategy.

Short-Lived 

Memes are short-lived. While they capture a large audience, a meme does not stay relevant or humorous for a long time. As it is, the life of any post on digital marketing platform is short, with Instagram posts staying relevant for only several hours before getting lost in the plethora of posts by other content creators.

Therefore, relying heavily on memes is probably a bad idea. If you are creating a brand marketing strategy, you should ensure that you have a balance between meme marketing and other forms of content. Furthermore, having a team that is updated with pop culture will also ensure that your memes are fresh and not copied from other brands or content creators.

Another point worth noting would be the placement of memes in your strategy. While their short-life is a bane, it can prove to be a boon in certain cases. For example, beginning a campaign with a catchy meme could kick start your campaign giving your brand the attention you desire.

Unwanted Negativity 

As mentioned earlier, the sole reason for the popularity of memes is the humor behind it. However, humor is very subjective. What might be funny to you might not be funny to your viewers. It could even be offensive to them, and this may alienate or cause groups to ostracize the brand.

While planning memes into your strategy, you should ensure that the content is not controversial. In order to do so, it is always a better idea to interact with people outside of your team, as their opinions will be unbiased.

Meme Making Tools 

There are several sites that allow you to make memes for free, but they add their own watermark at the bottom. While there are ways of getting rid of the watermarks, that is another tedious process in itself.

If you have a graphic designer or handy Photoshop skills, then you can make your own meme easily and even add your brand’s logo, this would be ideal for your branding. Furthermore, if you are planning to make a video-based meme, several free YouTube intro makers are also available online.

Platform

As mentioned above, memes of all forms are available on the internet, be it video-based or pictorial. Therefore, these are suitable for every platform. However, with a majority of younger audiences spending a significant amount of time on Instagram makes Instagram a popular platform for this form of marketing.

Instagram story ads have seen a surge in meme-based content as brands are trying to take advantage of the short-life of the ads as well as the memes.

Conclusion

Memes are essentially a clever and witty take of brands or individuals on the ongoing pop culture. Their sarcastic approach makes it a popular tool. Witnessing the increasing popularity of memes, brands now want to exploit this tool to their benefit.

However, there are lots of pros and cons to this form of marketing. But, if done carefully and after thorough research, this form can reap you benefits like no other.

Author Bio: I’m Jaylin: SEO Expert of Leelija Web Solutions. I am a content manager, and the author of freeopenbook.com and a full time blogger. Favourite things include my camera, travelling, caring my fitness, food and my fashion. Email id: [email protected]

neoAdviser

[td_block_11 category_id=”3″ limit=”1″ td_filter_default_txt=””][td_block_ad_box spot_id=”custom_ad_3″]
progressive glasses

Facing difficulties using progressive glasses? Here are some ways to adjust and see better.

If you wear bifocals or trifocals, you’re no stranger to the inconveniences that the line between the lenses can cause. Not to mention, the immediate power jump! To help you with that, your optometrist may have recommended trying progressive glasses as an alternative. With no lines and power jumps, these multifocal lenses may seem the easiest to adjust to. But that is not always the case!

Popular as ‘no-line trifocals’, prescription glasses counter the problem of immediate power jump that bifocals and trifocals cause to wearers. Although this gradual power change may seem like the perfect solution, adjusting to progressive glasses can take some time.

[td_block_ad_box spot_id=”custom_ad_2″ tdc_css=””]

Tips to adjust to your progressive glasses!

Progressive glasses use progressive additional lenses (PALs) that have a gradual change in power, making it easier for the wearer to have great vision at all distances. These glasses have to be fitted correctly to give the best results. If you’re in the process of buying progressive glasses for yourself, here are a few ways you can minimize your adjustment problems.

Get progressives as soon as you discover you need multiple powers! This is recommended because the sooner you get your glasses, the lower the prescription will be and the easier the adjustment. The best time to see if you need progressives is in your mid-40s. And if you’re in your mid-40s, it’s good to schedule an eye test with Specscart as soon as possible.

The next thing you should do if you have got progressives is wearing them all the time. Yes, you heard me right. You may experience headaches and dizziness for the first few days but going back to your old glasses will make the adjustment more difficult. Progressive glasses are designed to be functional for all tasks. So, you better wear them everywhere!

Another practice you should adopt is keeping your chin towards your chest while you’re on the stairs. This allows you to see clearly through your progressive glasses!

Get your glasses adjusted according to your lifestyle! This is the most important thing and not getting them adjusted correctly can cause continuous discomfort.

The headaches aren’t going away? Or you find multifocals impractical for your job?

Peripheral distortion using progressive glasses for the first time is common. If your dizziness, headaches, vertigo, and nausea continue to persist after 2-3 weeks, you should probably see a doctor and see if any of the following can work for you.

You can get your progressive glasses fitted again: This sounds expensive but it is the best idea if you want to give progressives another chance. There are various types of progressive lenses available and so you can make a switch if you find better ones.

If you have problems using multifocals while working on computers, you can get another type of progressive lenses. Unlike the regular progressives, these have a gradual power change to view objects which are near or at medium length from you! These lenses can also be used if you have no problems seeing things at large distances but have been diagnosed with presbyopia!

Use single-vision glasses along with progressives:  If your job consists of looking at a particular distance for a long time, you can have a separate frame for work and a progressive glasses pair for all the other times. But you should get your eyes checked and ask your doctor before you make the shift to single-vision glasses.

In the end, it all comes down to your comfort. It depends on whether you are okay carrying many pairs of glasses everywhere or you’ve adjusted to the peripheral distortion that comes with the progressives.

If you think your progressives are acting up even after a few weeks of usage, you should see your doctor and find the best glasses for your needs on Specscart. An online eyewear brand, Specscart offers single-vision and varifocal lenses while making it very easy for eyeglass wearers to buy glasses online.

neoAdviser

[td_block_11 category_id=”3″ limit=”1″ td_filter_default_txt=”” tdc_css=””][td_block_ad_box spot_id=”custom_ad_3″ tdc_css=””]
Best Video Conferencing Software 2020

Top Best Video Conferencing Software for 2020

With a computer and a webcam, or with a “smart” mobile device, you can have individual or even group meetings, regardless of where you are, thus offering the flexibility of working from home, at a time when staying at home is already made mandatory. The expectations that businesses will increase day by day the use of a software for conferences and seminars through the web, simply thanks to the provision of a host of benefits such as time, cost, etc., are evident. In the following article, we will list some of the best video conferencing software for virtual meeting, some of which are more popular with us, and some are less talked about even though they offer a host of qualities making them competitive in the market.

[td_block_ad_box spot_id=”custom_ad_2″]

> Check Out: How to use your Android smartphone as a webcam for your PC

Best Video Conferencing Software for 2020

The current spread of the coronavirus has forced most companies in the world to switch from office work to home work, with the aim of not negatively affecting productivity. To achieve this, companies have turned to applications that offer video conferencing and applications that offer remote collaboration. It is a fact that this cannot replace close meetings – face to face – where the presence is more present, but since we are living in a time of “social distance“, remote meetings – by video – are a golden opportunity.

The usual offers for consumers made by companies like Skype, Google (Hangouts) or Apple (Facetime) have made video communications seem like a normal part of the conversation process. The expectations that businesses will increase day by day the use of applications for conferences and seminars through the web, simply thanks to the provision of a host of benefits such as time, cost, etc., are evident.

So follow the article below to know some of the best video conferencing software for virtual meetings in 2020, with some of which are more popular, and some are less known, even though they offer a host of qualities, making them competitive in the market.

#1. Cisco Webex Meetings 

Cisco Webex Meetings

Webex Meetings is a video conferencing platform established in 1995 as a company, that Cisco bought ($3.2 billion) in 2007. Due to the fact that behind this app is Cisco, the expectations are naturally high – and you will not be disappointed. Although there are some paid versions, in most cases the free version will be more than enough for you. This version offers you the opportunity to make HD video conferencing for up to 40 minutes, with up to 50 participants, with the ability to split the screen, which you can record and save in (MP4) – while also saving the transcription of Conversations – in which you can search for any keywords, and allows you to have room for private conversations. To save these conversations and share documents, you have 1 GB of cloud space available.

The paid version:

  • Starter: If these above restrictions are not enough, you can purchase the Starter version for $15/month per user, which offers up to 24 hours of long meetings, 5 GB of cloud space, and integration with other video platforms such as MS Teams, MS Outlook, PowerPoint, Skype and other applications.
  • Plus: The Plus version, which you can get for $20/month per user, increases the number of participants from 50 to 100, and allows you to customize the URL.
  • Businesses: The most expensive version of Webex Meetings is for businesses, for which you have to buy at least 5 licenses from $30/month per user. This version allows you to hold conferences with up to 200 participants, and take advantage of 10 GB of cloud space, and you will have some branding features available – which is special for this version.

Guests at your conference do not need to have a web account, nor do they need to download and install anything. In addition, through the Webex Meetings app you can also follow the conference from any video system that supports SIP or H.323. Once you register your Webex Meetings account, you will be given a personal URL link, which you can use to manage appointments, schedule video conferencing, or even open recordings you’ve previously made. In terms of meetings, you can use the Webex Meetings app – which gives you a better experience, or do it through the web. In addition to having a computer application, you can also use the mobile application.

Microsoft Teams, as the successor to Skype for Business, is more of an Office 365 feature than a separate application. To register for the free version of Microsoft Teams, all you have to do is have an active e-mail address.

The plans:

  • Basic: The basic version, which costs $5 per month for users, supports up to 300 members, guest access, voice and video calls for individuals and groups, card sharing – up to 2 GB for one user and 10 GB for groups , screen sharing, as well as collaboration with documents through the online applications of the Office package.
  • Business: Includes Standard ($12.50 months/user) and Enterprise ($20 month/user) of Office 365, where the Teams program is just one feature of the software package. In that package, administrators have access to a wide range of management, security, and other tracking tools. Group members, in these versions, can share cards up to 1TB per user, can schedule direct meetings from Outlook, can record (video) meetings, and interact in documents through Office programs and SharePoint online. In addition, these plans support online training sessions and seminars through the web.

#3. GoToMeeting

GoToMeeting
GoToMeeting

GoToMeeting is a service provided by LogMeIn, which you can use for video conferences through the web regardless of the system you use. In addition to offering the possibility of audio-visual conferencing and screen sharing, what sets this web application apart from other similar service providers, is the ability to launch a conference call from your mobile (smart) device. not offered by some of the most popular companies. You can also adjust the picture and sound quality, as well as it offers invitations for meetings and conversations with a single tap. For this, you can download the app on your mobile phone, be it an Android or iOS, which – both – have a very good user rating.

GoToMeeting Plans: 

  • Professional: You can get the “Professional” version for €12 per month, or €10.75 per month if you make the payment for one year (€129). This version limits the number of participants to 150.
  • Business: The Business version offers up to 250 participants. In addition, the Business version – which costs €14.33 per month, or €14 per month if you pay for it for a year – also offers some management options, as well as a table for drawing and moving the mouse pointer. 
  • Enterprise: While the plan for Enterprise could accommodate up to 3,000 participants.

#4. BlueJeans Meetings

BlueJeans Meetings
BlueJeans Meetings

BlueJeans Meetings is a web service that enables video conferencing which you can also use as an application on Android or iOS platforms. The special feature of this application on the web is the provision of voice quality which is supported by “Dolby Voice” which includes ambient noise cancellation, as well as the integration of hardware systems for conference offices. In addition, BlueJeans Meetings integrates with corporate applications such as Microsoft Teams, Slack, and Facebook Workplace, and offers a range of screen sharing tools, a whiteboard, and the ability to interact during meetings.

BlueJeans has been named from its founders to show that their app is as convenient and easy to use as it is appropriate to wear a pair of jeans.

The Plans:

You have a 30-day free trail service, than the option to choose between this plans:

  • Standard: BlueJeans Meetings – the Standard version – can be obtained for $12.49 per host per month, or for $9.99 per host per month if you make the payment within a year. This version is designed for individuals and small companies and supports up to 50 participants, up to 72 hours of meetings with the ability to record meetings for 5 hours per host, integrated with “Outlook” and “Google Calendar”, access to “Dektop” from a distance, and many other functions for Furniture, for Administration, and Security functions.
  • Pro: The Pro version includes all the options of the Standard version, plus additional options such as the number of participants increases by 25, ie 75 participants, 25 hours of video conferencing for hosting, integration of Slack and MS Teams applications, integration of Gong sales service & Zoho, integration of the Learning Management System including Canvas and CirQLive, as well as many other Security and Incident Management features offered by Okta and Splunk.
  • Enterprise: The Enterprise version supports up to 100 participants, registers unlimited, includes interactions with any of the traditional video conference rooms through H.323/SIP, and offers support for management, recommending steps to achieve results and  long-term success, technical management advice on implementation and many other services.

Zoom Meetings offers solutions for HD video conferencing and messaging for mobile devices and computers, with up to 1,000 participants simultaneously, and up to 49 videos on a single screen – which is only suitable for large screens. Meetings – between two people, or between groups – can be stored on your computer or in the Cloud. In addition, participants can share their screens during the collaboration, share cards in the Chat chat window, search the history of collaborations, and also offers archiving options for up to 10 years.

The sessions can be started by a web browser or by a dedicated application – be it for PC or mobile, providing two-way encryption (via AES 256-bit), role-based security (compatible with HIPAA), as well as integration with Gmail, Outlook and iCal applications for meeting schedule recording.

The Plans:

  • Free: The free version offers unlimited one-on-one meetings, limiting group meetings to 40 minutes for up to 100 people. It also offers the ability to record on your computer, or in the “Cloud” of meetings in .MP4 (Video), .M4A (Audio), and .txt (text chat – Chat). The meeting starter could check the audio, video, and screen sharing for all meeting participants, who if they have something to say have the option of raising their hand.
  • Pro: In addition to the free version options, the Pro version ($14.99 months/host) offers meeting times up to 24 hours, 1 GB of Cloud storage, user management and other tools for administrative controls (appoints someone to arrange appointments for you) as well as Skype interaction for Business.
  • Business: The business version ($19.99 months/host, starting with 10 hosts) supports up to 300 participants, administrator panel, convenient links (eg ants.zoom.us), login using your company’s accounts (Single Sign -on), brand marking of the company, integration with LTI (Moodle, Canvas, Desire2Learn, and Blackboard), as well as Transcription of recordings in “Cloud”.
  • Enterprise: If you need more than that, you can get the enterprise version for the same price as the above plan, but you have to pay for at least 100 hosts – so $19.99/month. This version, in addition to the options for the business version, offers support for up to 500 participants (Enterprise Plus offers up to 1,000), unlimited storage in “Cloud”, and other business qualities.

#6. Google Meet

Google Meet
Google Meet

Another video conferencing software for 2020 which you can use is Google Meet. Google Meet is an integral part of the “G Suite” and “G Suite for Education” app packages, and is a replacement for Google Hangouts in the accounts they pay for these two packages. Being part of Google’s application package, it is fully integrated with other G Suite applications. This means that you can schedule a Google Meet appointment directly from Google Calendar, and send out invitations to this email meeting using Gmail.

If you use the app, which comes for both Android and iOS, you will receive notifications of the meetings you have that day, to which you can respond (participate) with a single tap. And if you use the Enterprise version of the G Suite, you can join the meeting by phone while you’re on the go, where you don’t have access to the Internet. If you use other meeting apps like Skype or Microsoft Teams, or any other app that uses SIP and H.323, you can join a Google Meet meeting using the Pexip Infinity Platform.

The Prices:

Google Meet can be purchased through the G Suite Basic package for $6 per month for users – which supports up to 100 participants, or through more advanced packages, such as business ($12 months/user) or enterprise ($25 months/users) which support 150, respectively 250 participants.

#7. LifeSize

LifeSize
LifeSize

This award-winning video conference software and meeting room it has become the go-to cloud based communication alternative. LifeSize the “world’s first global 4K video conferencing solution” according to then, its being used by thousands of organizations in more than 100 countries.

With some of features, that may be also its downsides to, we can mention its own hardware that the LifeSize comes, but as it seams a great feature, it increases the price of the final product, which is why medium and smaller companies can hardly effort it. The software includes also monitor meeting rooms, set up a centralized directory of users, configure the home screen, and more.

The Plans:

LifeSize offers a Free 6 months trail plan with unlimited meeting duration, up to 25 participants, a personal meeting room and support for both Desktop and Mobile devices.

  • Standard: For small teams there is the ($16.95$ host/month) standard plan, with all the above Free 6 months features, up to 100 participants, Single sign-on (SSO) support, 24 hours of meeting and more.
  • Plus: If you need more, you can have all the Standard features mention above in the ($14.95 host/month) Plus plan with 15/hosts minimum order, plus up to 300 participants, Microsoft integrations, 1 hour cloud recording storage per host, and more.
  • Enterprise: For large organizations, there is the (12.95$ hosts/month) Enterprise plan with a minimum of 50/hosts order, that has all the Plus plan features, up to 1,000 participants, Unlimited US audio calling, Unlimited meeting recording, and more.

> Check Next: How To Export WhatsApp Chat as PDF using WPS Office

So here you have top 7 best video conferencing software alternatives for video conferencing and video meeting which you can use in 2020 according to your business needs. Hope you found this article useful. Follow us on twitter and facebook for more news and updates.

neoAdviser

[td_block_11 category_id=”3″ limit=”1″ td_filter_default_txt=”” tdc_css=””][td_block_ad_box spot_id=”custom_ad_3″ tdc_css=””]
Windows 10 PC into a WiFi Hotspot

How to Turn Your Windows 10 PC into a WiFi Hotspot

If you have upgraded recently to Windows 10 and want to share your internet connection with other devices, you can do it easily through the “Mobile Hotspot” Setting app in Windows 10. Just like on your Android and iPhone device, you can share your internet connection in Windows 10. You can broadcast your WiFi, Ethernet, or cellular data connection as a Wi-Fi hotspot. By doing that, you will allow other devices to connect to it. If your Windows 10 PC has cellular data connection and you want to share it, it will use the data form your mobile data plan.

[td_block_ad_box spot_id=”custom_ad_2″ tdc_css=””]

> Check Out: Windows 10 Tips & Tricks: Top Best Most Useful Features in Windows 10 

How to Turn Your Windows 10 PC into a WiFi Hotspot

There may be multiple reasons on why you may need turn your Windows 10 PC into a WiFi Hotspot, like when you need to connect to multiple devices but you are connected in a network with limited access. Some Wi-Fi in Hotels will allow only one device to be connected, so for this or many other reasons, is very important to know how to create and share your internet connection as a hotspot in Windows 10 by turning it into a Wireless hotspot (wireless access point).

Steps to turn your Widows 10 PC to a WiFi Hotspot

Windows 10 as made is really easy to create a WiFi hotspot (wireless access point) by using its own built-in hotspot software. So follow the steps below to turn you Windows 10 device into a WiFi hotspot:

  • Step 1: Click to the “Start” button and then the “Setting” gear in the left-side of the menu. You can do the same by pressing “Windows + I” keyboard shortcut.
  • Step 2: Next go to “Network and Internet“. If your PC has a WLAN or Bluetooth adapter than you can share your internet connection.
  • Step 3: Form the left panel window, click on “Mobile hotspot”
Windows 10 WiFi Hotspot: Mobile hotspot interface
  • Step 4: Under “Share my Internet connection from” select the connection which you want to share
Windows 10 WiFi Hotspot: Choose Internet
  • Step 5: Click the “Edit” button to change the hotspot’s name and password and next click “Save
Windows 10 WiFi Hotspot: Edit Name Password
  • Step 6. Finally “toggle on” the Mobile hotspot. Other devices now will be available to see your WiFi hotspot with the name you just created and connect to it.
Windows 10 WiFi Hotspot: Turn On Mobile Hotspot

> Check Next: How to use your Android smartphone as a webcam for your PC

Windows 10 will show the connected devices to the hotspot directly below along with they name. You can use Bluetooth for the same, by if you want a fasted internet connection speed, then WiFi if a better choice.

So below we cover everything you need to know about how to share your Windows 10 PC’s internet connection with other devices. Hope you found this article useful. If you have any thoughts, please let us know than in the comments section below, follow us on twitter and facebook for more news and updates.

neoAdviser

[td_block_11 category_id=”3″ limit=”1″ td_filter_default_txt=””][td_block_ad_box spot_id=”custom_ad_3″]
Windows 10 Tips & Tricks: Top Best Most Useful Features in Windows 10 (2020)

Windows 10 Tips & Tricks: Top Best Most Useful Features in Windows 10 (2020)

While Windows 10 may be the most convoluted operating system Microsoft has ever created it does include many handy features that are quite useful. So coming up i’ll show you more than 10+ tips, tricks and features that will help you get the most out of using Windows 10. Because there are many of you interested in this, we are going to include a mix of the newer features and some of the older classics that are still available for use with Windows 10. These top best 2020 Windows 10 tips and tricks will make your life a lot easier. I’m pretty sure you’re going to find something new here ’cause some of these are what I consider hidden features in Windows 10 and I have no clue about them for the longest time, but they made a big difference for me once i found out about them and started using.

> Check Out: How to Find Your Windows 10 Product Key (Using CMD & Windows Registry)

Windows 10 Tips & Tricks: Top Best Most Useful Features in Windows 10 (2020)

So, without going through to much talk, i will save your time and go right to it! So let’s get started with my tips for Windows 10 in 2020.

Tip #1. Clipboard History: Enjoy next level pasting with clipboard history

Windows 10 version 1809 has announced for the first time the new clipboard experience, so in order to use the new Clipboard History feature you will need to have Windows 10 version 1809 or greater. Although it came up with a new interface and some new features, its not really an complicated experience to use.

How to use Clipboard History feature on Windows 10

The new clipboard features uses the old experience that you already use. But instead of using CTRL + C to copy and CTRL + V shortcut to paste, now you will use the same CTRL + C shortcut to copy text multiple time and next you will use now Windows key + V shortcut to bring the new clipboard history. In this new interface you will find the lists of your copied items. So follow the steps below on how to do so:

  • Use CTRL + C shortcut several times to copy different text form your application
  • Open the document you want to paste it and this time click Windows key + V shortcut to open the clipboard history
  • In the new interface you will find the list of the above copied content
  • Select the content you want to paste

Isn’t that great? No more flipping back and forth between applications to copy and paste each bit separately and no more accidentally losing some copied text because you forgot to paste and copy something new over it. You can copy text, HTML and bitmaps up to four megabytes per item. You may have to activate clipboard history in the settings first, so here’s how to do so!

1. Enabling clipboard using a shortcut

The fasted way to activate clipboard history feature is by using a keyboard feature, so follow the steps:

  • Tap Windows key + V on keyboard
  • Click the Turn on button
Activate Clipboard History Feature
Activate Clipboard History Feature using shortcut

2. Enabling clipboard using Settings

To do so, in the Setting app, use the following steps:

  • Go to Settings.
  • Then click on System.
  • Next click on Clipboard.
  • Turn on the Clipboard history toggle switch.

From here you can tun ON or OFF the Clipboard History feature at any time.

Enable clipboard history using Settings

How to sync clipboard history on Windows 10

The other setting here, sync across devices allows you to share copied text across any of your windows devices as long as you’re signed in to the same Microsoft account. Anyway, for privacy reasons, this feature most be enabled and configured manually, here how to’s:

    • Go to Settings.
    • Next click on System.
    • Go to Clipboard.
    • Under “Sync across devices,” turn on the toggle switch.

Finally, select the automatic syncing option that you want:

  • Automatically sync text that I copy: Your clipboard history will sync to the cloud and across your devices.
  • Never automatically sync text that I copy: You must manually open the clipboard history and select the content you want to make available across devices.
Sync Clipboard history Windows 10

How to pin items in the clipboard history

One more great feature: Let’s say you have some items on your clipboard that you use frequently and you’d like to be able to reuse these even after rebooting your computer. No problem for clipboard history, you can pin these items. Here’s how to:

On the Clipboard History Interface:

  • Click the “ellipsis” next to the item
  • Next select pin.

They’ll still be there the next time you log in. The unpinned items on your clipboard history are cleared every time you restart your PC. Only those items you pinned are going to remain on the clipboard.

How to clear clipboard history on Windows 10

Latest, if you no longer need to use the Clipboard History feature, or is something does not work as expected, you can reset the history to see if the problem may be fixed, so here’s is how to:

  1. Click Settings.
  2. Go to System.
  3. next click on Clipboard.
  4. Under “Clear clipboard data,” click “Clear” button.
clear clipboard history

Once done, the clipboard content will be deleted form your device and Microsoft account, but Pinned item will still remain till you remove then manually. If you wish to just delete only one or two items, you can do it so by opening the Windows key + V interface and simply click the button on each of the content you want do delete. You can choose also Clear all button on the history interface to delete the list.

> Check Out: Top 5+ Best Free Screen Recorder For Windows 10

Tip #2. Sandbox: Stay safe by using Windows Sandbox feature

Sandbox is another exciting new feature that was introduced with the Windows 10 May 2019 Update (version 1903). It offers a separate testing environment to try out software or download apps from websites that you’re not so sure about. Sandbox is part of the Pro and Enterprise edition of Windows 10 so unfortunately it’s not available in Windows 10 Home. Also your processor and motherboard need to support virtualization. If the virtualization is supported but not enabled, check your motherboard manufacturer to find it out how to enable it. 

Sandbox is like a virtual PC that’s built right into your Operating System. This way you can run programs or access websites in a safe zone without affecting your system. Although you may be able to create virtual machines to reach the same experience, Windows Sandbox has some key benefits. By using it eliminates the steeps on downloading and creating virtual machines. Every time you run the Sandbox features, it will immediately create a new clean Windows 10 installation. Once the Windows Sandbox gets closed every thing gets wiped out automatically. Also an important thing is that everything happens inside the environment while being isolated from your main installation to offer maximum security.

Windows Sandbox system requirements

Before going through the steps on how to enable Windows Sandbox feature, make sure your device meet these minimum software and hardware requirements:

  • Windows 10 Pro (or Enterprise).
  • Hardware virtualization.
  • AMD64 architecture.
  • 2 processor cores minimum (4 cores with hyperthreading is recommended).
  • 4GB of RAM (8GB is recommended).
  • 1GB of HDD space (SSD is recommended)

How to check if virtualization is enabled

Hardware virtualization most be enabled in the BIOS of your system. Depending of your motherboard you may need to check if it supports it and how to enable.

To check is its enabled follow the steps below:

  • In the search bar type “CMD” end pres enter
  • Next in the CMD window type the following commandsysteminfo.exe
  • Check under the “Hyper-V Requirements” section, if “Virtualization Enabled In Firmware” reads Yes, then you can use Windows Sandbox.
check if virtualization is enabled

How to enable Windows Sandbox feature on Windows 10

Sandbox isn’t turned on by default, so you have to activate it first. Here’s how to:

  • On the windows search bar type “Turn Windows features on or off” and pres “Enter
  • In the pop-up window search for “Windows Sandbox” option
  • Check the “Windows Sandbox” and then click “OK” button
  • Click the Restart now button
enable Windows Sandbox

After completing above steps, you can start now using the new virtualization layer to install and test untrusted applications temporarily.

How to use Windows Sandbox feature on Windows 10

To start using the Windows Sandbox feature you have just activated is really easy, just follow the steps below:

  • In the windows search bar type “Windows Sandbox
  • In the search results at the top, right-click to “Windows Sandbox” and select “Run as administrator”
  • This will open the Sandbox window
  • Now at you main device, copy the app that you want to test it and than past it inside the Windows Sandbox experience
  • Click on the installer (.exe, .msi, etc) to execute the installation

You can safely now open it and check if everything is okay or use edge to check out some dodgy website you’re not sure about, to make sure it’s safe. When you’re done just close Sandbox an the X button and all the content there is going to be wiped out. So even if the Sandbox is compromised next time you start it up again, it’s going to give you a brand new box to play with, but be aware that Sandbox only gives you an Operating System with a browser, none of the other third party applications are going to be available in Sandbox.

So you can’t copy an office attachments that you received into the Sandbox and open it there because you won’t have Office in the Sandbox. You can install apps, but you’re going to have to install them again next time you open up a new Sandbox. Also keep note that you can’t drag and drop files form your Windows main installation to the Windows Sandbox interface.

So keep that in mind!

> Check Out: How To Partition A Hard Disk Without Formatting (Three Methods)

Tip #3. Virtual Desktop: Split your world using virtual desktop

So let’s say you’re working on a project and you have several apps open, then an appointment pops up reminding you that you need to join a video conference to present a status update. When you share your screen, you don’t want everyone to see all the other files you’re working on. And you don’t want to close them either because it’s going to take some time to get it all set up again, once you’re done with your phone call. The solution is to switch to another clean temporary workspace, which is also called a Virtual Desktop.

Virtual Desktop
Virtual Desktop Interface (Windows 10)

How to create a new virtual desktop in Windows 10

Windows 10 has made it really easy to use and setup virtual desktops. This is really a great and very useful feature to keep your unrelated and ongoing project organized or hide then from your boss quickly. So let find out how to use multiple desktops in Windows 10.

For creating a new virtual desktop you are just a few click away, or you can use simply a keyboard shortcut: Here’s how to:

  • Click “Task View” icon at your taskbar
  • Next, click “New Desktop” at the top-left corner of your screen.

Create a new virtual desktop Windows 10

That’s all! You can use also Ctrl + Windows key + D on your keyboard that it will create a new virtual desktop immediately.

How to switch between virtual desktops in Windows 10

You can use different ways to do so:

  • Click “Task View” on your taskbar icon
  • Click “Desktop 2″ or the other virtual desktops you have created

Switch between virtual desktops in Windows 10

There is also Ctrl + Windows key + Left and right arrow keyboard shortcut to switch between virtual desktops. If you use a device with touchpad you can do four-finger swipe left or right to switch between virtual desktops.

You can also do things like moving windows between virtual desktops by click and dragging then, duplicate virtual desktops by right-clicking on the active window and choose “Show this window on all desktops” to duplicate a single window, or select “Show windows from this app on all desktops” to duplicate all windows from one app.

Once you are done, you can close your virtual desktop by clicking “X” icon in the top-right corner, or simply use “Ctrl + Windows key + F4″ shortcut to close the virtual desktop you are currently viewing.

Tip #4. Quick Assist: Get remote Access using Quick Assist

Windows 10 Quick Assist feature is really useful when you need to help someone that has a PC problem. Windows 10 Quick Assist allows you to remotely access other Windows 10 PC form your own PC. It will give you full control so you can quickly help your friends, parents by doing your magic.

Quick Assist interface
Quick Assist interface: Windows 10

Things to know before allowing access:

This feature will give full control to other person’s PC, so you should use it with someone you trust. if you are the one giving assistance, you will need to use an Microsoft account to sign in. If you are the one receiving help, you don’t need to sign in to Microsoft account. Here’s how to use Windows 10 Quick Assist feature:

How to set up Windows 10 Quick Assist

If you are assisting someone:

  • At the “Search Bar“, type Quick Assist and hit Enter
  • Click Give assistance
  • Sign in to your Microsoft account by filling your email and password
  • Next you will get a “six-digit code” that you most give to the person you are helping out

If you’re getting help

Here’s how to get help form the other person:

  • At the search bar type “Quick Assist” and press “Enter”
  • Click “Get assistance” and type “six-digit code” you received for the person that is helping you
  • Click “Submit” and then click “Allow

Following the steps above, the person who is giving assistance to you will now have full access at your desktop.

> Check Out: How To Create WiFi Hotspot In Windows/Mac/Linux OS

Tip #5. Aero Shake: Minimize quickly using Aero Shake

With is another great Windows 10 tip that i use daily and for sure will help you saving a lot of time. Aero Shake is a fun little feature to quickly minimize opened windows. Just grab the window you want to keep by holding its title bar and starts shaking it a little bit. It’s going to minimize all other open windows. This way you can fully focus on the one open window.

Aero Shake
Aero Shake: Windows 10

If you did the shaking by mistake, just shake it again and they’re all going to come back. If you’re like me and always have countless windows open, this is much faster than minimizing each window one by one.

If you’re not a shaker and you like to use shortcuts, you can also use the shortcut
Windows + Home key. It will do the same thing.

> Check Out: Top 3 Best PS4 Emulators for Windows PC (2020 Edition)

Tip #6. Snip & Sketch: Capture your screen using Snip & Sketch

Another great Windows 10 tip you’re probably familiar with, but it’s just so useful that it has to be on this list .Snip & Sketch it’s a super handy screen capture tool. Sniffing sketch is the best screen capture tool ever to be included in any Microsoft operating system.

Snip & Sketch Windows 10 feature is the successor of the old Windows Snipping Tool. After the 1809 Windows 10 update, Snip & Sketch has updated with other features like copy a rectangle, a free-form area, or even the entire screen to the Clipboard and then save to reuse then.

How to Take a Screenshot Using Snip & Sketch Windows 10 Feature

Using Snip and Sketch feature to take a screenshot its pretty fast and easy. The fasted way to screenshot Windows 10 is by pressing Windows Key + Shift + S keyboard shortcut. After the Snipping Bar interface opens, just select a mode and snip it without opening Snip & Sketch Windows app.

Here’s how to open Snip & Sketch, take a screenshot, manage and edit it:

  • In Windows search bar type “Snip & Sketch” and press “Enter
  • From the pop-up window click “New” and choose from “Snip now” , “Snip in 3 seconds” or “Snip in 10 seconds” according to your need, after clicking the snipping bar will appear
  • Next select a mode between Window Snip, Fullscreen Snip, Rectangular Snip or Freeform Snip. 
  • Your snip it will appear at the Snip & Sketch window.
Snip & Sketch Interface

From this window you will have some features like Copy, to make a copy of the just created snip, Share, to share it with other others and also you can edit it through the different tools like a Pen, a Highlighter, and an Eraser provided on the app.

Tip #7. Split Screen: Look at multiple windows using split screen

If you often need to look at several windows on the same screen at the same time you can easily do that using Snap Assists. This feature works for any application.

Snap Assists Windows 10

How to Split Your Screen in Windows 10 With Snap Assist

There are different ways to do so but the most easiest is using Snap Assist. This feature should be enabled by default but if not enable it in Start > Settings > System > Multitasking > Snap Windows

With Snap Assist you can drag the windows to a side or corner of you screen and “snap” it there and this will make room for other app to be snapped in the empty screen space. Follow the steps to split you screen with Snap Assist:

  • Open two on more windows/apps
  • Grab one of the windows and drag it all the way over to the left side of the screen
  • Now let the mouse off and the windows will be snipped to the half of the left screen living half room to the right for your other programs/windows
  • Select now one other window/program to snap it to the right side
  • Now that you have two screen at the same window, you can drag the dividing line to resize then both simultaneously.
  • You can do the same to slip the screen on up to 4 windows by opening 4 different apps/windows and drag fist one of then at the top-right corner

You can do the same using by clicking on that windows with your mouse and use Win + left/right keyboard shortcut to decide the side of each window. Then use the arrow keys to move between other windows to choose the other one and press Enter.

Tip #8. Dictation: Use speech-to-text feature in Windows 10

Dictation has been around for a while in Windows and has improved quite a bit in any text field. This feature is available on Windows 10 Fall or greater. Using this feature, you can simply talk to your Windows OS to get it respond to your commands.

Here’s how to use Windows Dictation feature: 

  • Open the app on which you want to dictate text like Notepad, WordPad, Microsoft Word or your email software and type Windows + H keyboard shortcut to trigger the dictation.
Trigger Dictation
Trigger Dictation: How to use dictation in Windows
  • If the speech services is not enabled, a pop-up windows will appear, click on it and go to Settings > Privacy > Speech, inking & typing. Once there click “Turn on speech services and typing suggestions.”
Enable Speech Services
Enable Speech Services (How To use dictation in Windows)
  • With the speech services On, press again Windows + H on your keyboard and the e dictation window will pop-up and its now ready to listen.
Trigger the Dictation Feature

Now you can give your fingers a rest and use your voice to start dictating.

> Check Out: Windows 10 Themes/Skins: Top 15+ Best Windows 10 Themes

Tip #9. Pause Updates: Pause Windows 10 Automatic Updates to Avoid Critical Bugs

Microsoft says that updates are important four security patches, bug fixes and latest features. But there may be times you’re not ready to update, or you may have heard about issues with the latest updates causing problems for others, that of course would never happen with Windows 10. Thankfully, Windows 10 Home, Pro and Enterprise allows to pause updates for a specific time.

Here’s how to pause updates for a period (up to 35 days on Windows Professional) using Windows Update settings, or disable automatic updates permanently using Windows 10 Group Policy method.

Method 1: Pause updates via Windows 10 Settings

On all Windows 10 versions you can pause updates by using Windows Update settings. At Windows 10 Home you can pause updates for up to 7 days, while on Windows 10 Professional for up to 35 days.

So, follow the steps to pause updates on Windows 10:

  • On the start button click “Settings
  • Next click “Update & Security
  • There choose “Advanced Options
  • At the ‘Pause updates‘ section, form the drop-down menu select a date that you wish to pause the updates. After you reach your pause limit you’ll have to get a new update before being allowed to pause again.

Till the period is reached, Windows will no longer check for new updates.

Pause updates on Windows 10

Method 2: Pause updates permanently via Windows 10 Group Policy

Windows 10 Pro, unlike Windows 10 Home has a Group Policy editor that you may use to permanently disable automatic auto clicker updates. Here’s how to use the Group Policy editor to pause Windows Updates:

  • In the search bar type “gpedit.msc” and press “Enter
  • At the “Group Policy Editor” window navigate to this path: Computer Configuration\Administrative Templates\Windows Components\Windows Update
  • Under “Windows Update” section double click on “Configure Automatic Updates
Group Policy editor
Group Policy editor: Disable Windows Update
  • Set this policy to ‘Disabled‘, to disable automatic updates in Windows 10 at an unlimited period.
  • When done, click “Apply” and then “OK” to save the policy.
Policy interface
Policy interface

Windows 10 will no longer install updates automatically, but you can still use Windows Update to manually check for updates and install then. To enable the automatic updates, just set the policy to ‘Not Configured‘ again.

Tip #10. Slide To Shutdown: Enable Slide to Shutdown

Here’s a cool trick that uses a full-screen slide down to power off your computer. Here’s how you set it up on your desktop:

  • Right-click on the desktop and do the following New > Shortcut
  • In the pop up windows, paste the following code:
%windir%\System32\SlideToShutDown.exe
  • Click “Next“, then “Finish“. This will create a clickable icon which you may rename it.
  • To shut down you PC via slide-down, double-click at the icon to prompt a pull-down shade and then use your mouse to drag it to the bottom. Note that this is a shutdown, not a sleep.
SlideToShutDown Windows Feature

Tip #11. Nearby Sharing: Transfer files between PCs by using Nearby Sharing

If you’re familiar with Apple’s airdrop, Microsoft now has a similar feature called “nearby sharing” that will let you share content with other Windows 10 computers connected to your network or Bluetooth. This feature was first introduced with the Windows 10 April 2018 Update (version 1803) and you can use it to quickly send a  a document, photo, video, or presentation to other PCs in your room.

Nearby Sharing
Nearby Sharing

How to enable Nearby Sharing on Windows 10

Nearby sharing, Windows 10 feature should be enable by default after you have installed April 2018 Update. Anyway, to make sure this is enabled (or to disable it), you can do it in the Settings app. Here’s how to:

  • Open “Settings” and click on “System
  • Next click on “Shared experiences” and there turn on the “Nearby sharing” toggle switch
Enable Nearby sharing on Windows 10

From here you can “Enable” or “Disable” Nearby sharing feature on Windows 10. You can do the same using Action Center, (Ctrl + A) quick keyboard shortcut. If Nearby sharing button isn’t available there, you can add it quickly form the following: Settings > System > Notifications & actions, under “Quick actions,” click the Add or remove quick actions link, and then enable the button.

Now when you select share in Microsoft Word, and many other programs including photos, you should see nearby computers. The file you send (or receive) by default will be stored in the “Downloads” folder, but you may change this in the “Shared experiences” settings. Here’s how to:

Changing default transfer folder location

Follow the steps to easily specify another folder or any other drive for your transfer files:

  • On “Settings” click “System
  • Click “Shared experiences” and under “Nearby sharing,” using Save files I receive to option, click the “Change” button.
Nearby sharing: Change transfer folder location

Select your new location. Once done, the files will be saved to the new location.

I am text block. Click edit button to change this text. Lorem ipsum dolor sit amet, consectetur adipiscing elit. Ut elit tellus, luctus nec ullamcorper mattis, pulvinar dapibus leo.

> Check Out: How To Find Passwords of All Connected Wi-Fi Networks using CMD

Tip #12. Game Bar: Enable and open the Xbox Game Bar in Windows 10

For gamers, the Xbox Game bar on Windows 10 is one of the great features. It will give access to so-called Xbox DVR, which in other words it will let you record the screen or take screenshots of your games while playing. Here’s how to enable and use it:

How to enable the Xbox Game bar Feature in Windows 10

Windows 10 Game bar was introduced first with the Windows 10 Creators Update and was updated with the Windows 10 November 2019 Update with some new features. Xbox Game bar should be enabled by default, but if its not here’s how to:

  • In the “Start” menu click “Settings
  • Then go to “Gaming
  • At the left side of your screen, click “Game bar“, then enable the Record game clips, screenshots, and broadcast using Game bar switch.

From here you can also change the default Xbox Game bar keyboard shortcuts according to your needs.

Now to bring the Xbox Game bar in Windows 10 by default just type Win + G keyboard shortcut. If you are using an Xbox controller, push the Xbox button on it. You can launch the Xbox Game bar at anytime during gameplay. This is an interface on how it looks:

Xbox Game Bar Windows 10 Interface

Xbox Game bar widgets on Windows 10

This are some generous useful widgets you can expect form Xbox Game bar in Windows 10.

  • The main widget: Its located at the top by default. You can see here the time, enable or disable other widgets that are available, and also access the settings of the Game bar.
  • The Capture widget: It will give you the tools for recording and capturing screenshots of your gaming sessions.
  • The Audio widget: You can control different audio channels without leaving the game
  • The Performance widget: It shows information about the utilization of your resources like (CPU), graphics card (GPU), RAM (memory), and number of FPS (frames per second).
  • Xbox Social widget: Will let you to connect and chat with your friends, as long as they’re also on Windows 10 or Xbox.
  • Xbox Achievements: It will display your achievements as Xbox records them.
  • Looking for group widget: Will show other connected players to Microsoft’s Xbox service that are looking to join a gamers’ group.
  • Spotify widget: It will let you play your favorite music form the Spotify app without having to leave you game.

Tip #13. Ransomware Protection: Enable Ransomware Protection in Windows 10

Ransomware is a nasty malware that encrypts your data holding it hostage unless you pay a ransom. To help protect your computer, ransomware protection is now included with Windows Defender. Windows 10’s Ransomware Protection feature is composed of two components: Controlled Folder Access and Ransomware Data Recovery.

  • Controlled Folder Access: This will monitor the folders that you specify and block any changes to the files in that folder. This will block all programs, expect the ones you allow, for making any modifications to the files of the monitored folders and will protect that folders form being encrypted by ransomware.
  • Ransomware Data Recovery: It will sync automatically all you common data folders with your Microsoft OneDrive account to make a backup of your files. If you may ever become a Ransomware victim, you can use OneDrive to recover your files.

How to enable Ransomware Protection in Windows 10

In Windows 10 version 1903, Windows Defender’s Ransomware Protection by default is disabled, so you will need to enable it to be protected form ransomware attacks. Note that is you use a third-party antivirus software and Windows Defender’s real-time protection is disabled the Ransomware Protection features screen and the Controlled Folder Access feature won’t be accessible. Also to enable full Ransomware Protection on your Windows 10 PC both Controlled Folder Access and login to Microsoft OneDrive should be configured: Here’s how to:

  • On the search bar type “Windows Security” and press “Enter” (You may do the same by following Settings> Update & Security> Windows Security.)
  • On this window click “Virus & Threat Protection
  • Scroll down to “Ransomware Protection” and click “Manage ransomware protection
  • Toggle the “Controlled folder access” to enable it, and next login to OneDrive so that both features will be enabled as seen below.

Now you can configure Controlled Folder Access to choose which folder you want to monitor by choosing the “Protected folders” option and block malicious programs form accessing then. Clicking “Protected folders” will show you a list of folders currently being protected. You can choose to add additional folders by selecting the “+”, then “next” to add a protected folder and browse your computer for that folder.

Tip #14. God Mode: Enter to God Mode in Windows 10

If you’re a power user that has recently made the switch from an older Windows operating system, you might be happy to know that the easter-egg, known as “God Mode” is still available in Windows 10. It’s great for those people that want a massive amount of settings all within a single user interface. Here’s how to enable it:

How to enable God Mode on Windows 10

  • Create a New Folder in your desktop.
  • Rename the New folder to “GodMode.{ED7BA470-8E54-465E-825C-99712043E01C}
  • Once done the step 2, the folder name will automatically change to GodMode.
Enable God Mode aon Windows 10

If done correctly this folder will become an icon and when you open it you’ll now have the ultimate control, with more settings that you would probably ever need.

> Check Next: Create A Bootable Windows 10 USB Flash drive (Step By Step Guide)

That’s all for our top best Windows 10 Tips and Tricks. We will keep to update this article as soon as new cool features will be released. If you have a tip or trick for using Windows 10 you’d like to share, than let us know about it in the comments, follow us on twitter and facebook for more news and updates.

neoAdviser

Sites Like KissCartoon

KissCartoon Alternatives: Top 10+ Best Similar Sites Like KissCartoon (2020)

Are you a cartoon lover? Do you like to watch cartoons online for free without paying a penny? Then KissCartoon may come to help. KissCartoon is an very popular online streaming site that offers especially cartoons. At the time writing, it hosts over 5,000 cartoons form different genres like Family Guy, Gravity Falls, The Flintstones to Scooby-Doo, Batman, The Jetsons, Beavis and Butt-Head, King of the Hill etc. The best part, is totally free and available to all. But if you still need more options, or for some reasons this website isn’t accessible to you, below, we are going to share some good KissCartoon alternatives to continue watching cartoon online for free by having the same experience.

[td_block_ad_box spot_id=”custom_ad_2″ tdc_css=””]

NOTE: If the given links are not working, please do a quick google search to find the latest working links to the given website!

> Check Out: Top 10+ Best Free Anime Streaming Apps of 2020 (Android and iOS)

What Is KissCartoon?

KissCartoon is an online streaming site to watch cartoons for free. Like other online streaming services, it provides links to third-party contents where you can watch cartoons for free. KissCartoon pack about 5,000 cartoons from different genres like The Jetsons, Beavis and Butt-Head, King of the Hill, Family Guy, Gravity Falls, The Flintstones, Scooby-Doo, Batman, to The Tom and Jerry Show, X-Men, and many more. The best part, every thing available on the website is totally free and you don’t need to sign up, but you may find a few ads as it is an ad-supported website.

KissCartoon is the sister site of the well-known KissAnime, and as the name suggest it offers hundreds of cartoons as an addition to Anime. It packs an well-designed interface that is pretty easy to use and navigate through. The content comes well-organized in categories to easy find your child loved cartoon.

Is KissCartoon Legal and Safe to use?

KissCartoon and other free streaming sites like KissCartoon to stay live use advertisements that are not controlled by trusted networks like Google. So clicking through ads may lead you on malicious download programs that may effect your system.

As for its legality, like other free online streaming services, KissCartoon has not the right to host the content they provide. For this reason, streaming ilegal copyrighted content is forbided by laws in may countries like US. As for these reason, these type of services are always the main target of Gouvernments and they domain gets blocked by ISP (Internet Services Providers) in these countries. As for this reason, to keep staying online, these type of services, changes they domain frequently. So depending on where you live, a good VPN is always best to protect your identity online.

KissCartoon Proxy/Mirrors

KissCartoon proxy and mirror sites are clones to the main domain and hosts the entire content library of the main website but at a different domain name. For more these mirror sites uses the same user interface as the parent site and you can expect periodic updates. Depending an where you live, you may need to use an good VPN to avoid penalties from your Gouvernment, and we at neoAdviser we always recommend to you to use these mirrors/proxyes that have a SSL certificate.

So below, there are some KissCartoon proxy/mirror sites that are working fine at the time  writing the article and you can still use to have the same experience as at KissCartoon website.

  • https://kisscartoon.nz/
  • http://www2.kisscartoons.co/
  • http://kisscartoon.bz/
  • https://kimcartoon.to/

Top 10+ KissCartoon Alternatives to Watch Cartoons online Free (2020)

So knowing all the above, lets dig right into the top 10+ best alternatives to KissCartoon in 2020 to watch cartoons online for free. The sites shared below are randomly, so make sure to check then all and find your next favorite KissCartoon alternative.

#1. KissAnime

KissAnime is one of the best sites like KissCartoon to stream anime shows and movies for free in HD and FHD format without the need of signup. You can find a huge collections of the latest anime shows and movies from Japan and Korea. The anime comes with English subtitles or dubbed in English and if high quality video and audio resolution.

It offers various categories that are available and you can choose to watch then form 240p to 1080 according to your internet speed. In the recent update the new added anime are showcased directly at the homepage.

KissAnime Website: https://kissanime.ru/

KissAnime
KissAnime – Similar Sites Like KissCartoon

Check outTop 15+ Best Free Sports Streaming Sites: Watch Sports Online for Free On 2020

#2. KimCartoon

KimCartoon is another great well-known free streaming service online focused on animations. It pack no just an well-executed interface but its also known for it largest animation collection of content, starting form the classic ones like The Tom and Jerry Shows.

KimCartoon website: http://kimcartoon.biz/

KimCartoon
KimCartoon – Similar Sites Like KissCartoon

#3. Chia-Anime

This is one of the best websites to watch anime online for free, listening to anime soundtracks, and reading manga in various genres. For sure you will find you favorite anime here as Chia-Anime gets updated daily. The site offers also the feature to save or download your favorite anime.

The website is compatible with different screen device, so you can use Chia-Anime to stream anime content even form you Android or iOS device. Another top features is the availability of dubbed in English and subbed versions of anime.

Chia-Anime Website: http://www.chia-anime.me/

Chia-Anime
Chia-Anime – Similar Sites Like KissCartoon

#4. Anime Toon

Anime Toon is yet another great KissCartoon alternative to watch cartoons online at no cost. It pack hundreds of animations and films to choose form its different categories and also you may want to look Dubbed Anime category from the website. Anime Toon gives the option to choose form different anime genres like action, comedy, adventure, crime etc.

The well-design and the simple user interface offers also many sorting options to help you discover easily all the new and most trending anime video contents.

Anime Toon Website: http://www.animetoon.org/

Anime Toon
Anime Toon – Similar Sites Like KissCartoon

> Check Out: Top 10+ Best Free Live TV Apps for Android & iOS (2020)

#5. GoGoAnime

A super-fast streaming site with a lot of content, GoGoAnime is marked as one of the best sites like KissCartoon. The site can be accessed from PC and form all smartphones as it works with HTML 5. The latest anime movies and series are with English subtitles and also you can find many English dubbed anime. With a huge collection of the latest Japan anime series and movies, GoGoAnime is the station of millions anime lovers.

GoGoAnime is a free website to watch anime online and downloading anime with English subtitles or dubbed in English. The site offers an clean and easily user interface (UI) which is well-organised. GoGoAnime packs all of the popular anime videos to choose from. 

GoGoAnime Website: http://gogoanimee.io/

GoGoAnime
GoGoAnime – Similar Sites Like KissCartoon

#6. Crunchyroll

Crunchyroll offers free anime movies and shows as well as with its paid subscription. This is a legal site and has more than 2 million premium members an about 45 million registered users. You can also watch Japanese manga and Asian TV for free at Crunchyroll.

All groups of peoples, form age of 60 years old to 7 years old, that are anime fan can enjoy watching they’re favorite anime here for free. Its database gets updated daily so you will never miss the latest anime episodes.

Crunchyrol Website: https://www.crunchyroll.com/

Crunchyroll
Crunchyroll – Similar Sites Like KissCartoon

#7. WatchSeries

Unlike the above streaming services online, WatchSerie features all type of genres form Game of Thrones to Titans, Dark Mirror or The Big Bang Theory. Beside that, its animation collection is huge an its featured in an separate section dedicated for anime and cartoons.

Why says cartoons fans like only cartoons?

WatchSeries website: https://www4.watchmovie.movie/anime

WatchSeries
WatchSeries – Similar Sites Like KissCartoon

> Check Out: Top 5 Best Sites to Watch Wrestling Online for Free: Watch WWE for Free Online (2020)

#8. 9Anime

9Anime is the best competitor and great alternative to KissCartoon. Through 9Anime you can watch for free online the latest and most popular anime shows in English subtitles and also in HD format. No signup is needed to access these features that makes 9Anime one of the best alternatives to AnimeDao and one of the best sites to watch the latest anime online for free.

Users can chose also to download they’re favorite anime content which is an great feature. 9Anime packs a loot of similarities with KissCartoon and for sure you will love it!

9Anime Website: https://www2.9anime.to/

9Anime
9Anime – Similar Sites Like KissCartoon

#9. AnimeFreak

Animefreak offers a loot of free anime shows and movies with English subtitles and even some of than are dubbed in English. It has a great user interface (UI) which makes this site a really great KissCartoon alternative to watch cartoons online.

AnimeFreak pack an huge collections of more than 10K episodes of anime series form various categories to stream and watch for free. Clicking on the photos of the anime you can see the review of the show, ratings, and episode list. You will find both original and dubbed series at AnimeFreak and to make the watching more enjoyable you can also download they’re app from Play Store.

AnimeFreak Website: https://www.animefreak.tv/

AnimeFreak
AnimeFreak – Similar Sites Like KissCartoon

#10. AnimeDao

AnimeDao offer a large collection of diverse anime series and different categories with an great interface. You will also find dubbed anime and the only drawback is that it is not giving to its users the option to download anime.

Another top feature of AnimeDao is its “Request/Report” option, which lets is users to request Anime series to be included in the website. If you are looking for extensive library of a full-length anime content, than AnimeDao is your perfect place!

AnimeDao website: https://animedao.com/

Animedao
Animedao – Similar Sites Like KissCartoon

> Check Out: Top 20+ Best Websites to Watch Free Movies Online (2020)

#11. CartoonExtra

CartoonExtra is yet another extra entertainment to stream online not only cartoons and the top popular animations video content, but also offers a group of comics and movies. Simply to name a few, right now you can watch from SpongeBob SquarePants, Adventure Time, to The Loud House, Frequent Display, and Dora the Explorer.

CartoonExtra website: http://cartoonextra.in/

CartoonExtra
CartoonExtra – Similar Sites Like KissCartoon

#12. AniWatcher

AniWatcher provides a large collection of your loved cartoons at totally free of cost. The database gets updated frequently with new anime content. This website may not be as popular as the above shared but now it count around 800K visitors monthly. Like other free anime streaming sites, this is also an ad-supported so you will face some advertisements.

AniWatcher website: https://aniwatcher.com/

AniWatche
AniWatche – Similar Sites Like KissCartoon

> Check next: Top 10+ Best Anime Sites to Watch Anime Online (2020)

Everyone how love to watch cartoons online, for sure can do that on KissCartoon. So, above you have still plenty alternative to KissCartoon in 2020 for your entertainment online. Hope you found this article useful. If you have any similar site like KissCartoon, please let us know in the comment section below, follow us on twitter and facebook for more news and updates.

neoAdviser

[td_block_11 category_id=”3″ limit=”1″ td_filter_default_txt=”” tdc_css=””][td_block_ad_box spot_id=”custom_ad_3″ tdc_css=””]
Make Group Calls on WhatsApp

WhatsApp Group Calls: How to Make Group Calls on WhatsApp (Android & iOS)

Note: Finally in the latest update, Whatsapp has announced that the limit of participants in a group call is now extended at 8 people instead of four people. The extension of the limit is announced for both audio and video calls.

Staying in touch while in distance is very important and that’s why using apps to make group calls may come in help. WhatsApp is a very popular app used not only as an alternative to texting but also to make Video or Audio calls. Not only, but you can also do audio or video group call on WhatsApp with up to 8 peoples. The WhatsApp app is available for both iOS and Android devices, so despite the type of device you or your friends use, you can easily use group calls on WhatsApp. You are going to share two methods for making group calls on WhatsApp.The GB WhatsApp Download App is available for both iOS and Android devices, so despite the type of device you or your friends use, you can easily use group calls on WhatsApp.

> Check Out: How to play YouTube in Background (Android & iOS)

How to Make Group Calls on WhatsApp (Android & iOS)

WhatsApp is an very popular video and audio messaging app used worldwide buy over 2 billion peoples. Group call is an really great feature to stay in contact with your friends and family and WhatsApp make it very straightforward to do so

On Android the UI (User Interface) may look a bit different, but the steps to make group calls are still the same. The only drawback of WhatsApp group calls is that you are unable to switch a group call form audio-only and video once you start the call, you will need to hang up and start again the call. So here are the steps on hot to make group calls on WhatsAapp:

At the “Call” section: 

  • Click “Calls” at the bottom of your screen
  • Next tap the icon with a phone and a “+” sign at the top-right of your screen
  • Click “New Group Call
  • It will open a list of your contacts. You can search but typing they name in the search bar and add then by clicking the circle next to the name.
  • After you finished adding then, tap the phone button for starting you video or audio group call.

At the group chat:

  • Tap “Chats” at the bottom of the screen an select a group conversation to open
  • Tap on the button with a phone and a “+” sign at the top-right of your screen
  • All the name of members from the group chat will pop up. Choose who to add by tapping the circles next to the names.
  • Next, type the video button to start a video call or the phone button to start an audio call.

> Check Out: How to create email lists in Gmail to send group emails

Add More Peoples in an One-on-One Call on WhatsApp

From an one-on-one call you can also add more peoples. You will need to place an one-on-one voice or audio call and then add more participants. Here’s how to:

  • Click “Chats” on your bottom-right corner and open a conversation
  • Tap the hone button to start an audio call or the video button to start an video call
  • After you started the conversation and the person picked up, now to add another person in the chat tap the button with a person and an “+” sing your top right corner
  • A list of your contact will show up. tap the name of the person in the search bar at the top and next click on the name you want to add.
  • An pop-up may be displayed asking if you want to add it, tap “Add” so it will join the call
  • Follow these steps to ad more participants at you call. You can add up to four peoples simultaneously

> Check Next: Netflix Party: How to watch movies with your friends at the same time

So here is an step-by-step guide on how to make group call on WhatsApp. The process is the same on both Android and iOS devices. We have also showed a way on how to add more peoples in an one-on-one conversation. Using this WhatsApp Feature you can make group video or audio calls with up to 8 peoples and the best part is that all the participants are not required to have the same type of device (Android or iOS). Hope you found this article useful. Let us know your thoughts in the comments section below, follow us on twitter and facebook for more news and updates.

neoAdviser

YouTube in Background

How to play YouTube in Background (Android & iOS)

And you don’t have to pay for YouTube Premium

There’s a lot of music, stories and news on YouTube, and the fact is that you want to be able to play it in the background on your mobile device while reading, writing text, or doing other things. Unfortunately, if you don’t have YouTube Premium, your ability to listen to a YouTube video in the background is limited…, possible, but limited.

[td_block_ad_box spot_id=”custom_ad_2″]

> Check Out: How to create email lists in Gmail to send group emails

How to play YouTube in Background (Android & iOS)

However, there are some solutions. You can play a single song in the background, both on an Android phone and with an iPhone, but it’s a little weird as an experience. And I wasn’t able to play more than a single song on a playlist in the operating system. When I tried it on a phone running Android 10, the same song kept repeating itself, while on an iPhone that had iOS 13, the music just stopped.

However, if you want to try it, here’s how to play music in the background of your mobile device.

How to play YouTube in Background on your Android device

This method, which we saw for the first time written in Digital Trends, works on Chrome and can work on other mobile browsers as well.

  • While you’re at Chrome, go to the YouTube website. (This should be done using a mobile browser, so make sure you are on the website and not on the YouTube app.)
  • Find the video you want to play
  • Click on the three dots in the upper right corner of the screen and then select “Desktop site” from the menu
  • You will now use the desktop version on YouTube. Start the video again.
  • Click the Home button at the bottom of your screen. Once you see the home screen, the music can be stopped. But wait…
  • Swipe down notifications from top to bottom on the screen. You should see the notification for the current song; just press play to restart it.

How to play YouTube in Background on your iOS device

Playing a free video on YouTube on an iPhone is even more complicated, especially since some methods that have worked before have been blocked by iOS 13. We’ve finally found a method that actually works (most of the time). , anyway) in a video by Daniel About Tech.

  • Find your video in Safari. (You will probably use the mobile version of YouTube.)
  • Click on the “AA” symbol in the upper left corner of the screen
  • In the ‘drop-down‘ menu, click on “Request Desktop Website
  • In the YouTube desktop version, start the video and then delete to close the Safari app
  • The video will surely stop playing. Swipe down from the Control Center at the top right of the screen. You will see the video uploaded there; press the play button and the video should start playing again.

We had no problem playing a single video in the background using this method. If it doesn’t work for you at first, then, according to Daniel, if you go back to Safari and restart the video, it should be played. But while I was able to play a single video in the background, as in Android mode, I was not able to play more than one single song.

> Check next: Netflix Party: How to watch movies with your friends at the same time

That’s all! Hope you found this article useful. Please let us know if it worked for you in the comment section below, follow us on twitter and facebook for more news and updates.

neoAdviser

[td_block_11 category_id=”3″ limit=”1″ td_filter_default_txt=””][td_block_ad_box spot_id=”custom_ad_3″]