Cellphone Battery - that's what you need to know (8 Tips)

Cellphone Battery – that’s what you need to know (8 Tips)

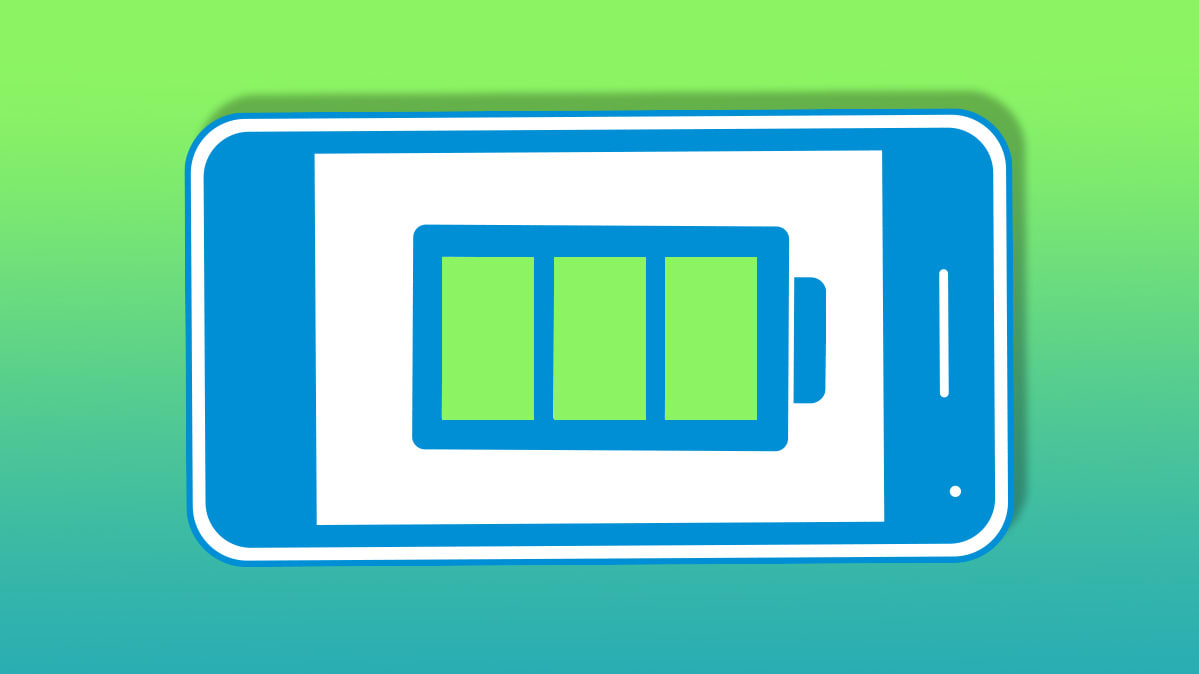
Despite the many advances in technology that have brought dual camera systems, smaller frames, and the integration of artificial intelligence devices, the industry that is not sufficiently developed is that of batteries. The minimum required is the possibility of a full day of use with one load.

[td_block_ad_box spot_id=”custom_ad_2″]

> Check Out: How to Calibrate Mobile Phone Battery – That’s why it Needs Calibration

Cellphone Battery – that’s what you need to know

#1. Even if the battery of the handset is 100%, is there room for a small extra charge? (True)

There is more power in your cellphone battery than the percentage indicates, but if you use it all, you will significantly reduce battery life. Increasing the available power within the battery leads to a reduction in the amount of time it can charge and hurt the internal battery life. In order for the batteries to last for multiple charging cycles, manufacturers limit the amount of power they can charge from the battery.

#2. Having Wi-Fi and Bluetooth open, wasted more on the battery of the device? (True)

In addition to the display, battery consumption is also the fact that the device is trying to connect to WiFi or mobile networks. For example, if you notice that the battery of your smartphone is consumed while driving, because you try to connect to a cellular network

REDUCTION OF DISPLAY LIGHTING AND THE TIME OF TELEPHONE IN THE SLEEP MODE ARE SOME WAY TO INCREASE LIFE OF BATTERY.

#3. The battery of the handset is destroyed by the use of an informal charger? (True)

Not all chargers are created in the same way and this can cause damage to the battery. Official chargers have special security devices that reduce the amount of power when the battery is fully charged, but some of the unofficial ones do not have these capabilities. This means a rapid emptying of its duration.

> Check Out: How to Scan a Document Using Your Phone or Tablet – The Best way

#4. Does the device battery damages if it is charged via a PC or laptop? (Not true)

Slightly slower load is good for the battery. Slow load with less “pressure” taking lithium ions, results in a lesser impact on its destruction. That is why manufacturers are putting restrictions on the devices so they can not be loaded fast.

#5. Turning off the device at random occasionally helps increase battery life? (Not Applicable)

This is a myth, of course. Before the lithium-ion batteries were batteries of nickel-metal hydride, it was impossible to obtain a valid loading level indicator without discharge and recharging completely. By contrast, in lithium-ion batteries, this is no longer so. They can show us their status regardless of the loading level.

#6. Does the handset battery behave worse when it is cold? (Not true)

Indeed, it is the opposite. Trying to keep the battery at low temperatures is much better for his life. Exposing the battery at high temperatures is something that greatly affects her life and leads to its deterioration. But why batteries hate so much fever? The reason is electrolyte. At high temperatures, these electrolytes “damage” something that leads to battery damage.

#7. Should you let the battery reach 0% before recharging? (Not true)

For some strange reasons, batteries get maximum pressure when fully charged and completely discharged.

THE BEST THING TO DO IS LET THE BATTERY REACH 50% AND THEN CHARGE

#8. Does charging the battery more than 100% destroy it? (Yes, but not for the reason you are thinking)

When you leave the battery of the phone connected to the charger and charge it to 100%, charging stops due to security reasons. And she replenishes again when it falls short. However, it is not good to keep 100%, as we said before.

> Read Next: Here’s how to see what kind of information Facebook has about you and how to clear it!

So that’s all about the cellphone battery! Hope you find this article useful.Please let us know your thoughts in the comment section below,follow us on twitter and facebook for more news and updates.

neoAdviser

[td_block_11 category_id=”3″ limit=”1″ td_filter_default_txt=”” tdc_css=””][td_block_ad_box spot_id=”custom_ad_3″]
Find Any Saved WiFi Passwords On Android

How To Find Any Saved WiFi Passwords On Android – Latest

WiFi now-days is the best way to access the internet, cos the mobile data fees are day by day increasing by becoming unaffordable for many customers. One bad thing of using WiFi is remembering difficult passwords. You use difficult pass cos you don’t want other people using your WiFi, cos of your week password. In PC or Laptop, its an easy task to find saved WiFI password, if you forged it. But if you use and android device, than this will be a really difficult task.

[td_block_ad_box spot_id=”custom_ad_2″]

> Check Out: How to Calibrate Mobile Phone Battery – That’s why it Needs Calibration

Find Any Saved WiFi Passwords On Android – Latest (How To)

But don’t panic 🙂 ! Here, in the article below, will will share to you a really easy trick to find any saved WiFi passwords on Android device. So, if you want to know more just follow the guide below.

Some Questions Asked By Our Visitors

  • How to find saved WiFi password on Android?
  • How to find WiFi password?
  • Find forgotten WiFi password.

Requirements –

  1. Rooted Android device – Click here for Guide.
  2. ES File Explorer – Click here to Download.

Steps to find saved WiFi passwords in Android Device

1. First, your android device should be rooted. Check the link above if it is not rooted.

2. After, Download & Install ES file explorer from the link above.

3. Open ES File Explorer then, go to options and turn on “Root Explorer”.

4. Click on Options > Device.

5. Find the data folder > misc > WiFi.

Steps to find saved WiFi passwords in Android Device

6. Then, you need to find a file named wpa_supplicant.conf. Tap on the and open it up.Make sure you use ES File Explorer‘s built-in text/HTML viewer for the task.

7. Here you will find your Network name and below there is the password of your WiFi.

Remembering difficult passwords sometimes its not an easy task. But if you forged it, is really a “Cold shower” finding it back.

> Read Next: How to Scan a Document Using Your Phone or Tablet – The Best Way

By following this guide, through your android device, you can easily find any saved WiFi passwords on Android. So we hope that you find this article useful. Please let us know your thoughts in the comment section below, follow us on twitter and facebook for more news and updates.

neoAdviser

[td_block_11 category_id=”3″ limit=”1″ td_filter_default_txt=””][td_block_ad_box spot_id=”custom_ad_3″]
Tips and Tricks for Macs

5 Awesome Tips and Tricks for Macs

Mac computers are popular for being different than other computers and laptops. Know these 11 awesome tips and tricks for Macs.

Do you have a MacBook? Perhaps you’ve had one for a few years of perhaps you’ve just invested in the new MacBook Pro 16-inch? Either way, if you have one of Apple’s marvelous machines you will want to know how to use it properly and get the most out of it.

So what are some of the best tips and tricks for Macs that you might not have heard of? Here’s what you need to know.

[td_block_ad_box spot_id=”custom_ad_2″]

1. Windows On Your Mac

Bored of Mac OS? Did you know you can run Windows from your Mac? No longer will you be restricted by a program that is only compatible with Windows. Running the latest version of Windows on your Mac can solve this problem.

To get Windows up and running, first log into your Mac and begin the boot camp procedure. You can access this from your Applications folder. Starting this procedure will partition your hard drive – chop it in half or however way you want to split this.

After you complete this process you should restart your computer and then download or install Windows. You can do this using a CD or a file from the internet. Depending on the version of Windows you buy you might need to purchase this.

After you have installed it and partitioned your hard drive you will be given an option as to what operating system you want to use every time you open your Mac. This is one of the best Mac hacks.

2. Install Another Language

Are you fluent in more than one language? Of course, you can use special characters Mac to write the odd sentence but sometimes you need to use more than one character or word and you might want to have a whole keyboard devoted to another language.

You can install this by opening up system preferences from your menu bar or dock and selecting the keyboard setting. In the keyboard menu, scroll to the input sources tab. Here press the +  symbol and select the keyboard you want.

You will now have easer-to-use shortcuts for letters and accents from different keyboards. You can also easily switch between English and other keyboards by pressing the black box A in the right-hand corner of your menu bar.

3. Control Your Mac Using Siri

Did you know that you can use Siri on Mac as you can for the iPhone and iPad? It’s a miraculous tool that once helped rescue a stroke victim. You can activate it using the logo in the corner of your menu bar or by pressing the physical button on your Apple headphones.

Once you have activated it you can use it for all kinds of purposes from asking Siri what the weather is like outside to current news. You can even ask it to translate various phrases into another language such as French or Mandarin.

But did you know that you can also use Siri to control various functions on your Mac? You can Siri to open applications for you, to play a specific song on Apple Music or to play an audiobook for you or to write an email for you.

4. Highlight and Use Dictionary

Another great feature of Mac computers is the ability to highlight phrases or words you don’t understand while browsing the web without having to leave the comfort of the web page.

This is great for comprehension and it can also improve your vocabulary skills. Rather than not bothering to look up a word because it’s too much effort to open up a dictionary page, all you have to do is right-click and press the dictionary option.

5. Multi-Task

The modern world is all about learning how to handle multi-tasking. From juggling various projects for your work while also scrolling through newspaper websites and responding to group Facebook messages.

Mac computers make all that easier because you can now have two windows open side-by-side on your screen.

Press the green button on the left-hand side of your browser window and hold it. Then you will be given three options, enter full screen, tile window to the left of the screen or tile window to the right of the screen. Once you have selected which side of the screen you want you to work on you can then select another window to fill up the other side.

Another way Macs help you to multi-task is through their sidecar feature. If you own an iPad you can use the iPad screen as a second screen for your Mac. Once you have connected it you will be able to send one of your windows to the iPad and work on it there using your keyboard and trackpad.

There Are Many Tips and Tricks for Macs

If you have a Macbook computer then you will no doubt want to take advantage of it. There are so many Mac tricks you can use to help make your workday more productive and to help you keep in touch with your friends more easily.

From using Siri to control your Mac for basic functions to using the multi-tasking facilities which allow you to use your iPad as a second screen and your windows split into two, there is so much you can do if you have the know-how.

And, as Apple continues to improve its offering with yearly updates to its operating system, there will no doubt be many more Mac hacks to come with the release of Mac OS 10.16 in September 2020.

If you are interested in reading more about tips and tricks for Macs or some advice on using a Mac be sure to check out the rest of our site.

neoAdviser

Find Your Windows 10 Product Key

How to Find Your Windows 10 Product Key (Using CMD & Windows Registry)

If you are searching for your Windows 10 product key, you can find it very easily by using a command in CMD (Command Prompt) or by using a Windows Registry Method. Finding you Windows 10 product key may be important for ex. when you are trying to reinstall your Windows 10 and you came to the point when you need your Windows product key. Below we are sharing an How To guide so make sure to read it!

[td_block_ad_box spot_id=”custom_ad_2″]

> Check Out: How To Activate GodMode On Windows 7, 8 and 10

Do you really need a product key?

Windows 10 is the very latest version of Microsoft that you should install nowdays on your devices. The major upgrade that come with it was the “Digital Licence”, which means that you don’t need any license for activating your Windows 10 when you reinstall it. Through your digital license linked to your Microsoft account, your Windows 10 will be activates automatically by itself.

Windows 10 Product Key

But still, for some other good reasons you may also need to extract your Windows 10 Product key form your Windows device.

How to Find Your Windows 10 Product Key (Using CMD & Windows Registry)

After installing your Windows OS on your device and activate it, Microsoft will save it at your Windows Registry, something that for general users is very hard to find it. By using the methods below, you can find easily your Windows OS Product key. These methods are really for every Windows users and can be also used on Windows 7 and Windows 10.

Method #1. Find Your Windows 10 Product Key Using the Command Prompt (CMD)

This is the most simple method to extract your Windows 10 product key all you need is to start your Command Prompt window with the administrator rights. To do so follow the steps below:

  • Step 1.  Type “CMD” on you windows search bar
  • Step 2. The Command Prompt will appear at your search results. “Right-click” on it and choose “Run As Administrator” from the window. If needed, enter the password of your Windows account.
  • Step 3. Once the CMD window is opened, “Copy & Paste” the code below and hit “Enter
wmic path softwarelicensingservice get OA3xOriginalProductKey
  • Step 4. After than, your 25-digit product key will be displayed as below example:

That’s all! This is one of the most simple and quick method to find you Windows 10 Product Key using a code, but a code than is not really that easy to remember it. Be advised that this method will also work for OEM and Retail licenses.

> Check Out: Top 5+ Best Free Screen Recorder For Windows 10 

Method #2. Find Your Windows 10 Product Key Using a Windows Registry Method

This is one other very simple method to find your Windows OS product key by using a VBScript-  that you may have seen it at Microsoft forums. This code simply translates the Registry values to readable format. So follow the simple guide below on how to find your Windows 10 Key using Windows Registry method.

  • Step 1. “Right-click” on the desktop to open Notepad, go to “New” than go to “Text-Document” form the window.

  • Step 2. Next “Copy & Paste” the below code in Notepad
Set WshShell = CreateObject("WScript.Shell")
MsgBox ConvertToKey(WshShell.RegRead("HKLM\SOFTWARE\Microsoft\Windows NT\CurrentVersion\DigitalProductId"))

Function ConvertToKey(Key)
Const KeyOffset = 52
i = 28
Chars = "BCDFGHJKMPQRTVWXY2346789"
Do
Cur = 0
x = 14
Do
Cur = Cur * 256
Cur = Key(x + KeyOffset) + Cur
Key(x + KeyOffset) = (Cur \ 24) And 255
Cur = Cur Mod 24
x = x -1
Loop While x >= 0
i = i -1
KeyOutput = Mid(Chars, Cur + 1, 1) & KeyOutput
If (((29 - i) Mod 6) = 0) And (i <> -1) Then
i = i -1
KeyOutput = "-" & KeyOutput
End If
Loop While i >= 0
ConvertToKey = KeyOutput
End Function
  • Step 3. In Notepad, click “File” and choose “Save As
  • Step 4. On the File Explorer, at the “Save As Type” choose “All Files” give your file a name and put .vbs next to the file name. Example: windowskey.vbs
  • Step 5. Next “Save” the file
  • Step 6. Finally to view your Windows 10 product key you simply click the file you have just created to open it.

> Check Next: Windows 10 Themes/Skins: Top 15+ Best Windows 10 Themes

That’s all! Knowing these two simple methods you can easily find your Windows 10 product key. The methods shared below works well also on Window 8 and Windows 7. Hope you found this article useful, please let us know in the comment section below, follow us on twitter and facebook for more news and updates.

neoAdviser

[td_block_11 category_id=”3″ limit=”1″ td_filter_default_txt=”” tdc_css=””][td_block_ad_box spot_id=”custom_ad_3″ tdc_css=””]
Clear your Search History on Facebook

How to Clear your Search History on Facebook (Mobile&Desktop)

The latest Facebook search feature helps you get back to the pages you’ve recently searched for or visited frequently. But on the other hand, it is a threat to privacy. If you leave the phone in the hands of a friend for a second, you won’t want to risk them seeing what you asked for and the first thing that comes to your mind is how to clear the history.

> Check Out: How To Accept All Friend Requests On Facebook At Once

Here’s how to clear your Facebook search history from a mobile device

  1. Open the Facebook app
  2. Click the search icon in the upper right corner
  3. Next to the “Recent Searches” option is the “Edit” button
  4. When the activity log opens, click on the “Clear Searches” option.

Here’s how to clear your Facebook search history on your desktop

  1. On the profile page in the upper right corner of the cover is the “Activity Log” button
  2. Click the “More” option under the comments in the left pane
  3. From the open menu, type “Search History
  4. At the top of the search page, type “Clear Searches
  5. Click “Clear Searches” to confirm

> Read Next: Here’s how to see what kind of information Facebook has about you and how to clear it!

Hope you found this article useful. Let us know your thoughts in the comment section below,follow us on twitter and facebook for more news and updates.

neoAdviser

Accept All Friend Requests On Facebook

How To Accept All Friend Requests On Facebook At Once – (2020)

Facebook with more than 6 billion users worldwide is absolutely the biggest social media platform. Facebook is the place to make new friends, chat with our friends join groups, post status or even pay games, promote our business and many many more. Users of the social media Facebook can reach many peoples through groups or they pages. We have already shared a guide on how to Invite All Friends To Like A Page On Facebook. We can also reach many peoples not only from groups or pages but even through our profile page. Now-days peoples, in a smart way, make females profile page and grow that profile by accepting friend requests of buy increasing they followers.

[td_block_ad_box spot_id=”custom_ad_2″ separator=””]

> Check Out: How to Change my Facebook Profile Name Before 60 Days Limit (2 METHODS)

How To Accept All Friend Requests On Facebook At Once – (2020)

Normally we can accept the friends on Facebook one by one, but the problem is when we get to many friend request and it is a consume time accepting then one by one. So, doing this by just a simple click it i really a great thing to save a lot of time. To now more about how to accept all friends requests on Facebook at once follow the article below.

Steps To Accept All Friend Requests On Facebook at Once.

  • First open the given link below in your browser or visit here
https://www.facebook.com/reqs.php
  • After opening the link all your Pending request will be visible there.
  • Next Click F12 to open console box or you open it by right click through Inspect Element.
  • Next copy the below given code and paste it in console box. Like shown in the image below.

javascript:for( i = 1;i<document.getElementsByName(“actions[accept]”).length;i++){document.getElementsByName(“actions[accept]”)[i].click();}void(0);

Accept All Friend Requests On Facebook
  • After pasting press Enter and wait for sometime until all pending request will get confirmed.
  • Scroll down to make sure all request are accepted. In case there is a See more option, click on it.

  • Run again the scrip to accept request of pending request.
  • Follow the same process until all the request will get accepted.
Accept All Friend Requests On Facebook At Once

WARRING: Don’t accept friends requests in excessive. Always try to accept up to 50 per hour. This will reduce the chances of getting block.

> Read Next: How To Make Single Name On Facebook Account

That’s all! hope you find this trick on how to accept all friend requests on Facebook at once useful. Please let us know your thoughts in the comment section below, follow us on twitter and facebook for more news and updates.

neoAdviser

[td_block_11 category_id=”3″ limit=”1″ td_filter_default_txt=”” tdc_css=””][td_block_ad_box spot_id=”custom_ad_3″]
Delete Gmail Adress

How to delete a Gmail address and Download the Data

If you’ve created a Gmail account you no longer want, you probably plan to delete it but you need the emails. When you delete a Gmail address, you do not delete your Google Account. But on the other hand, it means that you can neither send e-mails with that nor receive e-mails from others. So make sure before you make the decision to delete your Gmail account.

[td_block_ad_box spot_id=”custom_ad_2″ tdc_css=””]

> Check Out: How to Change my Facebook Profile Name Before 60 Days Limit (2 Methods)

How to delete a Gmail address and Download the Data

If you’re sure, then follow the steps below to delete a Gmail account.

Here’s how to delete your Gmail account: 

  • Open the Gmail account you want to delete
  • Click on the profile icon in the upper right corner
  • From the Account menu, click the “Google Account” option

  • In the left pane click on “Data & Personalization
  • Scroll to the bottom of the page and click “Delete a service

  • Click “Delete a service

  • Enter the password if prompted
  • On this page you can also choose to download all the data before deleting the account by clicking the “Download Data” button
  • Click on the trash icon
  • Set up an email where you can get confirmation

  • Open the email you provided and click the link sent inside it to complete the deletion process

> Read Next: How to find out if someone has opened the email you sent through Gmail

That’s all! You have now successfully deleted your Gmail account. Hope you found this article useful, follow us on twitter and facebook for more news and updates.

neoAdviser

[td_block_11 category_id=”3″ limit=”1″ td_filter_default_txt=”” tdc_css=””][td_block_ad_box spot_id=”custom_ad_3″ tdc_css=””]
Why Content Delivery Network (CDN) Is Needed for Your Website?

Why Content Delivery Network (CDN) Is Needed for Your Website?

A website, which takes a lot of time to open up, is likely to be in the end ineffective. You are stressed as this happens, and you hope to be back online, as sales have stopped. Does your website need content delivery network? Yes, if you want your site to be incredibly fast and stable. Below are the main reasons why you should start using CDN.

[td_block_ad_box spot_id=”custom_ad_2″]

> Check Out: How to Optimize Your Domain Name: Best SEO Practices of 2020

Why Content Delivery Network (CDN) Is Needed for Your Website?

A website, which takes a lot of time to open up, is likely to be in the end ineffective. You are stressed as this happens, and you hope to be back online, as sales have stopped. My host service has not shown the right quality of the large number of visitors to the website – and is showing it with facts.

Content delivery network (CDN) can ease the traffic load of a loaded website.

Do you wonder why a CDN is essential for the smooth functioning of your website? Continue reading, you will understand what are the undeniable 6 reasons why you should be included on your website.

The Need for Content Delivery Network

When the website host is of a quality, it is sufficient for quick delivery of content to the visitor. But what if a blog post would become viral? What if your advertising campaign is successful and brings thousands of clicks at the same time?

Content delivery network is the rescue for these scenarios. But that’s not all.

#1. WeBsite Security

The CDN retains a local copy of the website and sends to its visitors its local copy. Visitors interact with the site as they always do but without damaging the main servers. This means your host is not affected by the huge influx of visitors.

CDN can distribute site content to some servers. By doing so, your site can afford more users at the same time. Benefits are: less interruptions, less dead pages, and fewer unsatisfied clients seeking unattainable services.

#2. Quick delivery of content

Bring website closer to visitors and they will benefit a faster upload time of the site.

CDNs use servers that are physically located in data centers around the globe. Visitors, by region they come from, will receive the local version of your website. This reduces the loading time and the line after they are not already frustrated by the wait.

This brings us to have …

#3. High conversion rate

Reducing loading time can create a noticeable increase in site conversions:

  • Sales of products
  • Sing Ups for announcements
  • Account Creations
  • Downloads and apps

Why is this happening? Because your website interacts with users without delay. Visitors receive what they require within milliseconds. You begin to guide them while their interest is high.

> Check Out: The Most Simple Rules to Help You in Keyword Research

#4. Ranking In Research Results

The top SEO shows the time of view or the time people spend on your site. Long stay time tells Google that your web site has met the user’s goal. You can not fulfill this goal if your website is slow and does not respond!

Increasing speeds offers a better user experience. This annoys people to search on your site, and find what they are looking for. As a result, the low percentage of low interaction is added to SEO that is influenced by user engagement.

#5. Experiences Created

Are you familiar with A / B testing? Includes audience sharing and sending variants of the same message. The higher ROI version becomes the new standard with the best conversion rate.

You can do this with content delivery network.

CDN sends variants of your website based on geographic location. You can locate content by means of translation. You can also send specific products, content and experience by location.

#6. Security

DDoS attacks are common and growing. These attacks hurt the web site and host, and create difficulties or inability to access the users.

You can not do business if your website is offline, right?

A CDN can reduce the number of DDoS attacks by distributing page loading. Site cache versions are accessible by site users. A CDN may include SSL, encrypt and protect the data if it is ‘caught up’ during the attack.

Create a Secure Online Presence

A CDN network along with good hosting is a solid link to creating online presence. Make CDN services part of your goals to send the best possible experience to the users. If you do this, you will be rewarded.

> Read Next: Subdomain vs. Subdirectories: What Will Increase Your Website’s SEO?

That’s all about Why Content Delivery Network (CDN) Is Needed for Your Website. Hope you found this article useful. Please let us know your thoughts in the comment section below, follow us on twitter and facebook for more news and updates.

neoAdviser

[td_block_11 category_id=”3″ limit=”1″ td_filter_default_txt=””][td_block_ad_box spot_id=”custom_ad_3″]
Change my Facebook Profile Name Before 60 Days Limit

How to Change my Facebook Profile Name Before 60 Days Limit (2 METHODS)

So, what is this 60 Days Limit to change your facebook account name:

According to Facebook rules and regulations, one cannot change their facebook account name twice or thrice or even more in less than 60 days’ span, it is because Facebook requires everyone to provide the name they use in everyday life so that you always know who you’re connecting with.

There are two methods of changing your Facebook account name before 60 days limit

> Check Out: Convert a PDF File Into an Editable Text Document (How to)

[td_block_ad_box spot_id=”custom_ad_2″]

1)   Method 1:

This is illegal or not rightful method to change your facebook account name, as this might not harm anyone practically, you may consider this possibility of changing your facebook account name


2)   Method 2:

This is the method you might be looking for if you want to change your facebook account name completely to a different name as the first method doesn’t allow you to change to a new name for facebook account or facebook profile before 60 days’ limit.  This method has some limitations as well,  you can read it below.

How to Change Your Facebook Account Name Before 60 Days Limit – Method – I

By using this method, you cannot make a new account for your account instead you can revert to your old account name, which might be considered when you misspelt your name or your new name doesn’t suit you or you no longer use that name. So, you can shift to your old account name in less than 2 mins.

1)   Log in to your facebook account

2)   Go to this link: https://www.facebook.com/hacked

You might be wondering what  this link is actually, this is created by facebook in order to check the security settings and modifications happened in an account in case an account is hacked or any security issue occurs

How-To-change-your-Facebook-Profile-Name-Before-60-Days-Limit

3)   Click on “get Started” – let it complete checking your data and after it completes the process click “Continue”

4)   Now Change your facebook account password
5)   It asks you to check “what is your correct name” there select your old name and click next

6)   That’s it – Now Check your profile name, it will be changed to your old name

> Check Out: Invite All Friends To Like A Page On Facebook (2 Methods)

How to Change Your Facebook Account Name Before 60 Days Limit – Method – II

This is the legal and original process which is set up by facebook for people who want to change their name for real, not for fun. This method doesn’t go as smooth and as fast as the previous method, this takes time as facebook verifies your data.

All you need to do is send your details to facebook via link given out by facebook

1)   Go to this Link

2)   Fill out your details

Limitations of How to Change Your Facebook Account Name Before 60 Days Limit – Method – II

1)  You can only use your real name

2)  You can change your account name till next 2 months unless you use method -1

3)  Not as fast as method – I. This may take some time

source/ hackingdream.net

I Will Be Very Happy To Help You So For Queries or Any Problem Comment Below Or You Can Mail Me At [email protected]

neoAdviser

[td_block_11 category_id=”3″ limit=”1″ td_filter_default_txt=”” tdc_css=””][td_block_ad_box spot_id=”custom_ad_3″]
Complete Guide To Install Kodi on PS4 and PS3 (Working 2018)

Complete Guide To Install Kodi on PS4 and PS3 (2020)

Install Kodi on PS4 and PS3: PS4 and PS3 are great gaming consoles and many use they to play games.In this article we will go through the steps to install Kodi on PS4 and PS3.Yes this is possible!Kodi is a free open source software also Kodi on PS4 is the best medi streaming service available for you.So follow the steps below to install Kodi on PS4 and PS3!

[td_block_ad_box spot_id=”custom_ad_2″]

> Check OutSteps to Download PS4 Emulator for PC 

Complete Guide To Install Kodi on PS4 and PS3 (Working 2020)

Kodi On PS4 and PS3
Kodi On PS4 and PS3

Kodi is available for Android also iOS but not for PS4, for this reason you can’t install Kodi os PS4 and PS3 directly. But don’t worry we have on alternative for you by installing Plex app. Plex is the best alternative to Kodi on PS4 and PS3. Check the guide below on how to install this app.

Steps To Install Kodi on PS4 and PS3 (Working 2020)

Step 1: Launch the PlayStation Store.

Step 2: Go to the Home page.

Step 3: Then you can see the Apps option.

Step 4: Click on it.

Step 5: Select popular section.

Step 6: Scroll down till finding the Plex icon.

Step 7: Click on download and install it.

Step 8: Wait the installation process till is done.

Step 9: Tap to Start.

Step 10: Open Plex from TV and Video tab on your home screen.

Step 11: After, create one account for the Plex app.

Step 12: Sign in with that account on your PS4.

Step 13: After Logged in the app will show you code and link from your TV screen.

Step 14: Enter the code from your TV screen.

Step 15: Click on LINK.

Step 16: Now, go to Settings > System and then enable options like Advertise a server then Show camera roll media and Network discovery.

Step 17: Done.

Now you have successfully installed Kodi on ps4.

> Read NextSteps to Install Kodi 17.1 Ares Wizard, and Get Pin using http://bit.ly/build_pin

Hope you find useful this guide on how to install Kodi on PS4 and PS3, is you have any question please let us know in the comment section below,follow us on twitter and facebook for more news and updates.

neoAdviser 

[td_block_11 category_id=”3″ limit=”1″ td_filter_default_txt=””][td_block_ad_box spot_id=”custom_ad_3″]