If you do love movies, like me, then i’m sure that you found yourself online many times searching for the direct download link of your favorite movie. The popularity of movies fans in these days has grown and many of than are searching to download the latest movies cos not of than have time to go and watch then in cinema. But many times when we search for the direct download link of a movie we have faced a spam or an AD link. Today, in the article below, we will share to you a really simple trick with google search so you can easily find the Direct Download Link Of Any Movie. If you are interested to know more about how to find the Direct Download Link Of Any Movie, than follow the article below. We are going to share two simple methods along with some latest updated tips.
> Check Out: Top 20+ Best Websites to Watch Free Movies Online
How to Find Direct Download Link to Any Movie (Two Methods)
So, to avoid this, we are going to share an amazing trick from which you will be able to easily find the direct download link of any of your favorite movie. For this we are going to share to great google search tricks that we will help you with just one simple click to find easily the direct download link of your favorite movie.
Steps Find Direct Download Link To Any Movie
This google trick is amazing and pretty simple and with just a single click you will get the exact URL that the movie is stored on the servers.
Method 1. – Find Direct Download Link To Any Movie
Step 1. Launch the web browser on the device.
Step 2. Next put the name of the movie that you want to download, after the name copy and paste the below code.
Movie Name -inurl:(htm|html|php|pls|txt) intitle:index.of “last modified” (mp4|wma|aac|avi)
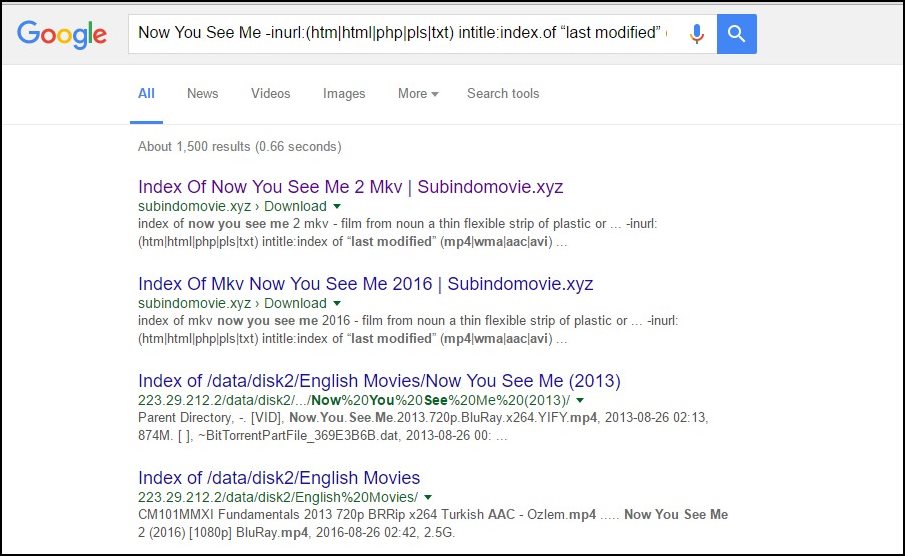
Like e.x :- Now You See Me -inurl:(htm|html|php|pls|txt) intitle:index.of “last modified” (mp4|wma|aac|avi)
Step 3. Now browse through google search results on the first or second page to find the direct link download of that movie.
That’s it! Congrats.
> Check Out: Top 10+ Best Free Anime Streaming Apps of 2020 (Android and iOS)
Method 2. – Find Direct Download Link To Any Movie
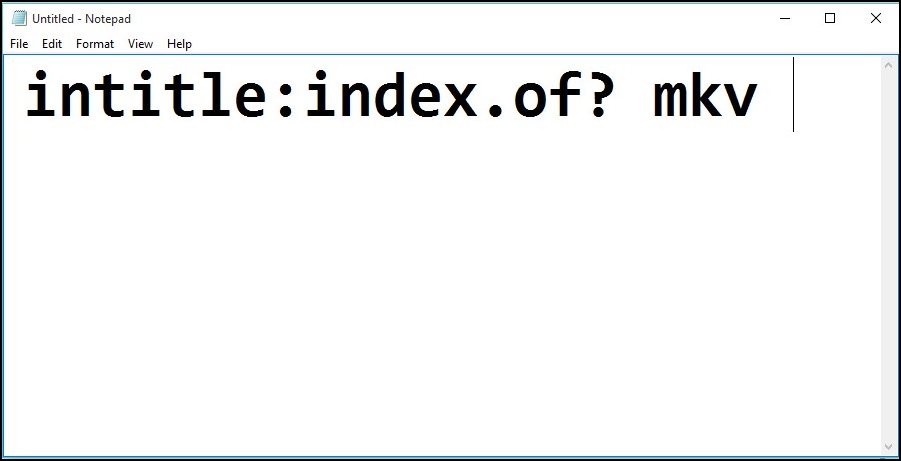
Step 1. Go to Google and copy the code below:
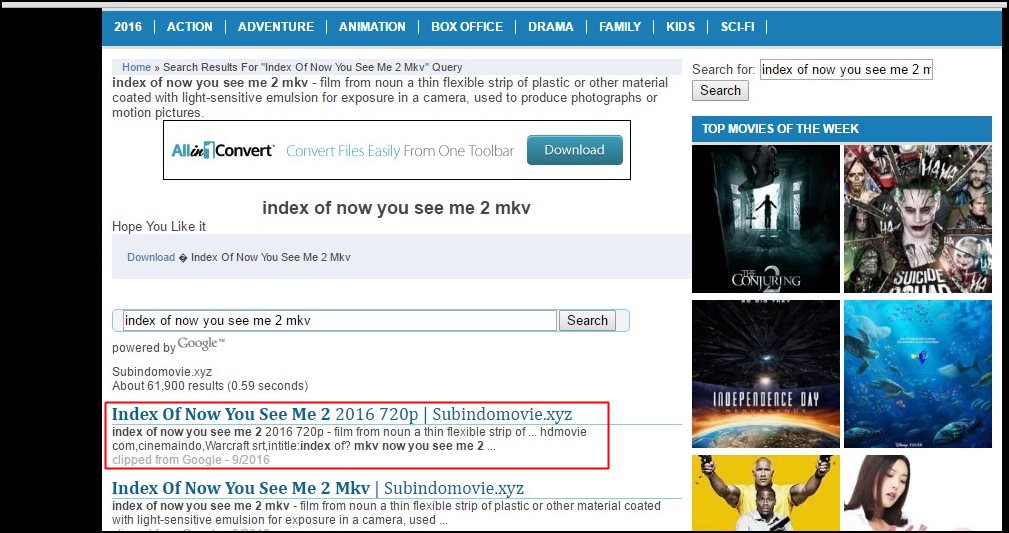
intitle:index.of? mkv
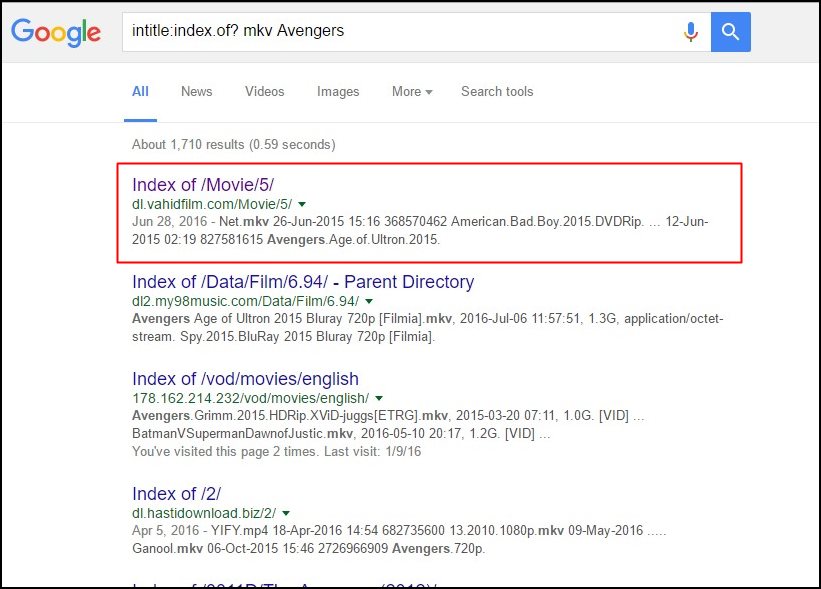
Step 2. After pasting the code above to google.com, jut put the name of the movie you want after the code like Avengers:
intitle:index.of? mkv Avengers
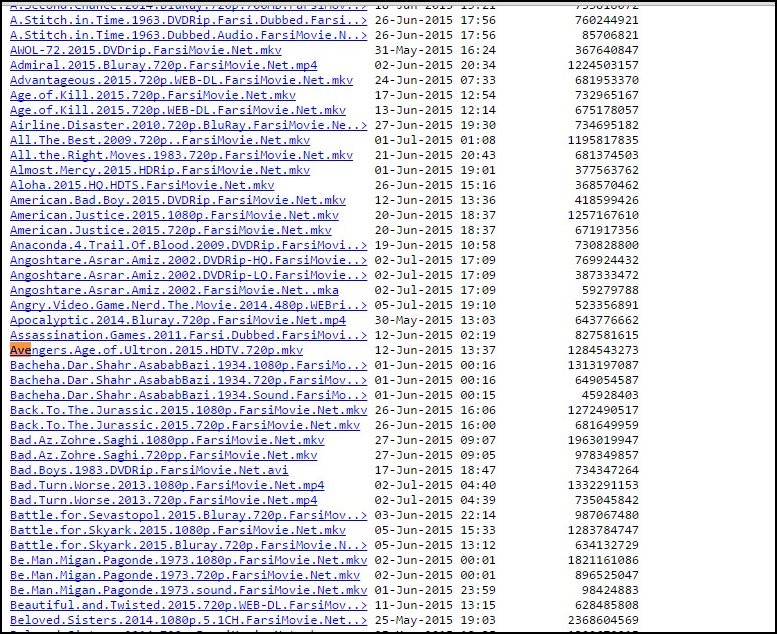
Step 3. Type enter and a list will be displayed that may or may not contain the one you are searching. Just type Ctrl+F to find the direct link of your movie.Than just click the link and the download will start.
That’s all, Congrats! You can search you movie in other format just by simply replacing the Mkv to your wanted format.
Other Tricks To Find direct download Link of any Movie
There are also more Google tricks over the internet that will help you to find the direct download link of any movie. You will only need to play around with Google Search. Below are some tricks that will help you to do so:
#1. Using Multiple keywords under asterisks
Using this method all you need is to enter multiple keywords related to the movie. Most movies are in .mp4 format So below in the screenshot you can see that we have searched for “.mp4” , but you can do the same in other keywords like:
“Dangal” “Movie” “download” “.mkv”

> Check Out: Top 10+ Best Free Live TV Apps for Android & iOS
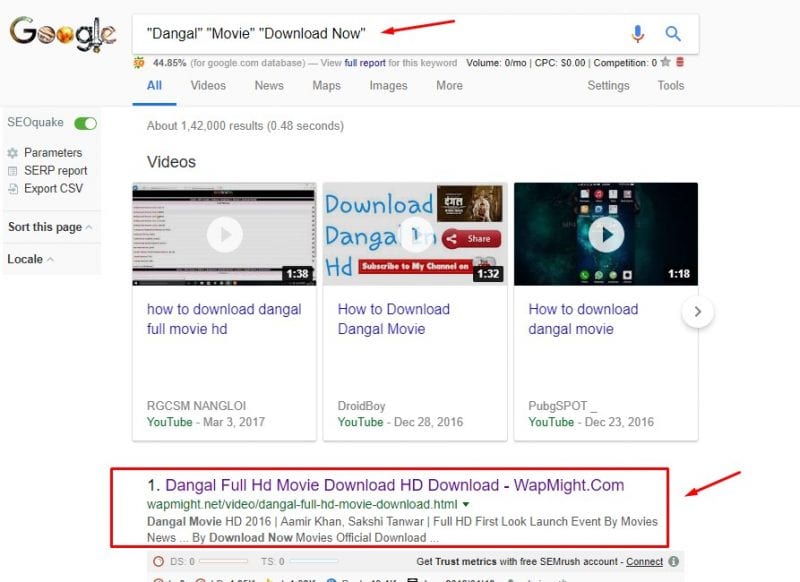
#2. Using the Download Now Keyword
This time Google will show the results of the sites which have the “Download Now” written. Almost all the movies sites lists the download link of the movie under the “Download Now” button.
“Dangal” “Movie” “Download Now”
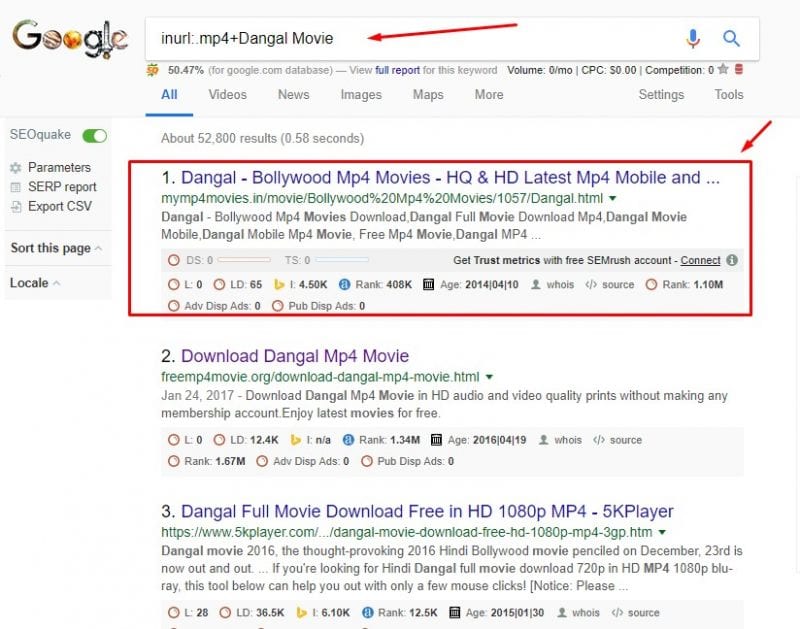
#3. Search for Movie names along with an extension on the URL
For this we will need to this keyword combination like: “inurl:mp4+movie name” or “inurl:mkv+movie name” and so on. Using this Google Search Trick on the search results will be listed only the websites that have that Movie Name along with the extension in they URL.
inurl:mp4+Dangal Movie
> Read Next: Top 15+ Best Free Sports Streaming Sites: Watch Sports Online for Free On 2020
So that’s all about this great google search tricks that will help you to easily find to Direct Download Link To Any Movie. You can use it also to download music by replacing in the code above mp4 with mp3. Hope you found this article useful. Please let us know your thoughts in the comment section below, follow us on twitter and facebook for more news and updates.