Windows 10 PC into a WiFi Hotspot

How to Turn Your Windows 10 PC into a WiFi Hotspot

If you have upgraded recently to Windows 10 and want to share your internet connection with other devices, you can do it easily through the “Mobile Hotspot” Setting app in Windows 10. Just like on your Android and iPhone device, you can share your internet connection in Windows 10. You can broadcast your WiFi, Ethernet, or cellular data connection as a Wi-Fi hotspot. By doing that, you will allow other devices to connect to it. If your Windows 10 PC has cellular data connection and you want to share it, it will use the data form your mobile data plan.

[td_block_ad_box spot_id=”custom_ad_2″ tdc_css=””]

> Check Out: Windows 10 Tips & Tricks: Top Best Most Useful Features in Windows 10 

How to Turn Your Windows 10 PC into a WiFi Hotspot

There may be multiple reasons on why you may need turn your Windows 10 PC into a WiFi Hotspot, like when you need to connect to multiple devices but you are connected in a network with limited access. Some Wi-Fi in Hotels will allow only one device to be connected, so for this or many other reasons, is very important to know how to create and share your internet connection as a hotspot in Windows 10 by turning it into a Wireless hotspot (wireless access point).

Steps to turn your Widows 10 PC to a WiFi Hotspot

Windows 10 as made is really easy to create a WiFi hotspot (wireless access point) by using its own built-in hotspot software. So follow the steps below to turn you Windows 10 device into a WiFi hotspot:

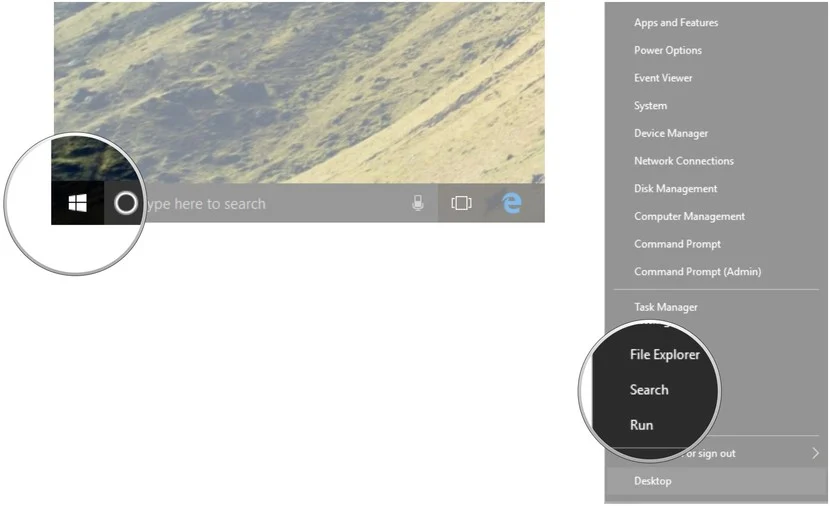
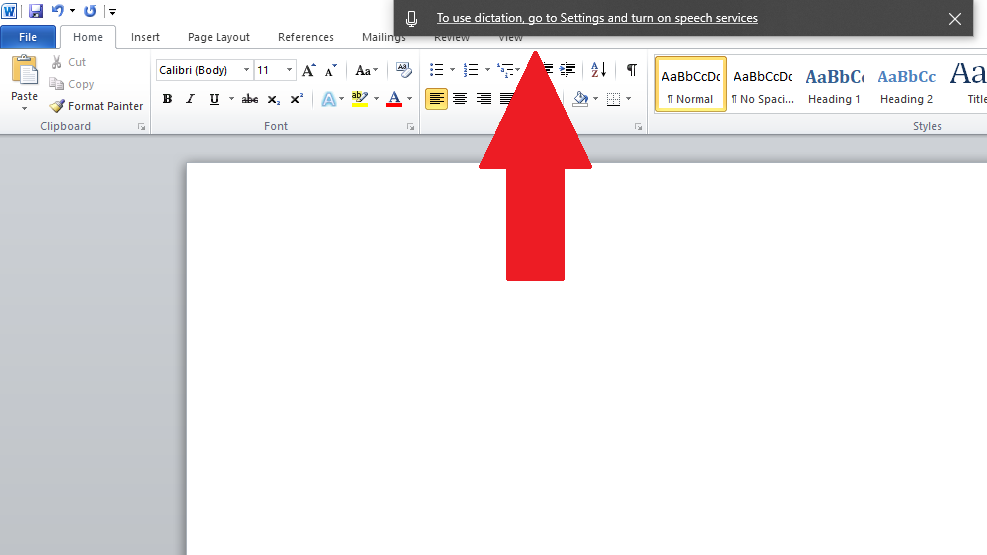
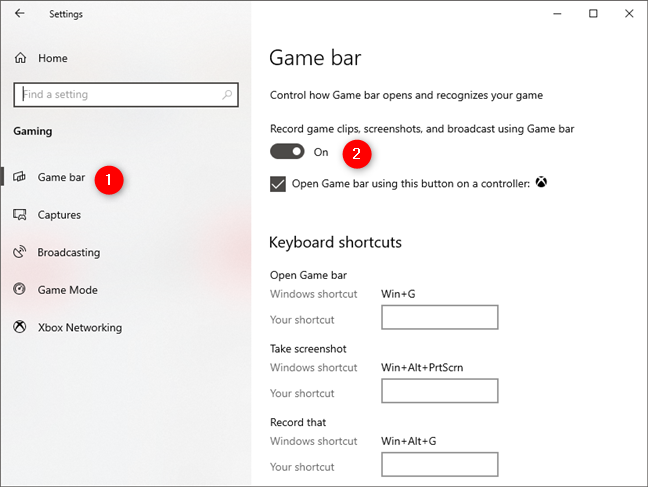
  • Step 1: Click to the “Start” button and then the “Setting” gear in the left-side of the menu. You can do the same by pressing “Windows + I” keyboard shortcut.
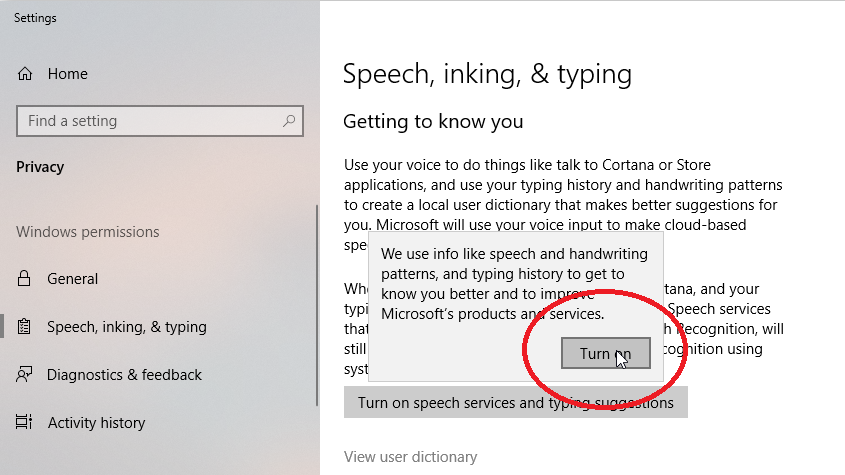
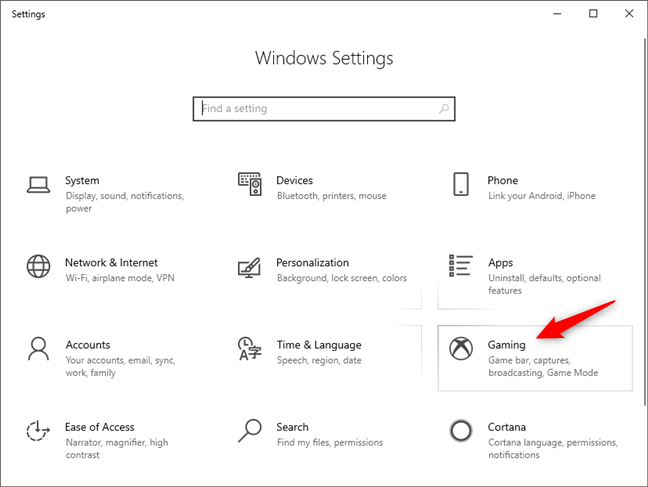
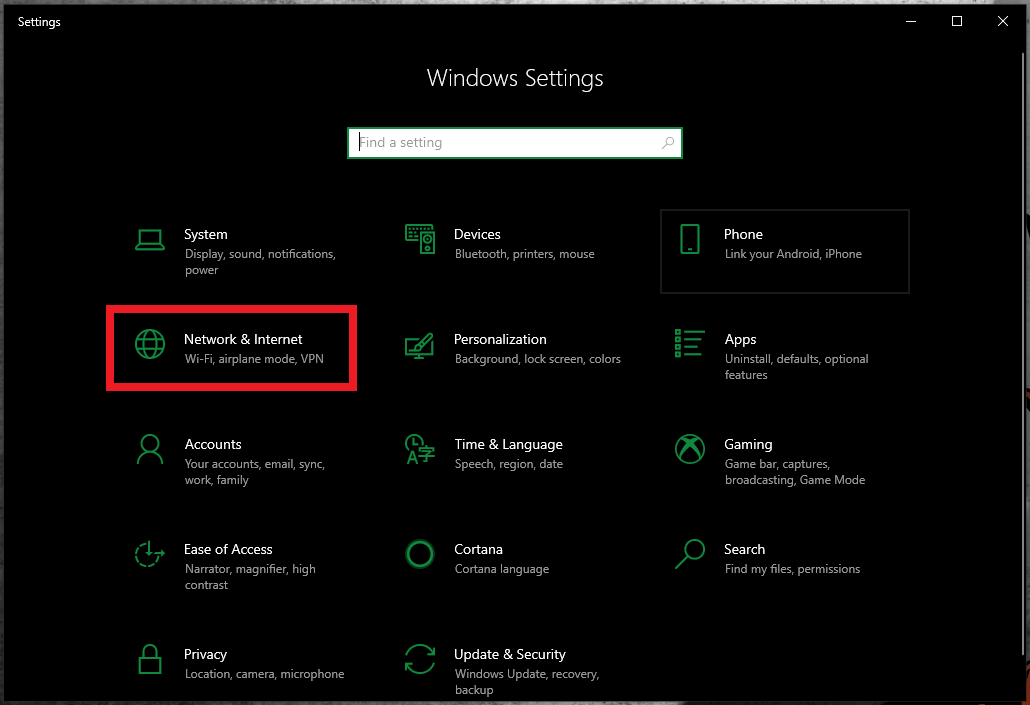
  • Step 2: Next go to “Network and Internet“. If your PC has a WLAN or Bluetooth adapter than you can share your internet connection.
  • Step 3: Form the left panel window, click on “Mobile hotspot”
Windows 10 WiFi Hotspot: Mobile hotspot interface
  • Step 4: Under “Share my Internet connection from” select the connection which you want to share
Windows 10 WiFi Hotspot: Choose Internet
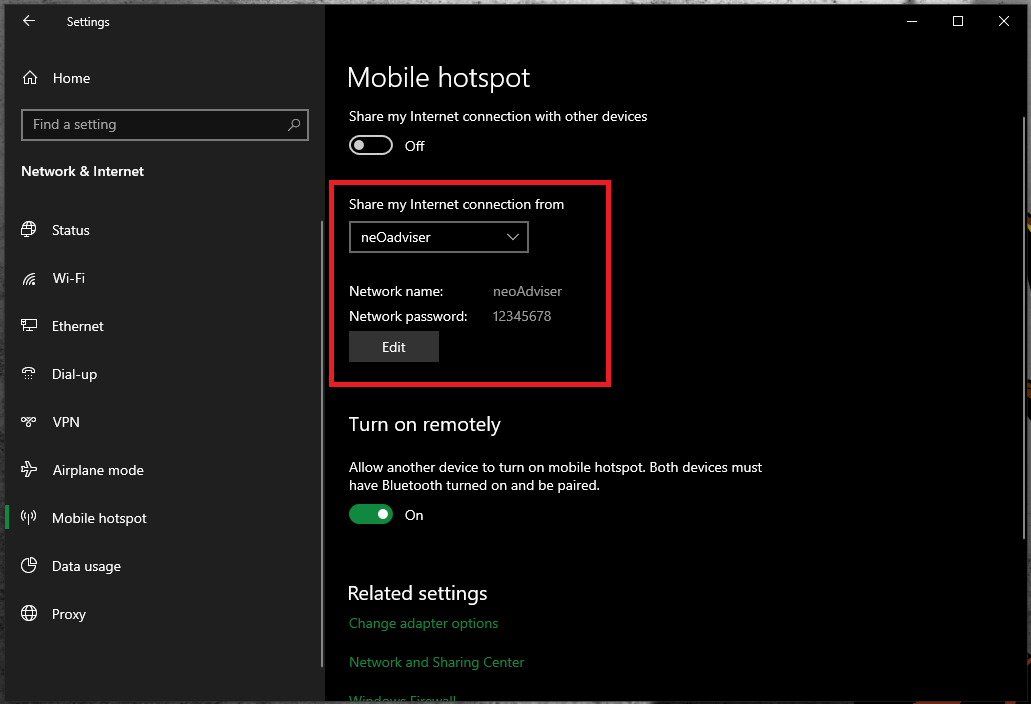
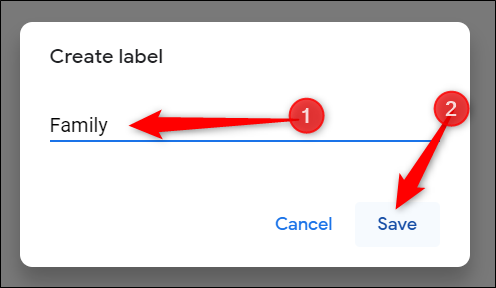
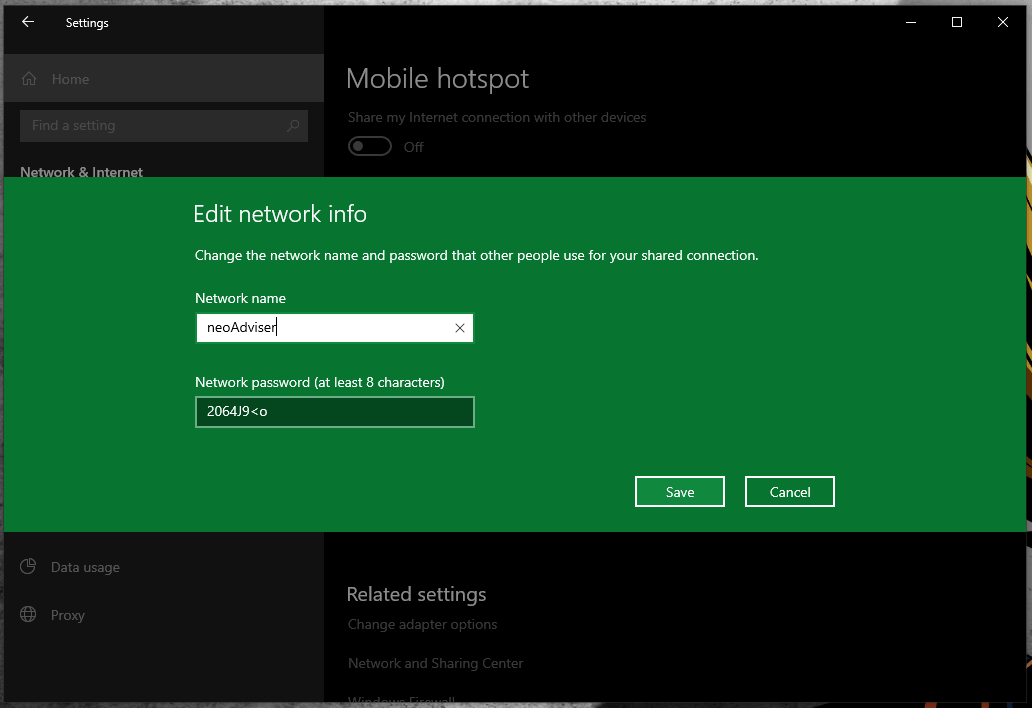
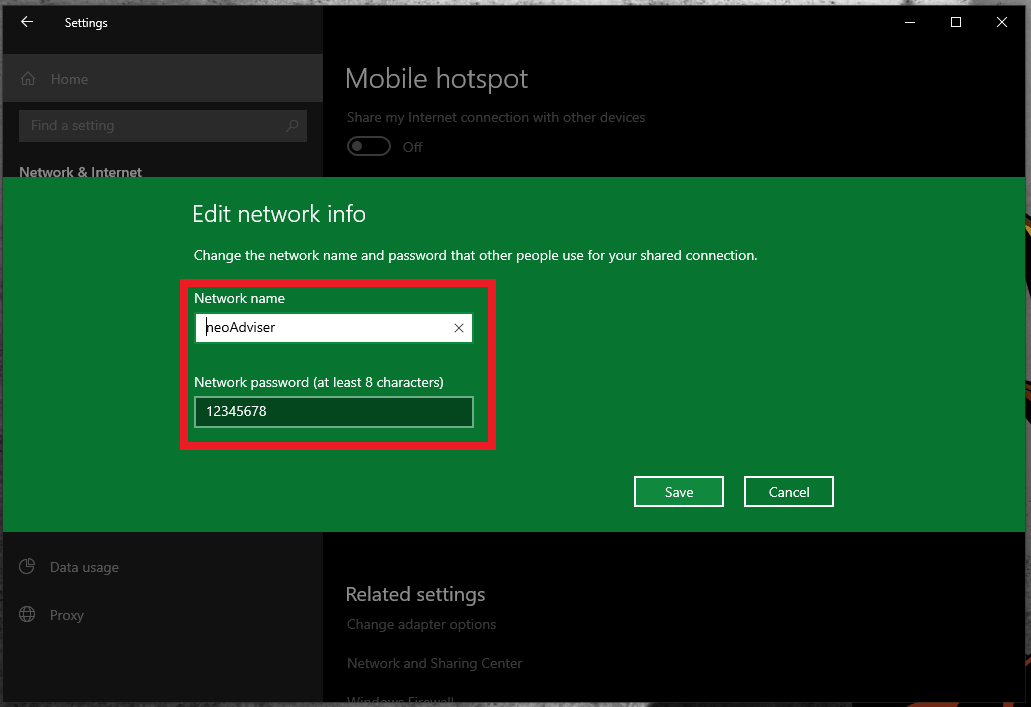
  • Step 5: Click the “Edit” button to change the hotspot’s name and password and next click “Save
Windows 10 WiFi Hotspot: Edit Name Password
  • Step 6. Finally “toggle on” the Mobile hotspot. Other devices now will be available to see your WiFi hotspot with the name you just created and connect to it.
Windows 10 WiFi Hotspot: Turn On Mobile Hotspot

> Check Next: How to use your Android smartphone as a webcam for your PC

Windows 10 will show the connected devices to the hotspot directly below along with they name. You can use Bluetooth for the same, by if you want a fasted internet connection speed, then WiFi if a better choice.

So below we cover everything you need to know about how to share your Windows 10 PC’s internet connection with other devices. Hope you found this article useful. If you have any thoughts, please let us know than in the comments section below, follow us on twitter and facebook for more news and updates.

neoAdviser

[td_block_11 category_id=”3″ limit=”1″ td_filter_default_txt=””][td_block_ad_box spot_id=”custom_ad_3″]
Windows 10 Tips & Tricks: Top Best Most Useful Features in Windows 10 (2020)

Windows 10 Tips & Tricks: Top Best Most Useful Features in Windows 10 (2020)

While Windows 10 may be the most convoluted operating system Microsoft has ever created it does include many handy features that are quite useful. So coming up i’ll show you more than 10+ tips, tricks and features that will help you get the most out of using Windows 10. Because there are many of you interested in this, we are going to include a mix of the newer features and some of the older classics that are still available for use with Windows 10. These top best 2020 Windows 10 tips and tricks will make your life a lot easier. I’m pretty sure you’re going to find something new here ’cause some of these are what I consider hidden features in Windows 10 and I have no clue about them for the longest time, but they made a big difference for me once i found out about them and started using.

> Check Out: How to Find Your Windows 10 Product Key (Using CMD & Windows Registry)

Windows 10 Tips & Tricks: Top Best Most Useful Features in Windows 10 (2020)

So, without going through to much talk, i will save your time and go right to it! So let’s get started with my tips for Windows 10 in 2020.

Tip #1. Clipboard History: Enjoy next level pasting with clipboard history

Windows 10 version 1809 has announced for the first time the new clipboard experience, so in order to use the new Clipboard History feature you will need to have Windows 10 version 1809 or greater. Although it came up with a new interface and some new features, its not really an complicated experience to use.

How to use Clipboard History feature on Windows 10

The new clipboard features uses the old experience that you already use. But instead of using CTRL + C to copy and CTRL + V shortcut to paste, now you will use the same CTRL + C shortcut to copy text multiple time and next you will use now Windows key + V shortcut to bring the new clipboard history. In this new interface you will find the lists of your copied items. So follow the steps below on how to do so:

  • Use CTRL + C shortcut several times to copy different text form your application
  • Open the document you want to paste it and this time click Windows key + V shortcut to open the clipboard history
  • In the new interface you will find the list of the above copied content
  • Select the content you want to paste

Isn’t that great? No more flipping back and forth between applications to copy and paste each bit separately and no more accidentally losing some copied text because you forgot to paste and copy something new over it. You can copy text, HTML and bitmaps up to four megabytes per item. You may have to activate clipboard history in the settings first, so here’s how to do so!

1. Enabling clipboard using a shortcut

The fasted way to activate clipboard history feature is by using a keyboard feature, so follow the steps:

  • Tap Windows key + V on keyboard
  • Click the Turn on button
Activate Clipboard History Feature
Activate Clipboard History Feature using shortcut

2. Enabling clipboard using Settings

To do so, in the Setting app, use the following steps:

  • Go to Settings.
  • Then click on System.
  • Next click on Clipboard.
  • Turn on the Clipboard history toggle switch.

From here you can tun ON or OFF the Clipboard History feature at any time.

Enable clipboard history using Settings

How to sync clipboard history on Windows 10

The other setting here, sync across devices allows you to share copied text across any of your windows devices as long as you’re signed in to the same Microsoft account. Anyway, for privacy reasons, this feature most be enabled and configured manually, here how to’s:

    • Go to Settings.
    • Next click on System.
    • Go to Clipboard.
    • Under “Sync across devices,” turn on the toggle switch.

Finally, select the automatic syncing option that you want:

  • Automatically sync text that I copy: Your clipboard history will sync to the cloud and across your devices.
  • Never automatically sync text that I copy: You must manually open the clipboard history and select the content you want to make available across devices.
Sync Clipboard history Windows 10

How to pin items in the clipboard history

One more great feature: Let’s say you have some items on your clipboard that you use frequently and you’d like to be able to reuse these even after rebooting your computer. No problem for clipboard history, you can pin these items. Here’s how to:

On the Clipboard History Interface:

  • Click the “ellipsis” next to the item
  • Next select pin.

They’ll still be there the next time you log in. The unpinned items on your clipboard history are cleared every time you restart your PC. Only those items you pinned are going to remain on the clipboard.

How to clear clipboard history on Windows 10

Latest, if you no longer need to use the Clipboard History feature, or is something does not work as expected, you can reset the history to see if the problem may be fixed, so here’s is how to:

  1. Click Settings.
  2. Go to System.
  3. next click on Clipboard.
  4. Under “Clear clipboard data,” click “Clear” button.
clear clipboard history

Once done, the clipboard content will be deleted form your device and Microsoft account, but Pinned item will still remain till you remove then manually. If you wish to just delete only one or two items, you can do it so by opening the Windows key + V interface and simply click the button on each of the content you want do delete. You can choose also Clear all button on the history interface to delete the list.

> Check Out: Top 5+ Best Free Screen Recorder For Windows 10

Tip #2. Sandbox: Stay safe by using Windows Sandbox feature

Sandbox is another exciting new feature that was introduced with the Windows 10 May 2019 Update (version 1903). It offers a separate testing environment to try out software or download apps from websites that you’re not so sure about. Sandbox is part of the Pro and Enterprise edition of Windows 10 so unfortunately it’s not available in Windows 10 Home. Also your processor and motherboard need to support virtualization. If the virtualization is supported but not enabled, check your motherboard manufacturer to find it out how to enable it. 

Sandbox is like a virtual PC that’s built right into your Operating System. This way you can run programs or access websites in a safe zone without affecting your system. Although you may be able to create virtual machines to reach the same experience, Windows Sandbox has some key benefits. By using it eliminates the steeps on downloading and creating virtual machines. Every time you run the Sandbox features, it will immediately create a new clean Windows 10 installation. Once the Windows Sandbox gets closed every thing gets wiped out automatically. Also an important thing is that everything happens inside the environment while being isolated from your main installation to offer maximum security.

Windows Sandbox system requirements

Before going through the steps on how to enable Windows Sandbox feature, make sure your device meet these minimum software and hardware requirements:

  • Windows 10 Pro (or Enterprise).
  • Hardware virtualization.
  • AMD64 architecture.
  • 2 processor cores minimum (4 cores with hyperthreading is recommended).
  • 4GB of RAM (8GB is recommended).
  • 1GB of HDD space (SSD is recommended)

How to check if virtualization is enabled

Hardware virtualization most be enabled in the BIOS of your system. Depending of your motherboard you may need to check if it supports it and how to enable.

To check is its enabled follow the steps below:

  • In the search bar type “CMD” end pres enter
  • Next in the CMD window type the following commandsysteminfo.exe
  • Check under the “Hyper-V Requirements” section, if “Virtualization Enabled In Firmware” reads Yes, then you can use Windows Sandbox.
check if virtualization is enabled

How to enable Windows Sandbox feature on Windows 10

Sandbox isn’t turned on by default, so you have to activate it first. Here’s how to:

  • On the windows search bar type “Turn Windows features on or off” and pres “Enter
  • In the pop-up window search for “Windows Sandbox” option
  • Check the “Windows Sandbox” and then click “OK” button
  • Click the Restart now button
enable Windows Sandbox

After completing above steps, you can start now using the new virtualization layer to install and test untrusted applications temporarily.

How to use Windows Sandbox feature on Windows 10

To start using the Windows Sandbox feature you have just activated is really easy, just follow the steps below:

  • In the windows search bar type “Windows Sandbox
  • In the search results at the top, right-click to “Windows Sandbox” and select “Run as administrator”
  • This will open the Sandbox window
  • Now at you main device, copy the app that you want to test it and than past it inside the Windows Sandbox experience
  • Click on the installer (.exe, .msi, etc) to execute the installation

You can safely now open it and check if everything is okay or use edge to check out some dodgy website you’re not sure about, to make sure it’s safe. When you’re done just close Sandbox an the X button and all the content there is going to be wiped out. So even if the Sandbox is compromised next time you start it up again, it’s going to give you a brand new box to play with, but be aware that Sandbox only gives you an Operating System with a browser, none of the other third party applications are going to be available in Sandbox.

So you can’t copy an office attachments that you received into the Sandbox and open it there because you won’t have Office in the Sandbox. You can install apps, but you’re going to have to install them again next time you open up a new Sandbox. Also keep note that you can’t drag and drop files form your Windows main installation to the Windows Sandbox interface.

So keep that in mind!

> Check Out: How To Partition A Hard Disk Without Formatting (Three Methods)

Tip #3. Virtual Desktop: Split your world using virtual desktop

So let’s say you’re working on a project and you have several apps open, then an appointment pops up reminding you that you need to join a video conference to present a status update. When you share your screen, you don’t want everyone to see all the other files you’re working on. And you don’t want to close them either because it’s going to take some time to get it all set up again, once you’re done with your phone call. The solution is to switch to another clean temporary workspace, which is also called a Virtual Desktop.

Virtual Desktop
Virtual Desktop Interface (Windows 10)

How to create a new virtual desktop in Windows 10

Windows 10 has made it really easy to use and setup virtual desktops. This is really a great and very useful feature to keep your unrelated and ongoing project organized or hide then from your boss quickly. So let find out how to use multiple desktops in Windows 10.

For creating a new virtual desktop you are just a few click away, or you can use simply a keyboard shortcut: Here’s how to:

  • Click “Task View” icon at your taskbar
  • Next, click “New Desktop” at the top-left corner of your screen.

Create a new virtual desktop Windows 10

That’s all! You can use also Ctrl + Windows key + D on your keyboard that it will create a new virtual desktop immediately.

How to switch between virtual desktops in Windows 10

You can use different ways to do so:

  • Click “Task View” on your taskbar icon
  • Click “Desktop 2″ or the other virtual desktops you have created

Switch between virtual desktops in Windows 10

There is also Ctrl + Windows key + Left and right arrow keyboard shortcut to switch between virtual desktops. If you use a device with touchpad you can do four-finger swipe left or right to switch between virtual desktops.

You can also do things like moving windows between virtual desktops by click and dragging then, duplicate virtual desktops by right-clicking on the active window and choose “Show this window on all desktops” to duplicate a single window, or select “Show windows from this app on all desktops” to duplicate all windows from one app.

Once you are done, you can close your virtual desktop by clicking “X” icon in the top-right corner, or simply use “Ctrl + Windows key + F4″ shortcut to close the virtual desktop you are currently viewing.

Tip #4. Quick Assist: Get remote Access using Quick Assist

Windows 10 Quick Assist feature is really useful when you need to help someone that has a PC problem. Windows 10 Quick Assist allows you to remotely access other Windows 10 PC form your own PC. It will give you full control so you can quickly help your friends, parents by doing your magic.

Quick Assist interface
Quick Assist interface: Windows 10

Things to know before allowing access:

This feature will give full control to other person’s PC, so you should use it with someone you trust. if you are the one giving assistance, you will need to use an Microsoft account to sign in. If you are the one receiving help, you don’t need to sign in to Microsoft account. Here’s how to use Windows 10 Quick Assist feature:

How to set up Windows 10 Quick Assist

If you are assisting someone:

  • At the “Search Bar“, type Quick Assist and hit Enter
  • Click Give assistance
  • Sign in to your Microsoft account by filling your email and password
  • Next you will get a “six-digit code” that you most give to the person you are helping out

If you’re getting help

Here’s how to get help form the other person:

  • At the search bar type “Quick Assist” and press “Enter”
  • Click “Get assistance” and type “six-digit code” you received for the person that is helping you
  • Click “Submit” and then click “Allow

Following the steps above, the person who is giving assistance to you will now have full access at your desktop.

> Check Out: How To Create WiFi Hotspot In Windows/Mac/Linux OS

Tip #5. Aero Shake: Minimize quickly using Aero Shake

With is another great Windows 10 tip that i use daily and for sure will help you saving a lot of time. Aero Shake is a fun little feature to quickly minimize opened windows. Just grab the window you want to keep by holding its title bar and starts shaking it a little bit. It’s going to minimize all other open windows. This way you can fully focus on the one open window.

Aero Shake
Aero Shake: Windows 10

If you did the shaking by mistake, just shake it again and they’re all going to come back. If you’re like me and always have countless windows open, this is much faster than minimizing each window one by one.

If you’re not a shaker and you like to use shortcuts, you can also use the shortcut
Windows + Home key. It will do the same thing.

> Check Out: Top 3 Best PS4 Emulators for Windows PC (2020 Edition)

Tip #6. Snip & Sketch: Capture your screen using Snip & Sketch

Another great Windows 10 tip you’re probably familiar with, but it’s just so useful that it has to be on this list .Snip & Sketch it’s a super handy screen capture tool. Sniffing sketch is the best screen capture tool ever to be included in any Microsoft operating system.

Snip & Sketch Windows 10 feature is the successor of the old Windows Snipping Tool. After the 1809 Windows 10 update, Snip & Sketch has updated with other features like copy a rectangle, a free-form area, or even the entire screen to the Clipboard and then save to reuse then.

How to Take a Screenshot Using Snip & Sketch Windows 10 Feature

Using Snip and Sketch feature to take a screenshot its pretty fast and easy. The fasted way to screenshot Windows 10 is by pressing Windows Key + Shift + S keyboard shortcut. After the Snipping Bar interface opens, just select a mode and snip it without opening Snip & Sketch Windows app.

Here’s how to open Snip & Sketch, take a screenshot, manage and edit it:

  • In Windows search bar type “Snip & Sketch” and press “Enter
  • From the pop-up window click “New” and choose from “Snip now” , “Snip in 3 seconds” or “Snip in 10 seconds” according to your need, after clicking the snipping bar will appear
  • Next select a mode between Window Snip, Fullscreen Snip, Rectangular Snip or Freeform Snip. 
  • Your snip it will appear at the Snip & Sketch window.
Snip & Sketch Interface

From this window you will have some features like Copy, to make a copy of the just created snip, Share, to share it with other others and also you can edit it through the different tools like a Pen, a Highlighter, and an Eraser provided on the app.

Tip #7. Split Screen: Look at multiple windows using split screen

If you often need to look at several windows on the same screen at the same time you can easily do that using Snap Assists. This feature works for any application.

Snap Assists Windows 10

How to Split Your Screen in Windows 10 With Snap Assist

There are different ways to do so but the most easiest is using Snap Assist. This feature should be enabled by default but if not enable it in Start > Settings > System > Multitasking > Snap Windows

With Snap Assist you can drag the windows to a side or corner of you screen and “snap” it there and this will make room for other app to be snapped in the empty screen space. Follow the steps to split you screen with Snap Assist:

  • Open two on more windows/apps
  • Grab one of the windows and drag it all the way over to the left side of the screen
  • Now let the mouse off and the windows will be snipped to the half of the left screen living half room to the right for your other programs/windows
  • Select now one other window/program to snap it to the right side
  • Now that you have two screen at the same window, you can drag the dividing line to resize then both simultaneously.
  • You can do the same to slip the screen on up to 4 windows by opening 4 different apps/windows and drag fist one of then at the top-right corner

You can do the same using by clicking on that windows with your mouse and use Win + left/right keyboard shortcut to decide the side of each window. Then use the arrow keys to move between other windows to choose the other one and press Enter.

Tip #8. Dictation: Use speech-to-text feature in Windows 10

Dictation has been around for a while in Windows and has improved quite a bit in any text field. This feature is available on Windows 10 Fall or greater. Using this feature, you can simply talk to your Windows OS to get it respond to your commands.

Here’s how to use Windows Dictation feature: 

  • Open the app on which you want to dictate text like Notepad, WordPad, Microsoft Word or your email software and type Windows + H keyboard shortcut to trigger the dictation.
Trigger Dictation
Trigger Dictation: How to use dictation in Windows
  • If the speech services is not enabled, a pop-up windows will appear, click on it and go to Settings > Privacy > Speech, inking & typing. Once there click “Turn on speech services and typing suggestions.”
Enable Speech Services
Enable Speech Services (How To use dictation in Windows)
  • With the speech services On, press again Windows + H on your keyboard and the e dictation window will pop-up and its now ready to listen.
Trigger the Dictation Feature

Now you can give your fingers a rest and use your voice to start dictating.

> Check Out: Windows 10 Themes/Skins: Top 15+ Best Windows 10 Themes

Tip #9. Pause Updates: Pause Windows 10 Automatic Updates to Avoid Critical Bugs

Microsoft says that updates are important four security patches, bug fixes and latest features. But there may be times you’re not ready to update, or you may have heard about issues with the latest updates causing problems for others, that of course would never happen with Windows 10. Thankfully, Windows 10 Home, Pro and Enterprise allows to pause updates for a specific time.

Here’s how to pause updates for a period (up to 35 days on Windows Professional) using Windows Update settings, or disable automatic updates permanently using Windows 10 Group Policy method.

Method 1: Pause updates via Windows 10 Settings

On all Windows 10 versions you can pause updates by using Windows Update settings. At Windows 10 Home you can pause updates for up to 7 days, while on Windows 10 Professional for up to 35 days.

So, follow the steps to pause updates on Windows 10:

  • On the start button click “Settings
  • Next click “Update & Security
  • There choose “Advanced Options
  • At the ‘Pause updates‘ section, form the drop-down menu select a date that you wish to pause the updates. After you reach your pause limit you’ll have to get a new update before being allowed to pause again.

Till the period is reached, Windows will no longer check for new updates.

Pause updates on Windows 10

Method 2: Pause updates permanently via Windows 10 Group Policy

Windows 10 Pro, unlike Windows 10 Home has a Group Policy editor that you may use to permanently disable automatic auto clicker updates. Here’s how to use the Group Policy editor to pause Windows Updates:

  • In the search bar type “gpedit.msc” and press “Enter
  • At the “Group Policy Editor” window navigate to this path: Computer Configuration\Administrative Templates\Windows Components\Windows Update
  • Under “Windows Update” section double click on “Configure Automatic Updates
Group Policy editor
Group Policy editor: Disable Windows Update
  • Set this policy to ‘Disabled‘, to disable automatic updates in Windows 10 at an unlimited period.
  • When done, click “Apply” and then “OK” to save the policy.
Policy interface
Policy interface

Windows 10 will no longer install updates automatically, but you can still use Windows Update to manually check for updates and install then. To enable the automatic updates, just set the policy to ‘Not Configured‘ again.

Tip #10. Slide To Shutdown: Enable Slide to Shutdown

Here’s a cool trick that uses a full-screen slide down to power off your computer. Here’s how you set it up on your desktop:

  • Right-click on the desktop and do the following New > Shortcut
  • In the pop up windows, paste the following code:
%windir%\System32\SlideToShutDown.exe
  • Click “Next“, then “Finish“. This will create a clickable icon which you may rename it.
  • To shut down you PC via slide-down, double-click at the icon to prompt a pull-down shade and then use your mouse to drag it to the bottom. Note that this is a shutdown, not a sleep.
SlideToShutDown Windows Feature

Tip #11. Nearby Sharing: Transfer files between PCs by using Nearby Sharing

If you’re familiar with Apple’s airdrop, Microsoft now has a similar feature called “nearby sharing” that will let you share content with other Windows 10 computers connected to your network or Bluetooth. This feature was first introduced with the Windows 10 April 2018 Update (version 1803) and you can use it to quickly send a  a document, photo, video, or presentation to other PCs in your room.

Nearby Sharing
Nearby Sharing

How to enable Nearby Sharing on Windows 10

Nearby sharing, Windows 10 feature should be enable by default after you have installed April 2018 Update. Anyway, to make sure this is enabled (or to disable it), you can do it in the Settings app. Here’s how to:

  • Open “Settings” and click on “System
  • Next click on “Shared experiences” and there turn on the “Nearby sharing” toggle switch
Enable Nearby sharing on Windows 10

From here you can “Enable” or “Disable” Nearby sharing feature on Windows 10. You can do the same using Action Center, (Ctrl + A) quick keyboard shortcut. If Nearby sharing button isn’t available there, you can add it quickly form the following: Settings > System > Notifications & actions, under “Quick actions,” click the Add or remove quick actions link, and then enable the button.

Now when you select share in Microsoft Word, and many other programs including photos, you should see nearby computers. The file you send (or receive) by default will be stored in the “Downloads” folder, but you may change this in the “Shared experiences” settings. Here’s how to:

Changing default transfer folder location

Follow the steps to easily specify another folder or any other drive for your transfer files:

  • On “Settings” click “System
  • Click “Shared experiences” and under “Nearby sharing,” using Save files I receive to option, click the “Change” button.
Nearby sharing: Change transfer folder location

Select your new location. Once done, the files will be saved to the new location.

I am text block. Click edit button to change this text. Lorem ipsum dolor sit amet, consectetur adipiscing elit. Ut elit tellus, luctus nec ullamcorper mattis, pulvinar dapibus leo.

> Check Out: How To Find Passwords of All Connected Wi-Fi Networks using CMD

Tip #12. Game Bar: Enable and open the Xbox Game Bar in Windows 10

For gamers, the Xbox Game bar on Windows 10 is one of the great features. It will give access to so-called Xbox DVR, which in other words it will let you record the screen or take screenshots of your games while playing. Here’s how to enable and use it:

How to enable the Xbox Game bar Feature in Windows 10

Windows 10 Game bar was introduced first with the Windows 10 Creators Update and was updated with the Windows 10 November 2019 Update with some new features. Xbox Game bar should be enabled by default, but if its not here’s how to:

  • In the “Start” menu click “Settings
  • Then go to “Gaming
  • At the left side of your screen, click “Game bar“, then enable the Record game clips, screenshots, and broadcast using Game bar switch.

From here you can also change the default Xbox Game bar keyboard shortcuts according to your needs.

Now to bring the Xbox Game bar in Windows 10 by default just type Win + G keyboard shortcut. If you are using an Xbox controller, push the Xbox button on it. You can launch the Xbox Game bar at anytime during gameplay. This is an interface on how it looks:

Xbox Game Bar Windows 10 Interface

Xbox Game bar widgets on Windows 10

This are some generous useful widgets you can expect form Xbox Game bar in Windows 10.

  • The main widget: Its located at the top by default. You can see here the time, enable or disable other widgets that are available, and also access the settings of the Game bar.
  • The Capture widget: It will give you the tools for recording and capturing screenshots of your gaming sessions.
  • The Audio widget: You can control different audio channels without leaving the game
  • The Performance widget: It shows information about the utilization of your resources like (CPU), graphics card (GPU), RAM (memory), and number of FPS (frames per second).
  • Xbox Social widget: Will let you to connect and chat with your friends, as long as they’re also on Windows 10 or Xbox.
  • Xbox Achievements: It will display your achievements as Xbox records them.
  • Looking for group widget: Will show other connected players to Microsoft’s Xbox service that are looking to join a gamers’ group.
  • Spotify widget: It will let you play your favorite music form the Spotify app without having to leave you game.

Tip #13. Ransomware Protection: Enable Ransomware Protection in Windows 10

Ransomware is a nasty malware that encrypts your data holding it hostage unless you pay a ransom. To help protect your computer, ransomware protection is now included with Windows Defender. Windows 10’s Ransomware Protection feature is composed of two components: Controlled Folder Access and Ransomware Data Recovery.

  • Controlled Folder Access: This will monitor the folders that you specify and block any changes to the files in that folder. This will block all programs, expect the ones you allow, for making any modifications to the files of the monitored folders and will protect that folders form being encrypted by ransomware.
  • Ransomware Data Recovery: It will sync automatically all you common data folders with your Microsoft OneDrive account to make a backup of your files. If you may ever become a Ransomware victim, you can use OneDrive to recover your files.

How to enable Ransomware Protection in Windows 10

In Windows 10 version 1903, Windows Defender’s Ransomware Protection by default is disabled, so you will need to enable it to be protected form ransomware attacks. Note that is you use a third-party antivirus software and Windows Defender’s real-time protection is disabled the Ransomware Protection features screen and the Controlled Folder Access feature won’t be accessible. Also to enable full Ransomware Protection on your Windows 10 PC both Controlled Folder Access and login to Microsoft OneDrive should be configured: Here’s how to:

  • On the search bar type “Windows Security” and press “Enter” (You may do the same by following Settings> Update & Security> Windows Security.)
  • On this window click “Virus & Threat Protection
  • Scroll down to “Ransomware Protection” and click “Manage ransomware protection
  • Toggle the “Controlled folder access” to enable it, and next login to OneDrive so that both features will be enabled as seen below.

Now you can configure Controlled Folder Access to choose which folder you want to monitor by choosing the “Protected folders” option and block malicious programs form accessing then. Clicking “Protected folders” will show you a list of folders currently being protected. You can choose to add additional folders by selecting the “+”, then “next” to add a protected folder and browse your computer for that folder.

Tip #14. God Mode: Enter to God Mode in Windows 10

If you’re a power user that has recently made the switch from an older Windows operating system, you might be happy to know that the easter-egg, known as “God Mode” is still available in Windows 10. It’s great for those people that want a massive amount of settings all within a single user interface. Here’s how to enable it:

How to enable God Mode on Windows 10

  • Create a New Folder in your desktop.
  • Rename the New folder to “GodMode.{ED7BA470-8E54-465E-825C-99712043E01C}
  • Once done the step 2, the folder name will automatically change to GodMode.
Enable God Mode aon Windows 10

If done correctly this folder will become an icon and when you open it you’ll now have the ultimate control, with more settings that you would probably ever need.

> Check Next: Create A Bootable Windows 10 USB Flash drive (Step By Step Guide)

That’s all for our top best Windows 10 Tips and Tricks. We will keep to update this article as soon as new cool features will be released. If you have a tip or trick for using Windows 10 you’d like to share, than let us know about it in the comments, follow us on twitter and facebook for more news and updates.

neoAdviser

Tab Groups Google Chrome-min

Google Chrome’s new Tab Groups: Here’s how to enable and use it!

Google has given Chrome users enough reason to give up the browser including controversial changes, security issues and privacy concerns. But recently Google introduced a new feature enough as a reason to stay. After a 360-degree turn last month, Google recently launched Chrome 81, which brought in Tab Groups and is the biggest change in how Chrome has been running for 11 years since its launch. As the name suggests, Tab Groups are the new way to organize the many tabs you have opened at once in Chrome and it’s easy. Here’s how to group tabs in Google Chrome:

[td_block_ad_box spot_id=”custom_ad_2″ tdc_css=””]

How to group tabs in Google Chrome

Chrome 81 is available for Windows, Mac and Linux from now on. As the name suggests, Tab Groups are the new way to organize the many tabs you have opened at once in Chrome and it’s easy:

  • First, update to the latest version of Chrome. Go to Settings>About Chrome.
  • Next, create a new tab group, right-click a tab and select “Add to new group option. Note: if you don’t see this option, you might not have the feature yet and if you still want to use Tab Groups, enable it at chrome://flags.
  • Some tabs will change colors to indicate their group and a dot will appear as the group header.
  • To add tabs to a group, right-click each tab and select Add to the existing group or drag the tabs and drop them. To remove tabs from groups use this same drag-and-drop method.
  • Change a group name, simply clicking the group. Here, you can change the color of the group.

As you see the new Tab Groups feature has many customization options available. By clicking on the tab title you can select colors, remove tabs from the group, and close all tabs in the group. You can also switch tabs from one group to another.

Tab groups will change the way you use Chrome. You will no longer need to keep multiple windows open for different projects because they can all coexist in a single one.

> Check next: WhatsApp Group Calls: How to Make Group Calls on WhatsApp (Android & iOS)

So what do you think about this? Let us know your thoughts in the comments section below, follow us on twitter and facebook for more news and updates.

neoAdviser

[td_block_11 category_id=”3″ limit=”1″ td_filter_default_txt=”” tdc_css=””][td_block_ad_box spot_id=”custom_ad_3″ tdc_css=””]
How to Find Direct Download Link Of Any Movie (Two Methods)

How to Find Direct Download Link to Any Movie (Two Methods)

If you do love movies, like me, then i’m sure that you found yourself online many times searching for the direct download link of your favorite movie. The popularity of movies fans in these days has grown and many of than are searching to download the latest movies cos not of than have time to go and watch then in cinema. But many times when we search for the direct download link of a movie we have faced a spam or an AD link. Today, in the article below, we will share to you a really simple trick with google search so you can easily find the Direct Download Link Of Any Movie. If you are interested to know more about how to find the Direct Download Link Of Any Moviethan follow the article below. We are going to share two simple methods along with some latest updated tips.

[td_block_ad_box spot_id=”custom_ad_2″]

> Check Out: Top 20+ Best Websites to Watch Free Movies Online

How to Find Direct Download Link to Any Movie (Two Methods)

So, to avoid this, we are going to share an amazing trick from which you will be able to easily find the direct download link of any of your favorite movie. For this we are going to share to great google search tricks that we will help you with just one simple click to find easily the direct download link of your favorite movie.

Steps Find Direct Download Link To Any Movie

This google trick is amazing and pretty simple and with just a single click you will get the exact URL that the movie is stored on the servers.

Method 1. – Find Direct Download Link To Any Movie 

Step 1. Launch the web browser on the device.

Step 2. Next put the name of the movie that you want to download, after the name copy and paste the below code.

Movie Name -inurl:(htm|html|php|pls|txt) intitle:index.of “last modified” (mp4|wma|aac|avi)

Method 1 - Find Direct Download Link To Any Movie 
Method 1 – Find Direct Download Link To Any Movie

Like e.x :- Now You See Me -inurl:(htm|html|php|pls|txt) intitle:index.of “last modified” (mp4|wma|aac|avi)

Step 3. Now browse through google search results on the first or second page to find the direct link download of that movie.

Method 1 – Find Direct Download Link To Any Movie

Method 2. – Find Direct Download Link To Any Movie

Step 1. Go to Google and copy the code below:

intitle:index.of? mkv 

Method 2: Find Direct Download Link To Any Movie

Step 2. After pasting the code above to google.com, jut put the name of the movie you want after the code like Avengers:

intitle:index.of? mkv Avengers 

Method 2: Find Direct Download Link To Any Movie

Step 3. Type enter and a list will be displayed that may or may not contain the one you are searching. Just type Ctrl+F to find the direct link of your movie.Than just click the link and the download will start.

Method 2: Find Direct Download Link To Any Movie

That’s all, Congrats! You can search you movie in other format just by simply replacing the Mkv to your wanted format.

Other Tricks To Find direct download Link of any Movie

There are also more Google tricks over the internet that will help you to find the direct download link of any movie. You will only need to play around with Google Search. Below are some tricks that will help you to do so:

#1. Using Multiple keywords under asterisks

Using this method all you need is to enter multiple keywords related to the movie. Most movies are in .mp4 format So below in the screenshot you can see that we have searched for “.mp4” , but you can do the same in other keywords like:

“Dangal” “Movie” “download” “.mkv”
Using Multiple keywords under asterisks

> Check Out: Top 10+ Best Free Live TV Apps for Android & iOS 

#2. Using the Download Now Keyword

This time Google will show the results of the sites which have the “Download Now” written. Almost all the movies sites lists the download link of the movie under the “Download Now” button.

“Dangal” “Movie” “Download Now” 
Using the Download Now Keyword

#3. Search for Movie names along with an extension on the URL

For this we will need to this keyword combination like: “inurl:mp4+movie name” or “inurl:mkv+movie name” and so on. Using this Google Search Trick on the search results will be listed only the websites that have that Movie Name along with the extension in they URL.

inurl:mp4+Dangal Movie
Search for Movie names along with an extension on the URL

> Read Next: Top 15+ Best Free Sports Streaming Sites: Watch Sports Online for Free On 2020

So that’s all about this great google search tricks that will help you to easily find to Direct Download Link To Any Movie. You can use it also to download music by replacing in the code above mp4 with mp3.  Hope you found this article useful. Please let us know your thoughts in the comment section below, follow us on twitter and facebook for more news and updates.

neoAdviser

[td_block_11 category_id=”3″ limit=”1″ td_filter_default_txt=””][td_block_ad_box spot_id=”custom_ad_3″]
Create email lists in Gmail

How to create email lists in Gmail to send group emails

If you continually send emails to a group of people, you may be able to reduce wasted time by searching for their contacts and creating email lists in Gmail. All the contacts you view and access in Gmail are managed by a separate application called Google Contacts. To create a contact list that you can use in Gmail you need to visit the Google Contacts web app.

[td_block_ad_box spot_id=”custom_ad_2″]

> Check Out: Netflix Party: How to watch movies with your friends at the same time

Step 1. Create mailing lists using Google Contacts

  • Open the browser and go to the Google Contacts website.
  • Once the page opens, go to the contact you want to add to the email list and click on the box next to it. Repeat this action with every contact you want to list.
  • Make sure all contacts have an email included otherwise it will not appear in the list later.
  • Once you have selected all contacts, click on the Label icon and then the Create Label button.

  • Enter a name for this list to remember more easily and click Save to create a contact list.
  • To add additional contacts to an existing list click the Label icon and select the list you want to place the contact in and then the Apply button.

Step 2. Send emails using a list in Gmail

  • Now that you have a list created and with contacts go to your Gmail inbox to email a group of contacts.
  • Once the page opens, send the cursor over the “+” button and the Compose text.

  • From the New Message window, type the name of the list of contacts you have accumulated and click on the suggestion that will appear.
  • Once you have selected the list, fill in the email you want to send and press the Send button to send it to everyone in the list.

The Gmail account allows you to send up to 500 emails a day. If you exceed this limit within 24 hours you will receive error messages that you have exceeded the limit.

> Check Next: How to delete a Gmail address and Download the Data

That’s! Hope you found this article useful, follow us on twitter and facebook for more news and updates.

neoAdviser

[td_block_11 category_id=”3″ limit=”1″ td_filter_default_txt=”” tdc_css=””][td_block_ad_box spot_id=”custom_ad_3″ tdc_css=””]
Galaxy S20 Camera

7 Ways to Get the Best of the Galaxy S20 Camera: Choose your Favorite!

Below neoAdviser lists 7 ways to get the best out of your Galaxy S20 camera.

The Galaxy S20 series camera is the most powerful of all the Galaxy saga. Now the series is on the market and you can all test it closely. The camera on the Galaxy S20, S20+ and S20 Ultra is built to change the way we capture the moment by offering endless options among which we often find it difficult to choose the right one.

[td_block_ad_box spot_id=”custom_ad_2″]

Every aspect of the Galaxy S20’s camera is designed to help you capture, edit and share photos and videos more easily than ever. Below the neoAdviser lists 7 ways to get the best out of your Galaxy S20 camera. At the end, we invite you to vote on what you find most important.

1. Capture what is important, as it is

When it comes to taking real photos, the resolution of a camera is essential. To help you shoot your next shots, each Galaxy S20 comes with an advanced sensor camera so you can capture your special moments in super high resolution.

With 108MP resolution on the S20 Ultra and 64MP on the S20 and S20+, photos and videos are so perfect in pixels that you can enlarge city views or landscapes with even the smallest details.

2. Get close to the Action

Not only is the Galaxy S20 camera powerful, but it is also full of innovative Zoom capabilities. The Galaxy S20’s Space Zoom feature brings you closer to all action, with the S20 and S20+ supporting up to 30x zoom and the S20 Ultra supporting game-changing 100x zoom.

Whether you’re at a concert or trying to capture your favorite player during a game, Space Zoom means you’re able to enlarge the visuals you love while maintaining image clarity. Even if you are looking to photograph something far away – such as the Moon – you will be able to capture the luminous subject as if it were right in front of you with Space Zoom.

3. Immerse yourself in a Cinematographic Video

If you’re shooting for a breathtaking, real-time sunset, now with the Galaxy S20, you can capture every beautiful detail in 8K without the need for other gadgets – perfect for those moments that require nothing less than to record with cinematic quality.

Not only that, but the Galaxy S20 can also help you focus on each particular moment by letting you select and save photos from your 33MP high resolution video recordings. Want to share your moment with your friends and family, exactly how you experienced it? You can stream your 8K videos straight to a Samsung 8K TV.

4. Let the Camera Do the Work

Finding the perfect camera mode can cost you essential seconds when trying to capture a spontaneous reunion or unexpected purpose. Single Take relieves the pressure as it uses AI to capture different versions of the same moment using each of its cameras.

With Single Take, all you have to do is press Record when the moment calls and the Galaxy S20 will capture images, up to 10 seconds, with a wide range of capture modes. Once it’s over, you’ll be able to review the clips and decide if you like what you shot best as my laps, as a forward-and-reverse video, or as one of many other options in the Gallery app.

5. Stay Focused on Fun

Life happens fast, and some of our most fun memories happen when we are on the go. Therefore, cameras should be able to walk our daily adventure, even when they are happening at 10 miles per hour.

The upgraded Super Steady utilizes a new and improved anti-rolling stabilizer and AI motion analysis to stabilize movement as you record. So the next time you’re trying to capture all the action on camera, don’t worry – your S20 will help you with clear, consistent shots.

6. Catch Clearly, also at the Night

When capturing scenes in low light conditions, we are often disappointed to see our pictures appear blurry, or simply different in appearance to us. But the Galaxy S20’s camera is set to change everything thanks to its larger image sensor, which means that even in the default camera mode, photos and videos come out clear and real, regardless of lighting conditions.

You can also enable Night Mode on your Galaxy S20 device. Powered by multi-image processing technology and multi-ISO composition, the Galaxy S20’s Night Mode works to reduce the motion blur found in night-time photos, and low lights. The S20 Ultra even features a unique nona-binning technology, the first of its kind, which merges nine pixels into one for exceptional low light photography and video.

7. Don’t Miss Any Opportunity to Shoot and Share

Not only is the Galaxy S20 camera ready for any scenario, but it also takes powerful performance to the next level. Thanks to its exceptional storage capability, you’ll have plenty of room for all your favorite photos and videos. And with the battery lasting all day, you’ll never have to prioritize usage on your phone, meaning you’ll never miss a single moment. Also, for those who want to spread the love, the Galaxy S20 Fast Speed ​​allows users to share files with up to five friends at once, without pairing the device.

The Galaxy S20’s camera is designed to remove the stress of shooting and capturing videos in order to capture everything as you see it, easier than ever before – all you have to do is get targeted and shoot.

> Read Next: Call of Duty: Warzone – A guide for new players

So what do you think about this? Let us know your thoughts in the comments section below, follow us on twitter and facebook for more news and updates.

neoAdviser

[td_block_11 category_id=”3″ limit=”1″ td_filter_default_txt=”” tdc_css=””][td_block_ad_box spot_id=”custom_ad_3″ tdc_css=””]
Tips and Tricks for Macs

5 Awesome Tips and Tricks for Macs

Mac computers are popular for being different than other computers and laptops. Know these 11 awesome tips and tricks for Macs.

Do you have a MacBook? Perhaps you’ve had one for a few years of perhaps you’ve just invested in the new MacBook Pro 16-inch? Either way, if you have one of Apple’s marvelous machines you will want to know how to use it properly and get the most out of it.

So what are some of the best tips and tricks for Macs that you might not have heard of? Here’s what you need to know.

[td_block_ad_box spot_id=”custom_ad_2″]

1. Windows On Your Mac

Bored of Mac OS? Did you know you can run Windows from your Mac? No longer will you be restricted by a program that is only compatible with Windows. Running the latest version of Windows on your Mac can solve this problem.

To get Windows up and running, first log into your Mac and begin the boot camp procedure. You can access this from your Applications folder. Starting this procedure will partition your hard drive – chop it in half or however way you want to split this.

After you complete this process you should restart your computer and then download or install Windows. You can do this using a CD or a file from the internet. Depending on the version of Windows you buy you might need to purchase this.

After you have installed it and partitioned your hard drive you will be given an option as to what operating system you want to use every time you open your Mac. This is one of the best Mac hacks.

2. Install Another Language

Are you fluent in more than one language? Of course, you can use special characters Mac to write the odd sentence but sometimes you need to use more than one character or word and you might want to have a whole keyboard devoted to another language.

You can install this by opening up system preferences from your menu bar or dock and selecting the keyboard setting. In the keyboard menu, scroll to the input sources tab. Here press the +  symbol and select the keyboard you want.

You will now have easer-to-use shortcuts for letters and accents from different keyboards. You can also easily switch between English and other keyboards by pressing the black box A in the right-hand corner of your menu bar.

3. Control Your Mac Using Siri

Did you know that you can use Siri on Mac as you can for the iPhone and iPad? It’s a miraculous tool that once helped rescue a stroke victim. You can activate it using the logo in the corner of your menu bar or by pressing the physical button on your Apple headphones.

Once you have activated it you can use it for all kinds of purposes from asking Siri what the weather is like outside to current news. You can even ask it to translate various phrases into another language such as French or Mandarin.

But did you know that you can also use Siri to control various functions on your Mac? You can Siri to open applications for you, to play a specific song on Apple Music or to play an audiobook for you or to write an email for you.

4. Highlight and Use Dictionary

Another great feature of Mac computers is the ability to highlight phrases or words you don’t understand while browsing the web without having to leave the comfort of the web page.

This is great for comprehension and it can also improve your vocabulary skills. Rather than not bothering to look up a word because it’s too much effort to open up a dictionary page, all you have to do is right-click and press the dictionary option.

5. Multi-Task

The modern world is all about learning how to handle multi-tasking. From juggling various projects for your work while also scrolling through newspaper websites and responding to group Facebook messages.

Mac computers make all that easier because you can now have two windows open side-by-side on your screen.

Press the green button on the left-hand side of your browser window and hold it. Then you will be given three options, enter full screen, tile window to the left of the screen or tile window to the right of the screen. Once you have selected which side of the screen you want you to work on you can then select another window to fill up the other side.

Another way Macs help you to multi-task is through their sidecar feature. If you own an iPad you can use the iPad screen as a second screen for your Mac. Once you have connected it you will be able to send one of your windows to the iPad and work on it there using your keyboard and trackpad.

There Are Many Tips and Tricks for Macs

If you have a Macbook computer then you will no doubt want to take advantage of it. There are so many Mac tricks you can use to help make your workday more productive and to help you keep in touch with your friends more easily.

From using Siri to control your Mac for basic functions to using the multi-tasking facilities which allow you to use your iPad as a second screen and your windows split into two, there is so much you can do if you have the know-how.

And, as Apple continues to improve its offering with yearly updates to its operating system, there will no doubt be many more Mac hacks to come with the release of Mac OS 10.16 in September 2020.

If you are interested in reading more about tips and tricks for Macs or some advice on using a Mac be sure to check out the rest of our site.

neoAdviser

Clear your Search History on Facebook

How to Clear your Search History on Facebook (Mobile&Desktop)

The latest Facebook search feature helps you get back to the pages you’ve recently searched for or visited frequently. But on the other hand, it is a threat to privacy. If you leave the phone in the hands of a friend for a second, you won’t want to risk them seeing what you asked for and the first thing that comes to your mind is how to clear the history.

> Check Out: How To Accept All Friend Requests On Facebook At Once

Here’s how to clear your Facebook search history from a mobile device

  1. Open the Facebook app
  2. Click the search icon in the upper right corner
  3. Next to the “Recent Searches” option is the “Edit” button
  4. When the activity log opens, click on the “Clear Searches” option.

Here’s how to clear your Facebook search history on your desktop

  1. On the profile page in the upper right corner of the cover is the “Activity Log” button
  2. Click the “More” option under the comments in the left pane
  3. From the open menu, type “Search History
  4. At the top of the search page, type “Clear Searches
  5. Click “Clear Searches” to confirm

> Read Next: Here’s how to see what kind of information Facebook has about you and how to clear it!

Hope you found this article useful. Let us know your thoughts in the comment section below,follow us on twitter and facebook for more news and updates.

neoAdviser

Accept All Friend Requests On Facebook

How To Accept All Friend Requests On Facebook At Once – (2020)

Facebook with more than 6 billion users worldwide is absolutely the biggest social media platform. Facebook is the place to make new friends, chat with our friends join groups, post status or even pay games, promote our business and many many more. Users of the social media Facebook can reach many peoples through groups or they pages. We have already shared a guide on how to Invite All Friends To Like A Page On Facebook. We can also reach many peoples not only from groups or pages but even through our profile page. Now-days peoples, in a smart way, make females profile page and grow that profile by accepting friend requests of buy increasing they followers.

[td_block_ad_box spot_id=”custom_ad_2″ separator=””]

> Check Out: How to Change my Facebook Profile Name Before 60 Days Limit (2 METHODS)

How To Accept All Friend Requests On Facebook At Once – (2020)

Normally we can accept the friends on Facebook one by one, but the problem is when we get to many friend request and it is a consume time accepting then one by one. So, doing this by just a simple click it i really a great thing to save a lot of time. To now more about how to accept all friends requests on Facebook at once follow the article below.

Steps To Accept All Friend Requests On Facebook at Once.

  • First open the given link below in your browser or visit here
https://www.facebook.com/reqs.php
  • After opening the link all your Pending request will be visible there.
  • Next Click F12 to open console box or you open it by right click through Inspect Element.
  • Next copy the below given code and paste it in console box. Like shown in the image below.

javascript:for( i = 1;i<document.getElementsByName(“actions[accept]”).length;i++){document.getElementsByName(“actions[accept]”)[i].click();}void(0);

Accept All Friend Requests On Facebook
  • After pasting press Enter and wait for sometime until all pending request will get confirmed.
  • Scroll down to make sure all request are accepted. In case there is a See more option, click on it.

  • Run again the scrip to accept request of pending request.
  • Follow the same process until all the request will get accepted.
Accept All Friend Requests On Facebook At Once

WARRING: Don’t accept friends requests in excessive. Always try to accept up to 50 per hour. This will reduce the chances of getting block.

> Read Next: How To Make Single Name On Facebook Account

That’s all! hope you find this trick on how to accept all friend requests on Facebook at once useful. Please let us know your thoughts in the comment section below, follow us on twitter and facebook for more news and updates.

neoAdviser

[td_block_11 category_id=”3″ limit=”1″ td_filter_default_txt=”” tdc_css=””][td_block_ad_box spot_id=”custom_ad_3″]