Is your blog struggling with a high bounce rate? Is the conversion rate declining? Are you struggling to rank your blog on Google? If you answered yes in all these questions, then it’s time to check your blog’s loading speed and improve it. A fast loading site gives users a good experience, attracts more traffic, and improves conversion.
And if you think your blog’s loading speed doesn’t matter, check the stats.
A Few Website Load Time Statistics Worth Considering
A page that takes more than 1 second to load affects many aspects of your blog in the following ways:
- Decreases page views by 11%.
- Reduces customer satisfaction by 16%.
- Reduces conversion rate by 7%.
Besides, 40% of your blog’s visitors are going to abandon it if its pages take 3+ seconds to load. As you can see, your blog’s load time is a precious element and that’s why you need to keep your site optimized for speed. In this article, you’re going to learn how to increase the speed of your blog and improve customer satisfaction and conversion.
Typically, certain factors can make your site take longer to load. Some are within your control such as image size and the number of redirects while others such as the server load time are out of your control. Start with a fast, yet affordable web hosting plan, such as Bluehost dedicated servers. A dedicated server or VPS account will have its own resources. Compare this to shared servers that are prone to slow loading speeds as many customers are sharing the same memory and processing power.
With a dedicated server, you have all the resources available to your website which helps to increase the speed of your blog and ultimately improve conversion. Before you start fixing the speed of your blog, you need to understand what a good load time is.
What is considered a good load time?
Generally, Google favors sites that take less than 3 seconds to load. If your blog pages take more than 10 seconds to load then you’re going to see a huge bounce rate of up to 123%. You will lose a lot of revenue on a blog that takes longer to load.
So, to stay on the safe sides, follow these tips to increase the speed of your blog.
1. Talk to Your Hosting Provider
As mentioned above, some factors affecting your blog’s load speed could be within or without your control. The last thing you want to do is to struggle to fix the other factors only to realize that your hosting provider is the key culprit.
So, before you start addressing the issue, let your hosting provider know that your blog is taking a long time to load to see whether they can help. If the problem originates from your hosting provider’s end, they will share tips and ideas to speed up your site.
2. Host Your Blog With The Right Provider
Typically, there’s no right or wrong web hosting provider but we recommend choosing a web hosting company that’s right for your needs.
Well, it’s easy to get tempted to choose the cheapest hosting option out there. There’s nothing wrong with that. After all, that’s what your budget can afford. However, for a high traffic blog, you should choose a web hosting company that can support your blog’s huge traffic.
Ideally, you have three options to choose from when it comes to deciding who and where to host your blog:
- Shared web hosting.
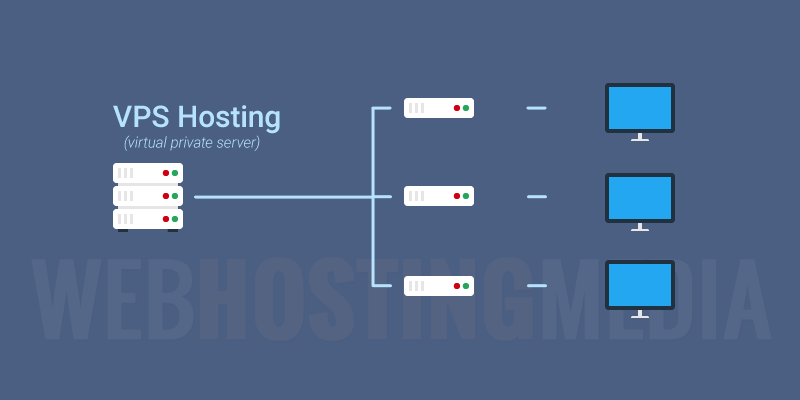
- VPS hosting.
- Dedicated server hosting.
With shared and VPS web hosting, many customers share resources and this could have a toll on your blog’s load speed. Dedicated servers offer ample space and you get full control over your hosting. Although it’s costly, this is the suitable hosting option for a high traffic blog.
3. Use a Fast-Loading Theme
The internet has a wealth of themes you can use on your blog some of which are stunning and impressive-looking but can be a needle in your butt when it comes to speed as some are poorly coded.
A good rule of thumb is to choose a simple theme that’s optimized for speed. Before you choose a theme for your blog, make sure you test its speed.
4. Be Careful With Plugins
Similar to themes, there are a ton of plugins out there but you don’t need them all. In fact, some are poorly coded and may take too long to load which can slow down your blog. When choosing plugins, always consider ease of use, user experience, and performance. You can also run a speed test of each plugin you want before installing it on your blog.
5. Compress Images to Maximize the Speed of Your High Traffic Blog
Undoubtedly, images add attractiveness to your content and can help to increase engagement. In fact, some studies suggest that images increase your content readership by 80%. But if you don’t optimize your images for speed, then you’re going to not only decrease your content engagement but also your conversion rates.
You may want to compress your images either before or after uploading them on your blog. The image file format also matters a lot here. Generally, JPEG and PNG are the recommended image formats to use on your blog but you must keep them in the recommended size.
You can use Pingdom to see how big or small your images are and then optimize them for speed. If your blog is hosted on the WordPress platform, WP Smush is a good plugin to use for image compression. For non-WordPress users, Compressor.io is a great tool for image compression as well.
In Conclusion…
As you can see, optimizing your blog for speed is not only challenging but a hectic endeavor that can help improve your blog’s overall performance.
These are just a few tips on how to maximize the speed of your high blog traffic and improve conversion. There are many blog speed optimization tips such as the use of a CDN, minimizing HTTP requests, and many others.
Always keep your blog speed on check then look for possible issues and see how you can fix things the best way.