Useful Tricks That Every Car Owner Must Know About,

Useful Tricks That Every Car Owner Must Know About

Useful Tricks That Every Car Owner Must Know About

Here’s an article about how car owners can save time and money by mastering a few handy tricks. One of the best things you can do is to learn how to fill up your own tires, or at least know what to do if they go flat on you! That way, you’ll never have to pay for expensive repairs again. There are also some other things that all car owners should know about things like how to change power steering fluids, change a tire, or jump-start your battery. With all these tips, you’ll be well prepared for any emergency.

1) Know How To Remove Frost From Your Windshield

Did you know that scraping ice, snow, and frost from your windshield can actually cause small cracks in the glass? Then, over time, the cracks will only get worse. A better thing to do is use a spray bottle filled with warm water and a little soap. Just apply it carefully onto the windscreen, wait a few minutes for it to melt away all of the frost or ice, and then scrape it clean. If there’s still some leftover dirt on your car after you’ve done this-just wipe it off with a paper towel!

2) How To Tell If You Have Road Flares In The Car

If you ever find yourself stranded on the side of the road because of a flat tire or an accident, then you might need road flares. Of course, it’s important that you have these things in your car at all times just to be safe and ready for any emergency! However, not everyone knows how to tell if they’re there or not. That’s one useful trick that every car owner must know about: just look under the driver’s side seat next to where you would put a spare tire. If there are some of those orange cones marked with reflective stripes, then you’ve got what you need! But if there aren’t any-it’s probably time to pick up some of your own so that your family stays safe on the road.

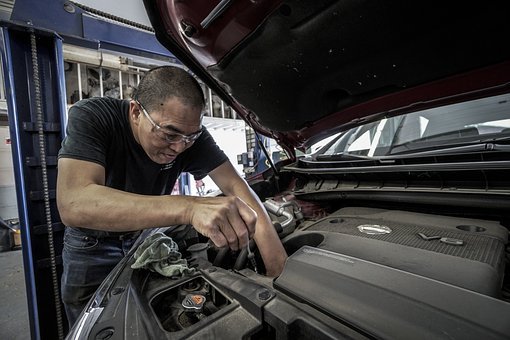
3) What To Do If The Car Overheats

Sometimes cars can overheat during the summer because of all the heat that’s trapped inside. This is especially true if you’re stuck in traffic with no air conditioning! If your car starts to overheat, then just pull over somewhere safe and stop driving immediately. Find a spot where it’s cool outside, open up the hood, and let it sit there for about thirty minutes so that it can cool down on its own. Meanwhile, search around the engine for any leaks or tell-tale signs of leaking fluids. If you find some oil or water-you’ll want to have them checked out by a mechanic as soon as possible!

4) How To Jumpstart A Battery

You may know how important having jumper cables is when it comes to jumping another car, but what about your own battery? Of course, you’ll want to make sure that it’s always in good condition-otherwise you’ll be stranded on the side of the road with no one to help! But there are two common problems that can cause a battery to die: leaving lights on overnight and overcharging. In order to jumpstart your car, you need to follow a few simple steps. First, attach the positive cables to your battery terminals and then do the same with the negative ones. Then you need to connect one of your jumper cables’ clamps to the positive terminal on the dead battery, and then use that same clamp on another car’s positive terminal. 

Lastly, you’ll want to attach one final clamp onto an unpainted metal surface inside your engine bay-like the strut tower or something similar! You don’t want it touching anything that conducts electricity-like bare wires or anything else that looks dangerous. And now just start up your car like normal; it’ll charge itself back up!

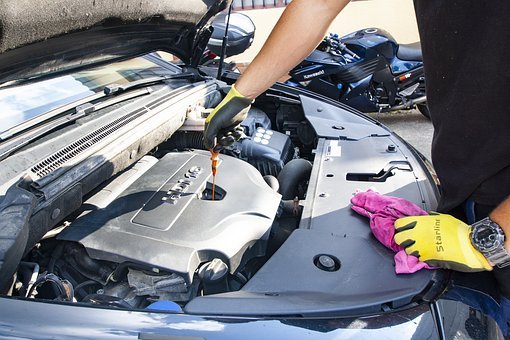
5) How To Change Power Steering  Fluid

Power steering fluid is important for keeping all the moving parts in the steering system lubricated and working properly. Additionally, comparing power steering fluids will help you decide which is best for your car. So if it starts to run low, then you’ll be at risk for your power steering being out during times of increased strain-like when you have to park on a hill! 

The first thing that you need to do is check what kind of power steering fluid your car needs, which should be listed in your owner’s manual. Then open up the hood of your car, find where the reservoir tank is, remove it with a wrench or pliers, clean it out with water and soap, dry it thoroughly, refill with new fluid using a funnel or turkey baster, replace the cap securely back into place-and voila! You saved yourself some money by doing it yourself. You’ll also want to make sure that you keep up with changing your power steering fluid at least once every two years. Otherwise, you could be at risk for severe damage in the long run especially if it’s never been changed before… 

6) How To Change Your Own Tires

It doesn’t matter how new or expensive your car is-if one of its tires has a puncture, then you’re going to need to get it fixed right away! Tire blowouts can cause all sorts of accidents and injuries that cost lives. That’s why every driver should know how to change their own tires, just in case they ever get caught out on the road when something goes wrong… First off, you’ll need to carefully remove the tire’s hubcap. You can do this by prying it off with a flathead screwdriver or removing some screws if there are any. Next, you want to track down the car’s lug nuts-usually four of them, but sometimes more depending on how many wheels your car has.

You’ll also want to find some wood blocks that are somehow secured into place on either side of the tires so that they don’t roll away when you’re jacking up the vehicle. Now just use whatever tools you have available to loosen up each lug nut, raise your car using a jack if there isn’t already one in place under it, take off the bad tire and put on its replacement, lower the car back down again, and finally tighten the lug nuts by hand on each wheel. Then you’re all set!

Changing a tire can seem daunting, but it’s actually not too difficult if you know what to do. All drivers should be familiar with how to change their own tires, just in case they ever get caught out on the road with a flat. With these simple tips, you’ll be able to replace your own tire, fluids, and more in no time and you’ll save yourself some money by doing so!

Check Next >https://www.neoadviser.com/why-is-my-car-not-accelerating-properly/

How To Prepare For A Court Hearing: Tips And Tricks

How To Prepare For A Court Hearing: Tips And Tricks

The hearing is the most important event in any legal proceeding. It’s when all of the evidence is presented, and it’s up to both parties to make their best case. So if you’re going into a court hearing unprepared, then chances are that you’re setting yourself up for failure. Don’t let this happen! Read on for some tips and tricks on how to prepare for a court hearing.

What do I need?

The first thing you should do before preparing for your court hearing is to figure out what kind of information will be needed during your trial so that you can anticipate what questions will be asked by the opposing counsel or the judge. Depending on the specifics of the case in hand, you will decide what kind of an attorney you will need. If you are from Minneapolis and you are trying to fight a DUI charge, you will need a Minneapolis DUI attorney, if you want to have the best chances of winning your case. Generally speaking, you’ll want to have all documents pertaining to your case with you at the time of your hearing. These can include:


  • Documents and information pertaining to the case (police report, etc.)


  • Birth certificate(s) of you and any children involved


  • Financial statements for both individuals


  • A list of witnesses that will testify on your behalf


You might also want to consider bringing an extra copy of these documents with you, in case they get lost or damaged. It’s also important to be prepared for cross-examination by the other party’s lawyer, so you should come up with a few believable answers beforehand so you don’t look uneducated or unprepared.

What can I expect?

Once inside the courtroom, it’s important not only to follow protocol and remain respectful at all times, but you need to understand what will happen during your court hearing, so you don’t have any unexpected surprises. The entire trial should be relatively brief and shouldn’t take place over a long period of time. This gives the judge an opportunity to hear everyone’s side without being influenced by either party. Once all of the evidence has been presented and both sides have made their case, the judge will give a verdict based on all testimony and evidence used in your hearing.

What do I want to get out of this?

It’s important that you consider prior preparation for your court date, so you can make sure all parties involved feel they were heard and understood throughout the process. If you’re familiar with everything going on, then it will make your legal case run smoothly. Make sure you understand the process and how everything works throughout your court hearing! You should also consider reaching an agreement before going into court if possible. However, this isn’t always possible, but it’s beneficial to talk things out with whatever party is involved. This can help spare both you and the other person some time in court!

What happens after the hearing?

After all of the evidence has been presented, the judge will have a verdict on what they believe happened during your trial. If you win your case, then any charges against you or default judgments will be dropped accordingly. If you lose your case, then chances are that fines or jail time will be given to you, so it’s important to plan ahead before your court date. Even if you lose your case, though, you can still appeal the verdict. This means that you’ll have another hearing in front of a different judge, with the same evidence presented for comparison.

How to make the most out of your courtroom appearance

In order to make sure you win your case and any charges against you are dropped, consider these tips for getting the best possible outcome from your trial. Make sure all of your paperwork is in order, this means making sure everything is filed correctly and all signatures, dates, etc. are correct! This can go a long way when dealing with judges who don’t feel like going over every detail again. Be well prepared for cross-examination, if you’re not ready then there’s nothing anyone can do to help you! It helps if both parties have an idea of what questions might be asked, so they can prepare ahead of time. Remember that judges are not your friends, you’re dealing with an entirely different branch of the law so it helps to keep this in mind throughout your court hearing! Judges don’t have much leeway when it comes to legal procedure and whether or not someone is guilty or innocent, so if you want to increase your chances for a positive outcome during your trial then familiarize yourself with everything going on prior to arriving at the courthouse.

It can be difficult to prepare for a court hearing because it’s important not only to understand the process of your case but also what is expected of you. Preparation will make sure that all parties are heard and understood throughout the entire trial. It’s equally as crucial to know how best to present yourself in front of the judge so he or she has enough information about your story. With these tips and tricks, you’ll be well prepared for any legal battle that comes your way! 

Check Next >https://www.neoadviser.com/safety-while-riding-a-bicycle/

DAX

What is DAX in Power BI?

What is DAX in Power BI?

Business intelligence is a critical aspect of any business. Along the development path of the business intelligence tools, Power BI  has stood out as one of the most versatile tools. Power BI, developed by Microsoft is a cloud-based business analysis suite that comes packaged with tools for performing calculations, data analysis, and data visualization. It is a drag-and-drop tool that allows you to select your desired field for analysis and drop in on the Power BI dashboard to perform analyses and generate insights. If you have undertaken the PowerBI training, you are probably familiar with PowerBI components including:

  • Power Query 
  • Power Pivot 
  • Power View 
  • Power Map 
  • Power BI desktop 
  • Power BI website 
  • Power Q & A

Power BI features 

  • An interactive dashboard 
  • Aesthetic designs 
  • Compatibility with databases 
  • Fast and easy creation of charts, dashboards, and Power BI reports
  • Real-time alerts and visualizations
  • Works well with other Microsoft tools like Azure, SQL Server, and Windows voice assistant Cortana

What is DAX in Power BI? 

DAX (Data Analysis Expressions) is a formula expression language used in BI tools like Power BI Desktop, PowerPivot, SQL Server Analysis Services (SSAS) to define custom calculations and analysis for the tabular data models. DAX in itself is a collection of functions, constants, and operators that are applied to an expression or a formula to perform dynamic aggregations and return one or more values. Ideally, DAX was designed to help extract more information from data that already exists in your model. Therefore, DAX helps data analysts to make the most out of the data sets that they have.  

DAX includes some of the functions used in Microsoft Excel formulas as well as other functions that can be applied to relational data to perform dynamic aggregation. Overall, DAX is simple and easy to learn. 

Importance of Data Analysis Expressions (DAX) 

As we have already seen, Power BI is used to run reports and present insights in the form of visuals from a company’s datasets. Power BI is built with a calculation engine that automatically performs calculations on data to generate reports with the desired insights. However, where more advanced analysis needs to be done on data, Power BI drag-and-drop function is not adequate. This is where DAX comes in. DAX expressions allow you to perform advanced calculations and data analysis on existing data sets. Creating DAX expressions is similar to the way formulas are created in Microsoft Excel

DAX Functions 

DAX functions allow you to perform calculations on the data organized in the tables in your data model. As we have already seen, some DAX formulas resemble those used in Excel in name and functionality but have been adjusted to be used on DAX tables in the data models. Other DAX functions are designed to be applied to relational data. Still, others are used for performing dynamic aggregations. 

Steps to creating DAX formulas

To create a DAX function:

  1. Begin by typing the equal (=) sign 
  2. Type the function name or expression 
  3. Type in the required values or supply arguments to the function by selecting the appropriate one from the dropdown list. PowerBI lists all functions in a dropdown list in each category which makes it easy to select the function that you want. 
  4. Close off parentheses. Also, check that referencing is correct on your columns, tables, and values.  
  5. Press enter to apply the formula to your data model

Types of DAX calculations 

Power BI has two main categories of calculations using DAX. These are:

  • Calculated columns
  • Calculated measures 

The data modeling tab includes a formula bar in which you can type your formula to perform your calculations. Both columns and measures use DAX expressions.  

DAX functions 

DAX has at least 250 functions. Some commonly used DAX function categories include:

  1. Date and time functions are used to create time and date calculations. These are similar to the Excel time and date formulas. Examples include DATE, HOUR, NOW, and WEEKDAY. 
  2. Filter functions that are applied on data models to return specific data types filtered by related values. Examples include ALL, ALLEXCEPT, ALLSELECTED, and CALCULATE. 
  3. Aggregation functions that are applied to return scalar values. Examples include MIN, MAX, AVERAGE, and SUM. 
  4. Financial functions are the same as those used in Microsoft Excel. They are used in formulas that perform financial calculations such as rate of return. Examples include ACCRINT (accrued interest), ACCRINTM (accrued interest on maturity), and DISC (discount rate for security).
  5. Logical functions are applied to expressions to return information about the values in the expressions. Examples include IF, AND, OR, and NOT. 
  6. Math and trigonometric functions are also similar to Excel math and trig functions with minor differences in the DAX numeric data types. Examples include ABS, ASIN, COS, and ACOS. 
  7. Other functions are special functions that perform very unique functions that cannot be classified under any of the categories. Examples include EXCEPT, GROUPBY, VALUE, TRIM, and UPPER.  
  8. Relationships management functions are applied to tables to return values on relationships. Examples include RELATEDTABLE, USERELATIONSHIP, CROSSFILTER, and RELATED. 
  9. Statistical functions perform aggregations. Examples include BETA.DIST, CONFIDENCE.NORM, MEDIANX, and BETA.INV. 
  10. Table manipulation functions manipulate existing tables or return tables. Examples include ADDCOLUMNS, CROSSJOIN, DATATABLE, and GROUPBY. 
  11. Text functions are used to manipulate strings. Examples include REPLACE, SEARCH, FIXED, and UPPER. 
  12. Time intelligence functions perform calculations together with aggregations to build comparisons and relationships between time periods. Examples include LASTDATE, NEXTDAY, NEXTMONTH, and NEXTQUARTER. 

Conclusion 

DAX was designed to be a solution to advanced data challenges in Power BI. DAX comes with higher data analysis and calculations capabilities. If you are familiar with basic Power BI concepts and Excel formulas, grasping the DAX function will be much easier for you. DAX enables businesses to make the most of the data sets available to them. This is certainly way beyond the capacities of Power BI which is limited to drawing reports from data and creating visualizations. Thus, DAX brings out the powerful data analysis capabilities of Power BI. 

Check this –> https://www.neoadviser.com/controlling-temperatures-with-a-touch-renting/

photoshop

Useful Photoshop Shortcuts You Need to Know About

Useful Photoshop Shortcuts You Need to Know About

Adobe Photoshop is a versatile tool that is used by millions of people worldwide. From editing photos to designing website interfaces, this tool is extremely useful. If you are a photographer or a graphic designer, you should definitely know your way around this software program. By editing your photos in Photoshop, you can achieve impeccable results and revamp your portfolio. Since every photographer is expected to master at least one editing tool, why not set your hand at this highly coveted program? Photoshop has a lot of shortcuts that can be used to save time and achieve faster results. On that note, here are some of the most useful shortcuts that will make your designing and photo editing projects easier. 

  • Marquee Tool

If you need to select a specific shape on your image layer, the Marquee tool can easily select the retained shape area. For both Windows and Mac, select the shortcut M. This will enable the Rectangular Marquee tool. To select the Elliptical shape, press Shift+M. Upon using the Elliptical shape, press Shift and drag the tool to make a perfect circle. 

  • New Layer

In Photoshop, every new design and editing work is based in layers as it makes your workflow smoother. If you need to change a particular part of the artwork or photograph, working in layers lets you make the change only in the specific areas, thereby saving your time and energy. For Windows, use Shift+Ctrl+N, and for Mac, use Shift+Cmd+N.

  • Quick Mask 

If you need to make any local adjustments within the image layer while keeping the rest of the image intact, use the Quick Mask option. To use this function, press the Q key after selecting the area in question. You will notice a red translucent mask formed in the unselected area. Press B, which is the shortcut key for the Brush Tool, and make changes as needed. Apply white color to delete the mask or apply black color to add a mask to the selected area. 

  • Lasso Tool

If you need to select a random (undefined) shape on your image layer, the Lasso Tool can help. Press L on the keyboard to activate this function. To switch between the Polygonal Lasso Tool and Magnetic Lasso Tool, press Shift+L on both Windows and Mac. The Magnetic option lets you select specific magnetic points and edges over the image layer, and the Polygonal option lets you select an area by clicking and placing points over the edges of the desired shape. Press the Alt/Opt key to form straight lines. 

  • Duplicate Layer

For every photo editing project, duplicating the image or making a copy of your current (image) layer is highly recommended. If you need to deselect certain elements, the expert editors at parkerphotographic.com/how-to-deselect-in-photoshop-step-by-step/ recommend working on the duplicated layer instead of the original as you can easily revert to the first image in case you make a mistake. If the copied layer is no longer needed, you can simply delete it. For Windows, use Ctrl+J, and for Mac, use Cmd+J.

  • Crop

This is the easiest and most effective command among all. Once you select an image layer, press the C key to activate the Crop function. The grid formation allows you to move your mouse and crop the image as required. You can also access the Straighten Tool from the panel. 

  • Move

To move a selected area from one place to another within the same image layer or in your workspace, press the M key. The selected areas can be dragged or moved using the keyboard arrows or the mouse. 

  • Deselect a Layer 

Before using the shortcut command to deselect a selected layer or part of any layer, the active lines of the selection should be visible. For Windows, use Ctrl+D, and for Mac, use Cmd+D.

  • Clone Stamp Tool

This is another useful retouching app that most photographers often use. The Clone Stamp Tool copies a specific area of the image on the layer (the area copied is equivalent to the clone stamp size) and pastes it at your preferred points. To access this tool, press the S key. To increase or decrease the size of the stamp brush, press ] or [ respectively. When clicking on the area to be copied, press Alt/Opt. Click on the area where you wish to paste your copied selection. 

If you are a beginner who is still trying to find your way around Photoshop, you can use these shortcuts to save time and improve your skills. If you are confused about whether or not you should learn this design and editing software, we highly recommend that you do. This versatile software will make your tasks easier and help improve your design and photo editing skills tremendously. 

Check  this  –> https://www.neoadviser.com/adobe-has-trained-an-ia-system-that-identifies-photo-manipulation-with-photoshop/

How Will Cybersecurity Be Automated in 2021?

How Will Cybersecurity Be Automated in 2021?

One of the biggest trends that is anticipated to affect cybersecurity this year is automation. When it comes to solutions for better network management and automation, it will be imperative for organizations and government entities to follow these trends. Otherwise, they’re left vulnerable to a staggering increase in cybersecurity attacks and incidents.

There was reportedly a webinar for U.S. federal agents in August of 2020. The webinar was for agents who are experts in cybersecurity and from cybersecurity directors from organizations like NASA.

The takeaway was that we’re moving away from the notion that you can account for each alert. Instead, there needs to be a significant reliance on artificial intelligence, machine learning, and automation in general.

Based on information from an IBM report, organizations that have invested in automation have average data breaches of around $2.45 million compared to $6 million for the organizations that haven’t made a similar investment.

The following are some of the key things to know about the automation of cybersecurity in 2021 and what trends are likely to be most relevant.

What is Cybersecurity Automation?

Cybersecurity automation broadly refers to products meant to automate specific tasks that fall within the parameters of security. Most organizations probably already have some level of automation as part of their cybersecurity arsenal.

An example of common automation in cybersecurity is the use of products that manage vulnerabilities.

Beyond the simplest and most prevalent types of automation, there are more specific types of security automation.

For example, there is security automation and orchestration or SOAR. There’s also custom software and code used to automate analysis and processes.

As organizations are emphasizing their digital transformation priorities, the complexities of their IT environments are increasing. That ups the risk of cybersecurity threats, alongside with the fact that it’s difficult to source security talent.

Why Automation?

Automation in cybersecurity isn’t just something for large enterprises. It can and should be used by small organizations too.

When you automate cybersecurity, then your team can focus on the more complex challenges.

This is especially important right now. The COVID-19 pandemic shifted work to a remote environment at a rapid pace, meaning many companies were left facing extensive threats and vulnerabilities. Being able to target their focus is helping businesses and their security professionals tackle the most pressing issues, while automation handles the rest.

Data Correlation

One way that automation is becoming more relevant in cybersecurity is for the correlation of data. Most vendors of security solutions gather large amounts of data related to threats. Unfortunately, that data isn’t often put to good use.

For data to be useful, it needs to be turned into action.

When data is not just gathered but appropriately analyzed and used,  it becomes easier to predict what an attacker might do next. You’re several steps ahead rather than behind.

Plus, just like automation is improving cybersecurity, it’s also making it easier for attackers. They are able to have more large-scale attacks that are similarly automated, so you need to be able to fight fire with fire in these instances.

Rapid Protection

Another key area of focus in cybersecurity automation will be making sure that after a threat is identified, then protections can be put into place faster than the attack can move throughout a network. Again, this wouldn’t be possible without the help of automation.

Automation can help preserve resources while simultaneously keeping up with an attack before it leads to downtime.

Automated

Robotic Process Automation

Robotic process automation is a phrase you’re likely to hear quite a bit in the coming years.

Robotic process automation means the use of robots, which can include virtual software bots, to automate repetitive security tasks. What this would mean is that a robot would handle tasks like scanning and monitoring, as well as basic threat detection.

Then, cybersecurity as a whole in an organization becomes more efficient. It removes the need for the human security team to have to manually do these repetitive tasks.

It also cuts out human error, which remains one of the biggest cybersecurity threats any organization faces.

Robotic process automation can help improve response time and alert notifications and can help identify attack surfaces. It can also help with automated patching and updates, and it fills the talent shortage that is inevitably going to be felt in a big way this year as far as security experts.

If you haven’t already done so, now is the time to start planning for the automation of all aspects of network management as well as your cybersecurity.

Check this post —> https://www.neoadviser.com/paypal-makes-a-sudden-move-in-the-cryptocurrency-industry/

Top 3 VMware Backup Solutions We Had In 2020 • NeoAdvis

Top 3 VMware Backup Solutions We Had In 2020

Top 3 VMware Backup Solutions We Had In 2020

In the modern world, information is as valuable as gold or oil, which is no exaggeration. People share, send, receive, create, and consume information daily, and the same goes for every existing company and enterprise. They wouldn’t operate without business correspondence, releases, client databases, official websites full of content, etc. That is why you cannot be too careful when securing your vital data, which is continuously confirmed by all knowledgeable IT specialists. Since we live in the digital era, multiple encounters with hijacker’s attacks, viruses, and malicious programs are inevitable, not to mention unexpected system and hardware failures. Everything that starts with annoying little things can lead to a full-fledged information disaster.

However, even if the organization or a person backs up their data regularly, storing copies on physical media, such as thumb drives or hard disks, their important files are still in danger. External storage devices can’t ensure 100% safety to the data that’s kept on them. Like any other physical object, they are prone to damages and even destruction. Even remote servers in the area where floods or other natural disasters are not uncommon cannot boast high reliability. Alternative solutions are necessary, and they come in the form of virtualization.

Why Is VMware Backup the Best Way Out?

Considering extensive costs associated with hardware updates, the demand for virtual machines (VMs) has rapidly increased in the past couple of years. Thus, one of the most popular software for virtual computers, VMware, provided businesses and average users with the opportunity to operate with a more dependable, not linked to a physical medium operating system with many useful programs. Moreover, it endowed them with cloud-based storage that is less fragile than its material counterparts.

Hence, the best way out is to switch to VMs and online storage, which come with the most advanced technologies regularly updated and improved. When resorting to the cutting-edge software for the OS installed on your virtual computer equipment, you actually can save a lot of money and, at the same time, boost the productivity of your staff members and enterprise in general. Yet, it doesn’t exclude the necessity of making backups.

Applying server backup solutions is of paramount importance for any firm dealing with data. While physical servers prove to be less and less steady, you should let your business grow with technology instead of struggling with it and opt for a virtual backup system ASAP. In the end, you’ll be glad that you did!

However, running VMs on ESXi hosts via vSphere requires certain precautions to ensure that your data is safe and intact. So, it’s time to talk about top threeESXi backup providers that rescued numerous people and organizations from the data loss apocalypse.

NAKIVO

Perhaps, the most in-demand backup utility of 2020 was created by experienced developers of NAKIVO Inc. Their product is called NAKIVO Backup & Replication, a high-end VMware backup solution promising quick and quality reserve copying and fast data restoration.

ESXi backup by Nakivo helped many individual and corporate users eliminate data corruption and information loss in 2020. While it represents a specialized hardware hypervisor, which is conveniently installed on the server and allows you to run multiple virtual machines on it, ESXi backup utility shows off some handy features:

  • A command-line function with real-time data output
  • Hot backups’ creation, while the virtual computer is working
  • Automatic preparation for space review
  • Detailed reports about reserve copying process and its results
  • Supports VMware ESX (previous version of the hypervisor) backup procedures.

Vembu

Another undeniable leader in the field of data management for cloud storage is the Vembu backup software. It ensures a straightforward, adjustable, and dependable reserve ESXi copying and recovery option for many enterprises. Its primary benefits include the following:

  • Fast and high-quality backups creation
  • Granular restoration feature
  • Quick and stable connection between different cloud environments
  • Limitless and free-of-charge ad hoc backup copies
  • Opportunity to save storage space by compressing backups, etc.

Iperius

The last but not the least on our list is the Iperius VMware ESXi, vCenter and ESXi backup product. Its most notable features include ease of use and robustness complemented by a complement server infrastructure protection framework. Users of Iperius solutions can enjoy both incremental and differential backups, free ESXi backups, and extensive VM replication features.

Undoubtedly, there were (and still are) other trustworthy backup solutions for VMware, and hopefully, the upcoming year will bring the industry even more fantastic innovations.

Android smartphone as a webcam for your PC

How to use your Android smartphone as a webcam for your PC

Do you have a computer or laptop that you use to make calls on Skype but don’t have a quality webcam to use?

If you have an Android smartphone then you are lucky because you can use it as a webcam for your PC. All you need is an Android app, a program in Windows, and a few clicks. In this guide, we show you what steps you need to follow to transform your smartphone into a camera for a Windows computer.

If you are in the middle of a meeting doing a presentation, and at that time, you may need to share your screen but don’t have a webcam on your desktop or laptop, then you may use your Android phone as a webcam by following the steps below. It is better to use a phone as a webcam for your PC instead of buying a webcam.

[td_block_ad_box spot_id=”custom_ad_2″]

> Check Out: How To Partition A Hard Disk Without Formatting (Three Methods)

How to use your Android smartphone as a webcam for your PC

So if you are interested to turn your Android smartphone into a webcam for your Windows PC, follow the steps below on how to do so. Before going through the steps below, make sure first that your phone and Windows PC are connected at the same WIFI network.

Step 1: Download DroidCam Wireless Webcam on your smartphone

You must first download and install DroidCam Wireless Webcam on Android (you should have Android 5.0 or above). Just search the Play Store or click this link: DroidCam Wireless Webcam. On the Play Store page, click Install. Once the application is installed, switch to the Windows computer for the next step.

Step 2: Download DroidCam Client to Windows

On your Windows computer, open your favorite browser and visit this website: DroidCam Windows Client (You may download also on Linux, but not on macOS). Once opened you should see a large DroidCam Client v6.0 button. Click to download.

You will download a 1,525KB file in .exe format. A double-click will open a window with instructions for installing DroidCam Client on Windows. It’s simple and all you have to do with this guide is click Next. When the installation is complete, open the software in Windows.

Droidcam PC Interface

Step 3: Connect DroidCam Wireless Android Webcam with Windows DroidCam Client

  • Go to your Android smartphone and open the DroidCam Wireless Webcam app.
  • Click the “Next” button at the bottom of the screen.

The application will ask you for permission to use the camera and the application microphone. Normally you need them and you need to approve them. Now the app will open a new screen that shows the Wi-Fi network where you are connected and the IP address of the smartphone and the application gateway.

  • In this case, the IP is 192.168.50.4 and the gateway is 4747.
  • Go to the Windows computer and open the program.
  • In the IP Device set the smartphone IP which in our case is 192.168.50.4 and gate 4747.
  • Make sure you have checked the video option below and press Start.
  • And with that, your smartphone will behave like a webcam you can use in your Skype or Zoom calls.

Note: To choose between the front or the back camera, you must go to the Droidcam app then click the three-dot icon, then Settings > Camera and select it. We advise using the rear camera for better video quality.

If you followed the steps carefully, then start the video conference and choose Droidcam as your camera. The DroidCam client is only available for Windows and Linux and you cannot use it on macOS.

> Check Next: Google Chrome’s new Tab Groups: Here’s how to enable and use it!

That’s all! Hope you found this article useful on how to use your Android phone as a webcam for your Windows PC. Let us know your thoughts in the comments section below, follow us on Twitter and Facebook for more news and updates.

neoAdviser

[td_block_11 category_id=”3″ limit=”1″ td_filter_default_txt=””][td_block_ad_box spot_id=”custom_ad_3″]
Bulk Delete Facebook posts

How to bulk delete your old Facebook posts

The social network Facebook has become a daily part of many people for some time now and most likely most of them have so far made “tons” of posts. For those who find the old posts inappropriate now, they may delete them one by one and this process can be very lengthy and tedious. Fortunately, Facebook now lets you delete or archive than in bulk. Facebook seems to have realized that most people want to bulk delete old posts and has recently launched a new feature that allows its users to delete multiple posts in bulk. Here’s the how-to guide to delete a piece of Facebook history in bulk through a very simple process.

[td_block_ad_box spot_id=”custom_ad_2″]

> Check out: The best way to post panoramic photos on Instagram

How to delete your old Facebook posts in bulk

Before starting, keep in mind that the bulk delete/archive feature at the time writing the article is only available on Facebook’s mobile apps (Android, iOS, and Lite). So make sure you are following this guide through the Facebook mobile app.

  • Log in to the Facebook app on your phone;
  • Go to profile and click the three dots to enter the menu;
  • Click on Activity Log> Manage Activity> Select “Your Posts”;
Activity Log Facebook
  • Click the small box next to your posts to archive or delete posts;
  • Click the “Trash” or “Archive” accordingly.
Archive/Delete Bulk Posts Facebook

Facebook saves the deleted posts in the recycle bin for 30 days before they are permanently deleted in case a post is deleted by mistake. The archived/deleted posts will show up at Your Posts section.

> Check next: How to automatically delete your location, search and web history from Google

So, that’s all about how to bulk delete your old posts on Facebook. It’s a bit disappointing that the bulk delete post option is not available on the Facebook desktop site. Hope you found this article useful. Feel free to comment your opinions down in the comments section belowfollow us on Twitter and Facebook for more news and updates.

neoAdviser

Search for a specific words in a YouTube video

How to search for specific words in a YouTube video

In this article we show you how to search for specific words in a YouTube video

If you’ve found yourself going through a YouTube video to find a certain piece you want to watch or listen to, then this article is for you. It is a phenomenon that consumes time and nerves for users to find a specific moment in a YouTube video. But you don’t have to.

In this article, we will show you how to search for specific words in a YouTube video.

[td_block_ad_box spot_id=”custom_ad_2″ tdc_css=””]

> Check out: How to block YouTube ads quite simply

Here’s how to search for specific words in a YouTube video

  • Navigate to the YouTube video you want to search for
  • Click on the three horizontal dots below it
  • Click Open Transcript
  • Press Ctrl + F to open the browser search function. Enter the word you are looking for and if it is in the transcript it will be marked
  • Then click the line where it is located to go directly to the part of the video you are looking for

Remember that it all depends on the accuracy and spelling of the subtitles. It is never guaranteed that the subtitles are proper especially if they are generated automatically.

Here’s how to search for words on many YouTube videos

  • Go to YouGlish
  • Put the word or expression you want to search for and press Say it
  • Use the controls below the video to play and skip to the part where the word or expression appears
  • Press Ctrl + Right Arrow to switch to the next video

YouGlish does not work with automatically generated subtitles but only with manual ones.

> Check next: How To Convert Text Into Audio Using Notepad

So, that’s all about how to search for specific words in a YouTube video by using this simple trick. Hope you found this article useful. Feel free to comment your opinions down in the comments section belowfollow us on Twitter and Facebook for more news and updates.

neoAdviser

[td_block_11 category_id=”3″ limit=”1″ td_filter_default_txt=”” tdc_css=””][td_block_ad_box spot_id=”custom_ad_3″ tdc_css=””]
Convert Text Into Audio

How To Convert Text Into Audio Using Notepad

Everyone loves to hear what is written in a paragraph or in a document. This is the reason why audiobooks are getting popular nowadays. In this article, i will show how you can convert text into audio using the Notepad.

[td_block_ad_box spot_id=”custom_ad_2″ separator=””]

> Check out: How to Scan a Document Using Your Phone or Tablet – The Best way

Why Use Notepad?

Because it is the most commonly used text editor everyone uses. That’s the reason.

How To Convert Text Into Audio Using Notepad

  • STEP 1: Open Notepad. You can do this by searching for “Notepad” in the windows search Or Press “Win+R” and type “Notepad” and press “Enter”.
  • STEP 2: Now, copy the following program and paste it in Notepad–
Dim message, sapi
message=InputBox("Enter your text for conversion | #LLSINFO","Sound Testing #llsinfo")
Set sapi=CreateObject("sapi.spvoice")
sapi.Speak message
Notepad: Paste The Code
  • STEP 3: Now save the code that you have entered above. The code has to be saved in .vbs format. Example sound test.vbs or any other name that you desire and save it.
Save The File as .vbs
  • STEP 4: Now navigate yourself to the location where the code is stored. in my case it was stored on the desktop so i will just go to the desktop and check for it. You can see that the file we saved was in the Visual Studio Script (.vbs) format.
  • STEP 5: Now just “double click” on the saved file and “Enter the text” you want to hear in the text box. The moment you click “OK“. You can hear the text you entered as Audio.

> Check next: Convert a PDF File Into an Editable Text Document (How to)

So, that’s all about how to convert a Text into Audio simply by using Notepad. Hope you found this article useful. Feel free to comment your opinions down in the comments section below, follow us on Twitter and Facebook for more news and updates.

neoAdviser

[td_block_11 category_id=”3″ limit=”1″ td_filter_default_txt=””][td_block_ad_box spot_id=”custom_ad_3″ separator=””]