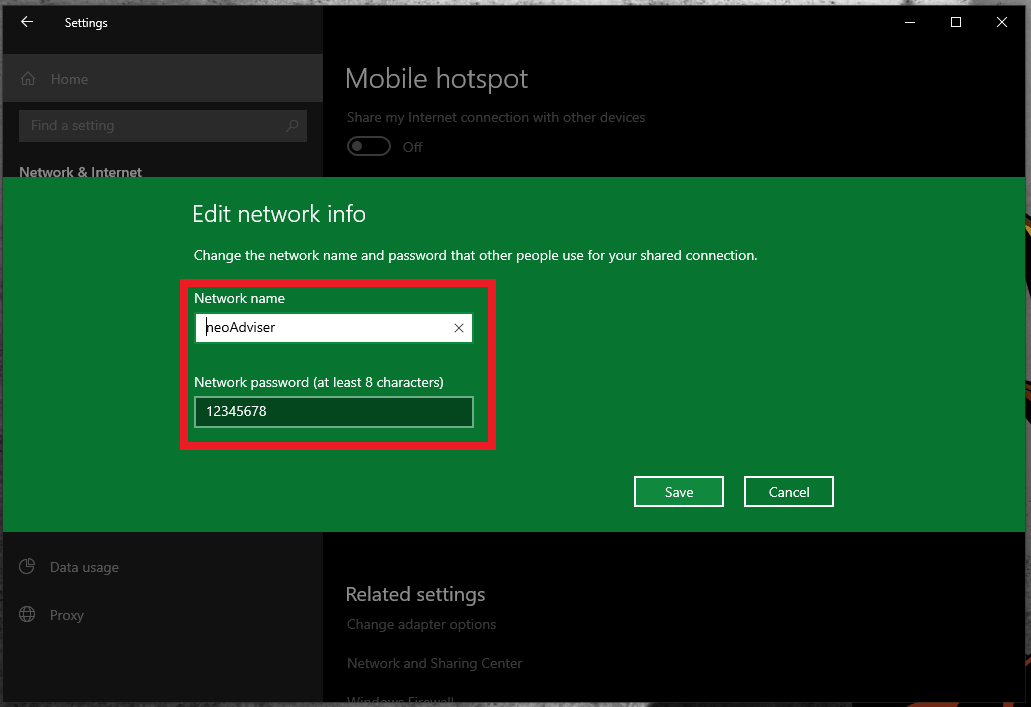
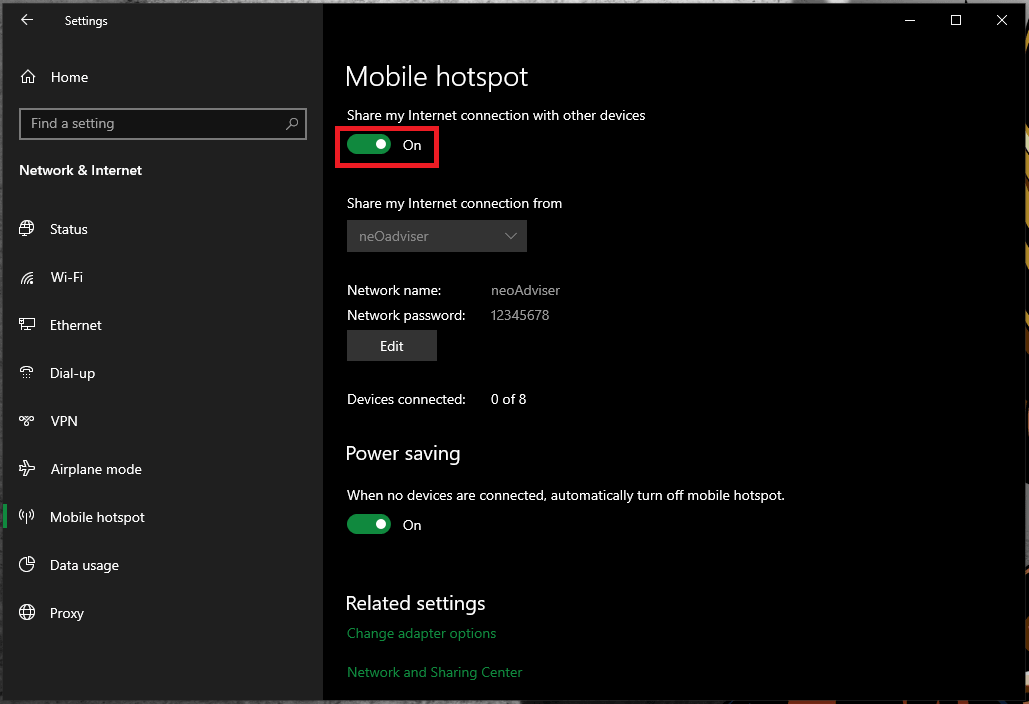
If you have upgraded recently to Windows 10 and want to share your internet connection with other devices, you can do it easily through the “Mobile Hotspot” Setting app in Windows 10. Just like on your Android and iPhone device, you can share your internet connection in Windows 10. You can broadcast your WiFi, Ethernet, or cellular data connection as a Wi-Fi hotspot. By doing that, you will allow other devices to connect to it. If your Windows 10 PC has cellular data connection and you want to share it, it will use the data form your mobile data plan.
> Check Out: Windows 10 Tips & Tricks: Top Best Most Useful Features in Windows 10
How to Turn Your Windows 10 PC into a WiFi Hotspot
There may be multiple reasons on why you may need turn your Windows 10 PC into a WiFi Hotspot, like when you need to connect to multiple devices but you are connected in a network with limited access. Some Wi-Fi in Hotels will allow only one device to be connected, so for this or many other reasons, is very important to know how to create and share your internet connection as a hotspot in Windows 10 by turning it into a Wireless hotspot (wireless access point).
Steps to turn your Widows 10 PC to a WiFi Hotspot
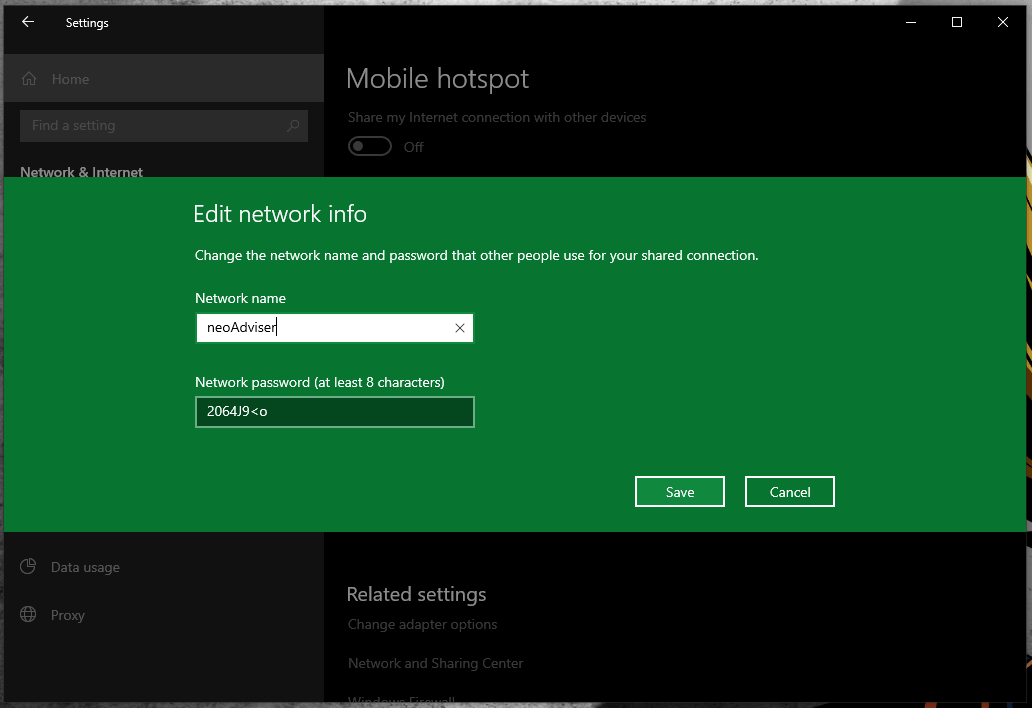
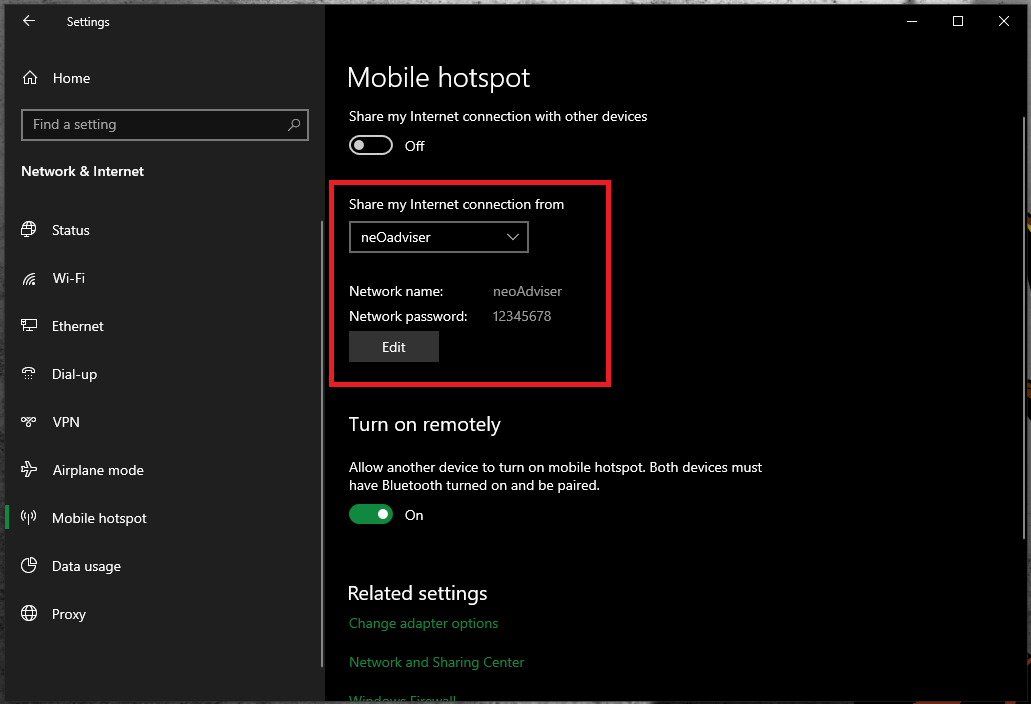
Windows 10 as made is really easy to create a WiFi hotspot (wireless access point) by using its own built-in hotspot software. So follow the steps below to turn you Windows 10 device into a WiFi hotspot:
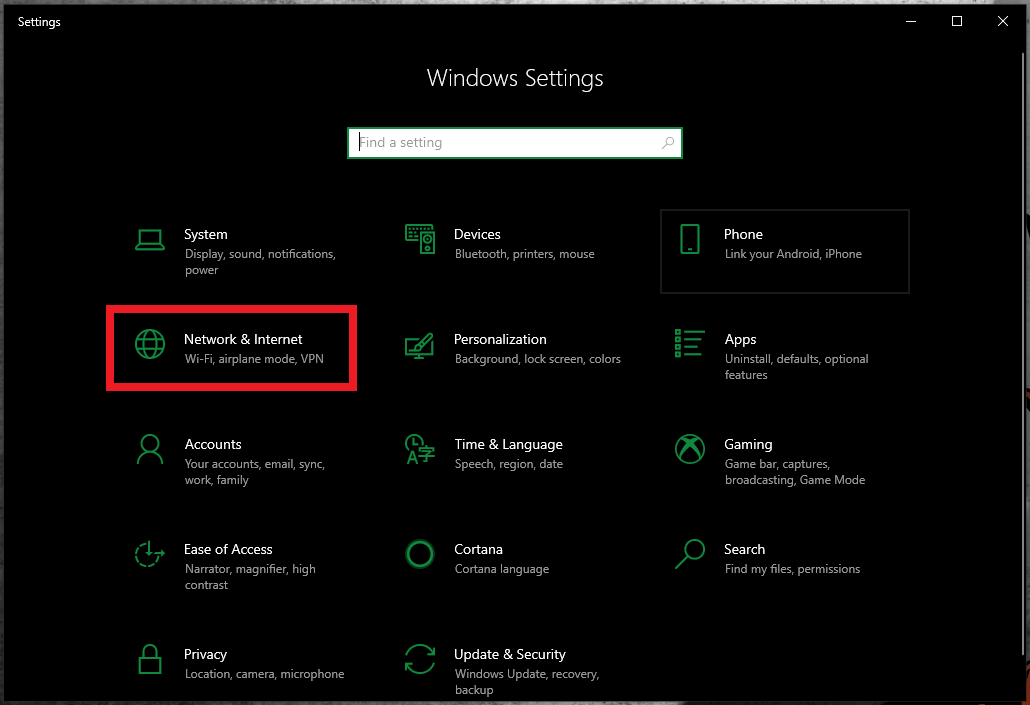
- Step 1: Click to the “Start” button and then the “Setting” gear in the left-side of the menu. You can do the same by pressing “Windows + I” keyboard shortcut.
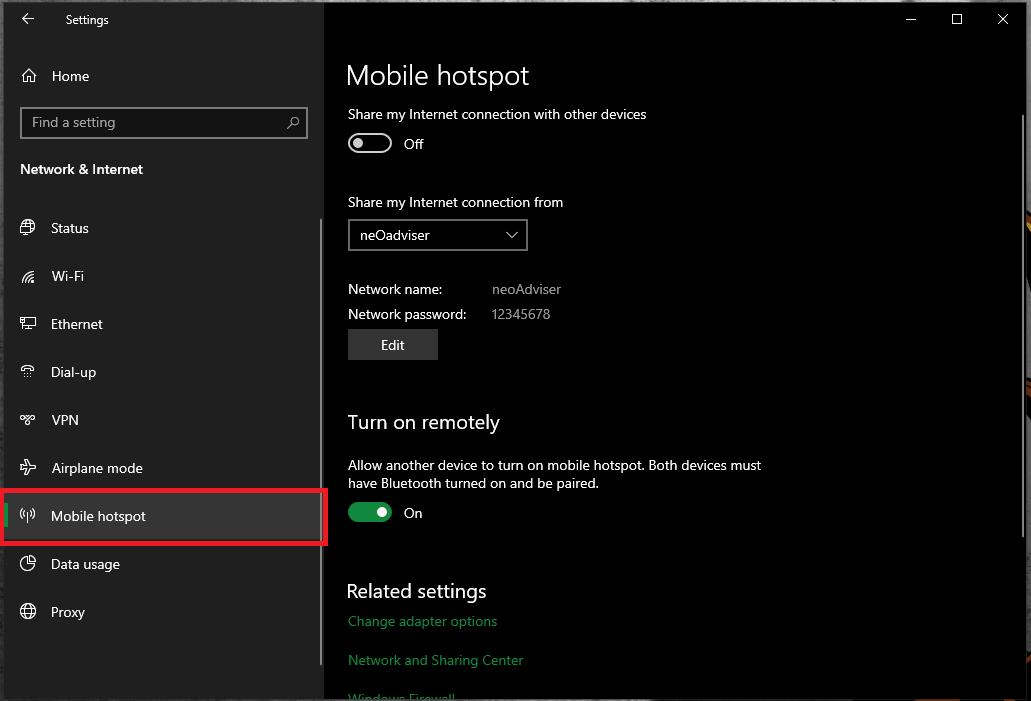
- Step 2: Next go to “Network and Internet“. If your PC has a WLAN or Bluetooth adapter than you can share your internet connection.
> Check Next: How to use your Android smartphone as a webcam for your PC
Windows 10 will show the connected devices to the hotspot directly below along with they name. You can use Bluetooth for the same, by if you want a fasted internet connection speed, then WiFi if a better choice.
So below we cover everything you need to know about how to share your Windows 10 PC’s internet connection with other devices. Hope you found this article useful. If you have any thoughts, please let us know than in the comments section below, follow us on twitter and facebook for more news and updates.
