Peaky Blinders for PS4, Xbox One, PC and Nintendo Switch

Peaky Blinders for PS4, Xbox One, PC and Nintendo Switch arrive this summer

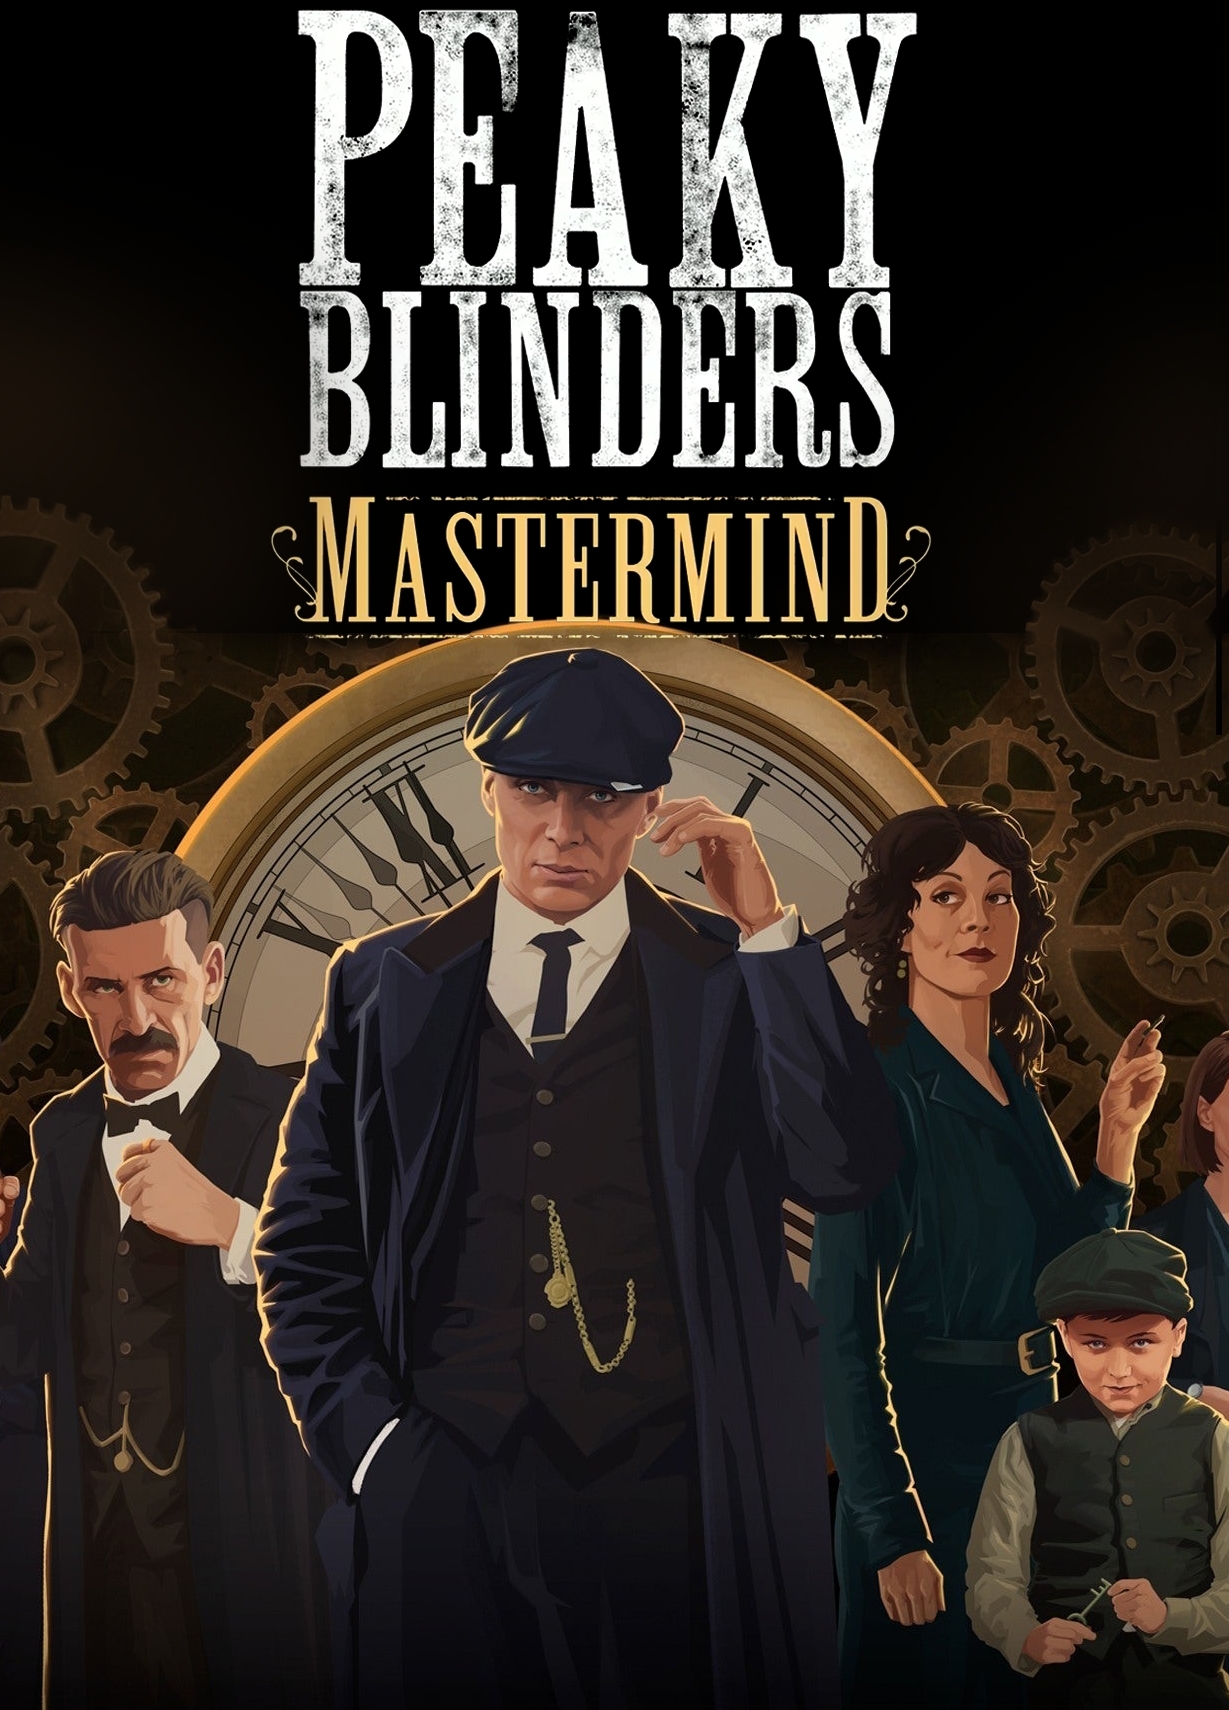
And is there anyone left without seeing Peaky Blinders ??

Cinema and video games often meet, but a cinematic production must have generated a lot of attention in order to win a video game title.

[td_block_ad_box spot_id=”custom_ad_2″]

By order of Peaky Blinders we will finally have a video game where we become part of Thomas Shelby’s genius mind. Catch the beret and get the game because the title will be available for PS4, Xbox One, PC and Nintendo Switch.

News of such a game came out a year ago, but we already have the first pictures of what the game will be like. Endemol in partnership with Curve Digital and FuturLab developers are the heroes we have to thank.

Peaky Blinders: Mastermind, will allow you to become part of solving complex mysteries using the 6 members of the Shelby family. Each of them comes with a unique arsenal of talents that can be put to use for the strategies needed from level to level.

Tommy will be the most threatening, Arthur ready to quarrel and break down doors and John capable of guns and hassles. Polly is capable of corrupting and unlocking keys, Ada to distract and Fin cunning and pickpocket.

The game will arrive this summer, so if someone has sinned and is left without seeing it, there is enough time.

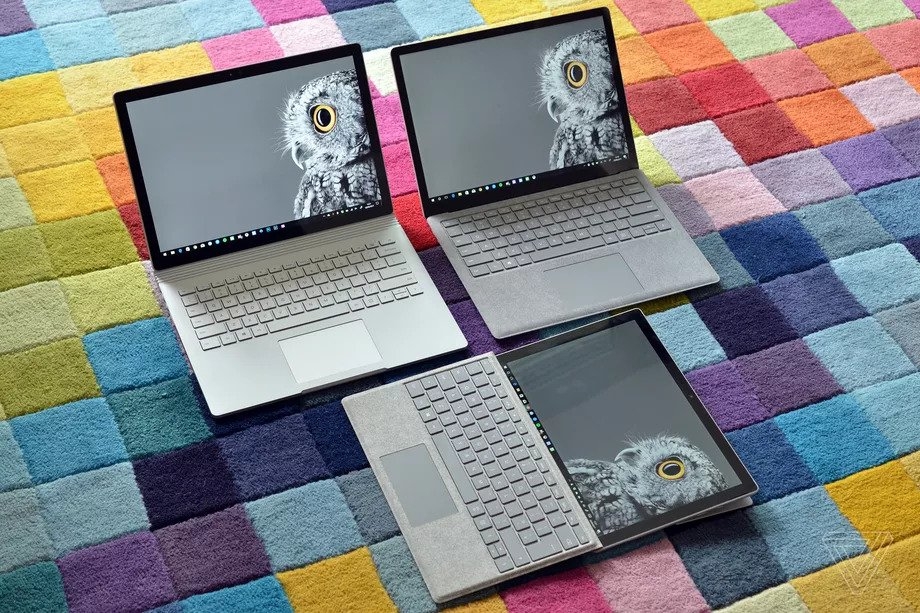
> Read Next: Microsoft will bring Surface Book 3 and Surface Go 2 next month

So what do you think about this? Let us know your thoughts in the comments section below, follow us on twitter and facebook for more news and updates.

neoAdviser

[td_block_11 category_id=”3″ limit=”1″ td_filter_default_txt=”” tdc_css=””][td_block_ad_box spot_id=”custom_ad_3″ tdc_css=””]
Windows 10 Tips & Tricks: Top Best Most Useful Features in Windows 10 (2020)

Windows 10 Tips & Tricks: Top Best Most Useful Features in Windows 10 (2020)

While Windows 10 may be the most convoluted operating system Microsoft has ever created it does include many handy features that are quite useful. So coming up i’ll show you more than 10+ tips, tricks and features that will help you get the most out of using Windows 10. Because there are many of you interested in this, we are going to include a mix of the newer features and some of the older classics that are still available for use with Windows 10. These top best 2020 Windows 10 tips and tricks will make your life a lot easier. I’m pretty sure you’re going to find something new here ’cause some of these are what I consider hidden features in Windows 10 and I have no clue about them for the longest time, but they made a big difference for me once i found out about them and started using.

> Check Out: How to Find Your Windows 10 Product Key (Using CMD & Windows Registry)

Windows 10 Tips & Tricks: Top Best Most Useful Features in Windows 10 (2020)

So, without going through to much talk, i will save your time and go right to it! So let’s get started with my tips for Windows 10 in 2020.

Tip #1. Clipboard History: Enjoy next level pasting with clipboard history

Windows 10 version 1809 has announced for the first time the new clipboard experience, so in order to use the new Clipboard History feature you will need to have Windows 10 version 1809 or greater. Although it came up with a new interface and some new features, its not really an complicated experience to use.

How to use Clipboard History feature on Windows 10

The new clipboard features uses the old experience that you already use. But instead of using CTRL + C to copy and CTRL + V shortcut to paste, now you will use the same CTRL + C shortcut to copy text multiple time and next you will use now Windows key + V shortcut to bring the new clipboard history. In this new interface you will find the lists of your copied items. So follow the steps below on how to do so:

  • Use CTRL + C shortcut several times to copy different text form your application
  • Open the document you want to paste it and this time click Windows key + V shortcut to open the clipboard history
  • In the new interface you will find the list of the above copied content
  • Select the content you want to paste

Isn’t that great? No more flipping back and forth between applications to copy and paste each bit separately and no more accidentally losing some copied text because you forgot to paste and copy something new over it. You can copy text, HTML and bitmaps up to four megabytes per item. You may have to activate clipboard history in the settings first, so here’s how to do so!

1. Enabling clipboard using a shortcut

The fasted way to activate clipboard history feature is by using a keyboard feature, so follow the steps:

  • Tap Windows key + V on keyboard
  • Click the Turn on button
Activate Clipboard History Feature
Activate Clipboard History Feature using shortcut

2. Enabling clipboard using Settings

To do so, in the Setting app, use the following steps:

  • Go to Settings.
  • Then click on System.
  • Next click on Clipboard.
  • Turn on the Clipboard history toggle switch.

From here you can tun ON or OFF the Clipboard History feature at any time.

Enable clipboard history using Settings

How to sync clipboard history on Windows 10

The other setting here, sync across devices allows you to share copied text across any of your windows devices as long as you’re signed in to the same Microsoft account. Anyway, for privacy reasons, this feature most be enabled and configured manually, here how to’s:

    • Go to Settings.
    • Next click on System.
    • Go to Clipboard.
    • Under “Sync across devices,” turn on the toggle switch.

Finally, select the automatic syncing option that you want:

  • Automatically sync text that I copy: Your clipboard history will sync to the cloud and across your devices.
  • Never automatically sync text that I copy: You must manually open the clipboard history and select the content you want to make available across devices.
Sync Clipboard history Windows 10

How to pin items in the clipboard history

One more great feature: Let’s say you have some items on your clipboard that you use frequently and you’d like to be able to reuse these even after rebooting your computer. No problem for clipboard history, you can pin these items. Here’s how to:

On the Clipboard History Interface:

  • Click the “ellipsis” next to the item
  • Next select pin.

They’ll still be there the next time you log in. The unpinned items on your clipboard history are cleared every time you restart your PC. Only those items you pinned are going to remain on the clipboard.

How to clear clipboard history on Windows 10

Latest, if you no longer need to use the Clipboard History feature, or is something does not work as expected, you can reset the history to see if the problem may be fixed, so here’s is how to:

  1. Click Settings.
  2. Go to System.
  3. next click on Clipboard.
  4. Under “Clear clipboard data,” click “Clear” button.
clear clipboard history

Once done, the clipboard content will be deleted form your device and Microsoft account, but Pinned item will still remain till you remove then manually. If you wish to just delete only one or two items, you can do it so by opening the Windows key + V interface and simply click the button on each of the content you want do delete. You can choose also Clear all button on the history interface to delete the list.

> Check Out: Top 5+ Best Free Screen Recorder For Windows 10

Tip #2. Sandbox: Stay safe by using Windows Sandbox feature

Sandbox is another exciting new feature that was introduced with the Windows 10 May 2019 Update (version 1903). It offers a separate testing environment to try out software or download apps from websites that you’re not so sure about. Sandbox is part of the Pro and Enterprise edition of Windows 10 so unfortunately it’s not available in Windows 10 Home. Also your processor and motherboard need to support virtualization. If the virtualization is supported but not enabled, check your motherboard manufacturer to find it out how to enable it. 

Sandbox is like a virtual PC that’s built right into your Operating System. This way you can run programs or access websites in a safe zone without affecting your system. Although you may be able to create virtual machines to reach the same experience, Windows Sandbox has some key benefits. By using it eliminates the steeps on downloading and creating virtual machines. Every time you run the Sandbox features, it will immediately create a new clean Windows 10 installation. Once the Windows Sandbox gets closed every thing gets wiped out automatically. Also an important thing is that everything happens inside the environment while being isolated from your main installation to offer maximum security.

Windows Sandbox system requirements

Before going through the steps on how to enable Windows Sandbox feature, make sure your device meet these minimum software and hardware requirements:

  • Windows 10 Pro (or Enterprise).
  • Hardware virtualization.
  • AMD64 architecture.
  • 2 processor cores minimum (4 cores with hyperthreading is recommended).
  • 4GB of RAM (8GB is recommended).
  • 1GB of HDD space (SSD is recommended)

How to check if virtualization is enabled

Hardware virtualization most be enabled in the BIOS of your system. Depending of your motherboard you may need to check if it supports it and how to enable.

To check is its enabled follow the steps below:

  • In the search bar type “CMD” end pres enter
  • Next in the CMD window type the following commandsysteminfo.exe
  • Check under the “Hyper-V Requirements” section, if “Virtualization Enabled In Firmware” reads Yes, then you can use Windows Sandbox.
check if virtualization is enabled

How to enable Windows Sandbox feature on Windows 10

Sandbox isn’t turned on by default, so you have to activate it first. Here’s how to:

  • On the windows search bar type “Turn Windows features on or off” and pres “Enter
  • In the pop-up window search for “Windows Sandbox” option
  • Check the “Windows Sandbox” and then click “OK” button
  • Click the Restart now button
enable Windows Sandbox

After completing above steps, you can start now using the new virtualization layer to install and test untrusted applications temporarily.

How to use Windows Sandbox feature on Windows 10

To start using the Windows Sandbox feature you have just activated is really easy, just follow the steps below:

  • In the windows search bar type “Windows Sandbox
  • In the search results at the top, right-click to “Windows Sandbox” and select “Run as administrator”
  • This will open the Sandbox window
  • Now at you main device, copy the app that you want to test it and than past it inside the Windows Sandbox experience
  • Click on the installer (.exe, .msi, etc) to execute the installation

You can safely now open it and check if everything is okay or use edge to check out some dodgy website you’re not sure about, to make sure it’s safe. When you’re done just close Sandbox an the X button and all the content there is going to be wiped out. So even if the Sandbox is compromised next time you start it up again, it’s going to give you a brand new box to play with, but be aware that Sandbox only gives you an Operating System with a browser, none of the other third party applications are going to be available in Sandbox.

So you can’t copy an office attachments that you received into the Sandbox and open it there because you won’t have Office in the Sandbox. You can install apps, but you’re going to have to install them again next time you open up a new Sandbox. Also keep note that you can’t drag and drop files form your Windows main installation to the Windows Sandbox interface.

So keep that in mind!

> Check Out: How To Partition A Hard Disk Without Formatting (Three Methods)

Tip #3. Virtual Desktop: Split your world using virtual desktop

So let’s say you’re working on a project and you have several apps open, then an appointment pops up reminding you that you need to join a video conference to present a status update. When you share your screen, you don’t want everyone to see all the other files you’re working on. And you don’t want to close them either because it’s going to take some time to get it all set up again, once you’re done with your phone call. The solution is to switch to another clean temporary workspace, which is also called a Virtual Desktop.

Virtual Desktop
Virtual Desktop Interface (Windows 10)

How to create a new virtual desktop in Windows 10

Windows 10 has made it really easy to use and setup virtual desktops. This is really a great and very useful feature to keep your unrelated and ongoing project organized or hide then from your boss quickly. So let find out how to use multiple desktops in Windows 10.

For creating a new virtual desktop you are just a few click away, or you can use simply a keyboard shortcut: Here’s how to:

  • Click “Task View” icon at your taskbar
  • Next, click “New Desktop” at the top-left corner of your screen.

Create a new virtual desktop Windows 10

That’s all! You can use also Ctrl + Windows key + D on your keyboard that it will create a new virtual desktop immediately.

How to switch between virtual desktops in Windows 10

You can use different ways to do so:

  • Click “Task View” on your taskbar icon
  • Click “Desktop 2″ or the other virtual desktops you have created

Switch between virtual desktops in Windows 10

There is also Ctrl + Windows key + Left and right arrow keyboard shortcut to switch between virtual desktops. If you use a device with touchpad you can do four-finger swipe left or right to switch between virtual desktops.

You can also do things like moving windows between virtual desktops by click and dragging then, duplicate virtual desktops by right-clicking on the active window and choose “Show this window on all desktops” to duplicate a single window, or select “Show windows from this app on all desktops” to duplicate all windows from one app.

Once you are done, you can close your virtual desktop by clicking “X” icon in the top-right corner, or simply use “Ctrl + Windows key + F4″ shortcut to close the virtual desktop you are currently viewing.

Tip #4. Quick Assist: Get remote Access using Quick Assist

Windows 10 Quick Assist feature is really useful when you need to help someone that has a PC problem. Windows 10 Quick Assist allows you to remotely access other Windows 10 PC form your own PC. It will give you full control so you can quickly help your friends, parents by doing your magic.

Quick Assist interface
Quick Assist interface: Windows 10

Things to know before allowing access:

This feature will give full control to other person’s PC, so you should use it with someone you trust. if you are the one giving assistance, you will need to use an Microsoft account to sign in. If you are the one receiving help, you don’t need to sign in to Microsoft account. Here’s how to use Windows 10 Quick Assist feature:

How to set up Windows 10 Quick Assist

If you are assisting someone:

  • At the “Search Bar“, type Quick Assist and hit Enter
  • Click Give assistance
  • Sign in to your Microsoft account by filling your email and password
  • Next you will get a “six-digit code” that you most give to the person you are helping out

If you’re getting help

Here’s how to get help form the other person:

  • At the search bar type “Quick Assist” and press “Enter”
  • Click “Get assistance” and type “six-digit code” you received for the person that is helping you
  • Click “Submit” and then click “Allow

Following the steps above, the person who is giving assistance to you will now have full access at your desktop.

> Check Out: How To Create WiFi Hotspot In Windows/Mac/Linux OS

Tip #5. Aero Shake: Minimize quickly using Aero Shake

With is another great Windows 10 tip that i use daily and for sure will help you saving a lot of time. Aero Shake is a fun little feature to quickly minimize opened windows. Just grab the window you want to keep by holding its title bar and starts shaking it a little bit. It’s going to minimize all other open windows. This way you can fully focus on the one open window.

Aero Shake
Aero Shake: Windows 10

If you did the shaking by mistake, just shake it again and they’re all going to come back. If you’re like me and always have countless windows open, this is much faster than minimizing each window one by one.

If you’re not a shaker and you like to use shortcuts, you can also use the shortcut
Windows + Home key. It will do the same thing.

> Check Out: Top 3 Best PS4 Emulators for Windows PC (2020 Edition)

Tip #6. Snip & Sketch: Capture your screen using Snip & Sketch

Another great Windows 10 tip you’re probably familiar with, but it’s just so useful that it has to be on this list .Snip & Sketch it’s a super handy screen capture tool. Sniffing sketch is the best screen capture tool ever to be included in any Microsoft operating system.

Snip & Sketch Windows 10 feature is the successor of the old Windows Snipping Tool. After the 1809 Windows 10 update, Snip & Sketch has updated with other features like copy a rectangle, a free-form area, or even the entire screen to the Clipboard and then save to reuse then.

How to Take a Screenshot Using Snip & Sketch Windows 10 Feature

Using Snip and Sketch feature to take a screenshot its pretty fast and easy. The fasted way to screenshot Windows 10 is by pressing Windows Key + Shift + S keyboard shortcut. After the Snipping Bar interface opens, just select a mode and snip it without opening Snip & Sketch Windows app.

Here’s how to open Snip & Sketch, take a screenshot, manage and edit it:

  • In Windows search bar type “Snip & Sketch” and press “Enter
  • From the pop-up window click “New” and choose from “Snip now” , “Snip in 3 seconds” or “Snip in 10 seconds” according to your need, after clicking the snipping bar will appear
  • Next select a mode between Window Snip, Fullscreen Snip, Rectangular Snip or Freeform Snip. 
  • Your snip it will appear at the Snip & Sketch window.
Snip & Sketch Interface

From this window you will have some features like Copy, to make a copy of the just created snip, Share, to share it with other others and also you can edit it through the different tools like a Pen, a Highlighter, and an Eraser provided on the app.

Tip #7. Split Screen: Look at multiple windows using split screen

If you often need to look at several windows on the same screen at the same time you can easily do that using Snap Assists. This feature works for any application.

Snap Assists Windows 10

How to Split Your Screen in Windows 10 With Snap Assist

There are different ways to do so but the most easiest is using Snap Assist. This feature should be enabled by default but if not enable it in Start > Settings > System > Multitasking > Snap Windows

With Snap Assist you can drag the windows to a side or corner of you screen and “snap” it there and this will make room for other app to be snapped in the empty screen space. Follow the steps to split you screen with Snap Assist:

  • Open two on more windows/apps
  • Grab one of the windows and drag it all the way over to the left side of the screen
  • Now let the mouse off and the windows will be snipped to the half of the left screen living half room to the right for your other programs/windows
  • Select now one other window/program to snap it to the right side
  • Now that you have two screen at the same window, you can drag the dividing line to resize then both simultaneously.
  • You can do the same to slip the screen on up to 4 windows by opening 4 different apps/windows and drag fist one of then at the top-right corner

You can do the same using by clicking on that windows with your mouse and use Win + left/right keyboard shortcut to decide the side of each window. Then use the arrow keys to move between other windows to choose the other one and press Enter.

Tip #8. Dictation: Use speech-to-text feature in Windows 10

Dictation has been around for a while in Windows and has improved quite a bit in any text field. This feature is available on Windows 10 Fall or greater. Using this feature, you can simply talk to your Windows OS to get it respond to your commands.

Here’s how to use Windows Dictation feature: 

  • Open the app on which you want to dictate text like Notepad, WordPad, Microsoft Word or your email software and type Windows + H keyboard shortcut to trigger the dictation.
Trigger Dictation
Trigger Dictation: How to use dictation in Windows
  • If the speech services is not enabled, a pop-up windows will appear, click on it and go to Settings > Privacy > Speech, inking & typing. Once there click “Turn on speech services and typing suggestions.”
Enable Speech Services
Enable Speech Services (How To use dictation in Windows)
  • With the speech services On, press again Windows + H on your keyboard and the e dictation window will pop-up and its now ready to listen.
Trigger the Dictation Feature

Now you can give your fingers a rest and use your voice to start dictating.

> Check Out: Windows 10 Themes/Skins: Top 15+ Best Windows 10 Themes

Tip #9. Pause Updates: Pause Windows 10 Automatic Updates to Avoid Critical Bugs

Microsoft says that updates are important four security patches, bug fixes and latest features. But there may be times you’re not ready to update, or you may have heard about issues with the latest updates causing problems for others, that of course would never happen with Windows 10. Thankfully, Windows 10 Home, Pro and Enterprise allows to pause updates for a specific time.

Here’s how to pause updates for a period (up to 35 days on Windows Professional) using Windows Update settings, or disable automatic updates permanently using Windows 10 Group Policy method.

Method 1: Pause updates via Windows 10 Settings

On all Windows 10 versions you can pause updates by using Windows Update settings. At Windows 10 Home you can pause updates for up to 7 days, while on Windows 10 Professional for up to 35 days.

So, follow the steps to pause updates on Windows 10:

  • On the start button click “Settings
  • Next click “Update & Security
  • There choose “Advanced Options
  • At the ‘Pause updates‘ section, form the drop-down menu select a date that you wish to pause the updates. After you reach your pause limit you’ll have to get a new update before being allowed to pause again.

Till the period is reached, Windows will no longer check for new updates.

Pause updates on Windows 10

Method 2: Pause updates permanently via Windows 10 Group Policy

Windows 10 Pro, unlike Windows 10 Home has a Group Policy editor that you may use to permanently disable automatic auto clicker updates. Here’s how to use the Group Policy editor to pause Windows Updates:

  • In the search bar type “gpedit.msc” and press “Enter
  • At the “Group Policy Editor” window navigate to this path: Computer Configuration\Administrative Templates\Windows Components\Windows Update
  • Under “Windows Update” section double click on “Configure Automatic Updates
Group Policy editor
Group Policy editor: Disable Windows Update
  • Set this policy to ‘Disabled‘, to disable automatic updates in Windows 10 at an unlimited period.
  • When done, click “Apply” and then “OK” to save the policy.
Policy interface
Policy interface

Windows 10 will no longer install updates automatically, but you can still use Windows Update to manually check for updates and install then. To enable the automatic updates, just set the policy to ‘Not Configured‘ again.

Tip #10. Slide To Shutdown: Enable Slide to Shutdown

Here’s a cool trick that uses a full-screen slide down to power off your computer. Here’s how you set it up on your desktop:

  • Right-click on the desktop and do the following New > Shortcut
  • In the pop up windows, paste the following code:
%windir%\System32\SlideToShutDown.exe
  • Click “Next“, then “Finish“. This will create a clickable icon which you may rename it.
  • To shut down you PC via slide-down, double-click at the icon to prompt a pull-down shade and then use your mouse to drag it to the bottom. Note that this is a shutdown, not a sleep.
SlideToShutDown Windows Feature

Tip #11. Nearby Sharing: Transfer files between PCs by using Nearby Sharing

If you’re familiar with Apple’s airdrop, Microsoft now has a similar feature called “nearby sharing” that will let you share content with other Windows 10 computers connected to your network or Bluetooth. This feature was first introduced with the Windows 10 April 2018 Update (version 1803) and you can use it to quickly send a  a document, photo, video, or presentation to other PCs in your room.

Nearby Sharing
Nearby Sharing

How to enable Nearby Sharing on Windows 10

Nearby sharing, Windows 10 feature should be enable by default after you have installed April 2018 Update. Anyway, to make sure this is enabled (or to disable it), you can do it in the Settings app. Here’s how to:

  • Open “Settings” and click on “System
  • Next click on “Shared experiences” and there turn on the “Nearby sharing” toggle switch
Enable Nearby sharing on Windows 10

From here you can “Enable” or “Disable” Nearby sharing feature on Windows 10. You can do the same using Action Center, (Ctrl + A) quick keyboard shortcut. If Nearby sharing button isn’t available there, you can add it quickly form the following: Settings > System > Notifications & actions, under “Quick actions,” click the Add or remove quick actions link, and then enable the button.

Now when you select share in Microsoft Word, and many other programs including photos, you should see nearby computers. The file you send (or receive) by default will be stored in the “Downloads” folder, but you may change this in the “Shared experiences” settings. Here’s how to:

Changing default transfer folder location

Follow the steps to easily specify another folder or any other drive for your transfer files:

  • On “Settings” click “System
  • Click “Shared experiences” and under “Nearby sharing,” using Save files I receive to option, click the “Change” button.
Nearby sharing: Change transfer folder location

Select your new location. Once done, the files will be saved to the new location.

I am text block. Click edit button to change this text. Lorem ipsum dolor sit amet, consectetur adipiscing elit. Ut elit tellus, luctus nec ullamcorper mattis, pulvinar dapibus leo.

> Check Out: How To Find Passwords of All Connected Wi-Fi Networks using CMD

Tip #12. Game Bar: Enable and open the Xbox Game Bar in Windows 10

For gamers, the Xbox Game bar on Windows 10 is one of the great features. It will give access to so-called Xbox DVR, which in other words it will let you record the screen or take screenshots of your games while playing. Here’s how to enable and use it:

How to enable the Xbox Game bar Feature in Windows 10

Windows 10 Game bar was introduced first with the Windows 10 Creators Update and was updated with the Windows 10 November 2019 Update with some new features. Xbox Game bar should be enabled by default, but if its not here’s how to:

  • In the “Start” menu click “Settings
  • Then go to “Gaming
  • At the left side of your screen, click “Game bar“, then enable the Record game clips, screenshots, and broadcast using Game bar switch.

From here you can also change the default Xbox Game bar keyboard shortcuts according to your needs.

Now to bring the Xbox Game bar in Windows 10 by default just type Win + G keyboard shortcut. If you are using an Xbox controller, push the Xbox button on it. You can launch the Xbox Game bar at anytime during gameplay. This is an interface on how it looks:

Xbox Game Bar Windows 10 Interface

Xbox Game bar widgets on Windows 10

This are some generous useful widgets you can expect form Xbox Game bar in Windows 10.

  • The main widget: Its located at the top by default. You can see here the time, enable or disable other widgets that are available, and also access the settings of the Game bar.
  • The Capture widget: It will give you the tools for recording and capturing screenshots of your gaming sessions.
  • The Audio widget: You can control different audio channels without leaving the game
  • The Performance widget: It shows information about the utilization of your resources like (CPU), graphics card (GPU), RAM (memory), and number of FPS (frames per second).
  • Xbox Social widget: Will let you to connect and chat with your friends, as long as they’re also on Windows 10 or Xbox.
  • Xbox Achievements: It will display your achievements as Xbox records them.
  • Looking for group widget: Will show other connected players to Microsoft’s Xbox service that are looking to join a gamers’ group.
  • Spotify widget: It will let you play your favorite music form the Spotify app without having to leave you game.

Tip #13. Ransomware Protection: Enable Ransomware Protection in Windows 10

Ransomware is a nasty malware that encrypts your data holding it hostage unless you pay a ransom. To help protect your computer, ransomware protection is now included with Windows Defender. Windows 10’s Ransomware Protection feature is composed of two components: Controlled Folder Access and Ransomware Data Recovery.

  • Controlled Folder Access: This will monitor the folders that you specify and block any changes to the files in that folder. This will block all programs, expect the ones you allow, for making any modifications to the files of the monitored folders and will protect that folders form being encrypted by ransomware.
  • Ransomware Data Recovery: It will sync automatically all you common data folders with your Microsoft OneDrive account to make a backup of your files. If you may ever become a Ransomware victim, you can use OneDrive to recover your files.

How to enable Ransomware Protection in Windows 10

In Windows 10 version 1903, Windows Defender’s Ransomware Protection by default is disabled, so you will need to enable it to be protected form ransomware attacks. Note that is you use a third-party antivirus software and Windows Defender’s real-time protection is disabled the Ransomware Protection features screen and the Controlled Folder Access feature won’t be accessible. Also to enable full Ransomware Protection on your Windows 10 PC both Controlled Folder Access and login to Microsoft OneDrive should be configured: Here’s how to:

  • On the search bar type “Windows Security” and press “Enter” (You may do the same by following Settings> Update & Security> Windows Security.)
  • On this window click “Virus & Threat Protection
  • Scroll down to “Ransomware Protection” and click “Manage ransomware protection
  • Toggle the “Controlled folder access” to enable it, and next login to OneDrive so that both features will be enabled as seen below.

Now you can configure Controlled Folder Access to choose which folder you want to monitor by choosing the “Protected folders” option and block malicious programs form accessing then. Clicking “Protected folders” will show you a list of folders currently being protected. You can choose to add additional folders by selecting the “+”, then “next” to add a protected folder and browse your computer for that folder.

Tip #14. God Mode: Enter to God Mode in Windows 10

If you’re a power user that has recently made the switch from an older Windows operating system, you might be happy to know that the easter-egg, known as “God Mode” is still available in Windows 10. It’s great for those people that want a massive amount of settings all within a single user interface. Here’s how to enable it:

How to enable God Mode on Windows 10

  • Create a New Folder in your desktop.
  • Rename the New folder to “GodMode.{ED7BA470-8E54-465E-825C-99712043E01C}
  • Once done the step 2, the folder name will automatically change to GodMode.
Enable God Mode aon Windows 10

If done correctly this folder will become an icon and when you open it you’ll now have the ultimate control, with more settings that you would probably ever need.

> Check Next: Create A Bootable Windows 10 USB Flash drive (Step By Step Guide)

That’s all for our top best Windows 10 Tips and Tricks. We will keep to update this article as soon as new cool features will be released. If you have a tip or trick for using Windows 10 you’d like to share, than let us know about it in the comments, follow us on twitter and facebook for more news and updates.

neoAdviser

Saving Money on Vacations

4 Tips for Saving Money on Vacations with Friends

One of the ways you can ensure a fun time on your break with friends is by spending wisely. Here are tips on saving money on vacations with friends.

Did you know that taking a vacation doesn’t have to cost you an arm and a leg? There are plenty of ways that you can take vacations with friends without breaking the bank!

Spending your money on vacation wisely is a great way to save some money while traveling. There are quite a few tips that you can use so that you don’t have to overspend while going on vacation.

Keep reading for our guide to the five best tips for saving money on vacations with friends.

[td_block_ad_box spot_id=”custom_ad_2″ tdc_css=””]

1. Have the Same Goals

When traveling with friends, you need to make sure that you all have the same goal of saving money. If you’re traveling with a group of people and you’re the only person who is concerned about saving money, then it is going to be really tough for you to all have the same experience.

On the other hand, if you all have the same mindset of saving money while traveling, then you will all be on the lookout for the best deals. Make sure that your travel partners all want to save money before you even plan the trip.

2. Research Deals

A great way to find good deals on attractions, events, or activities is by doing research before your vacation. Many times they will have deals and coupons that you can buy before your trip for your entire group.

A quick google search of the area will pull up tons of awesome things to do and you can check out deals and even read reviews of all the activities.

For example, if you’re heading to Maylasia, then this KL Travel Pass is the ultimate deal! You can get entry into multiple attractions with just one ticket and even have access to a fast pass lane which will get you to the front of the line.

3. Check Out the Free Sights

Another way to save money while traveling with friends is to check out all of the beautiful and natural sights of the city that you’re visiting. Many of the time these places will be free so you won’t have to pay any money to go see them.

4. Don’t Go Out to Eat

One thing that can kill a budget when traveling is by eating out for every meal. A great way to save your budget is by hitting up the grocery store when you first get to your destination.

Staying in accommodations with a kitchen can be cost-effective because you can cook your own meals and you can also get some more time to unwind. Make sure to buy some snacks and some meals to cook so you won’t find yourself wanting to go out to eat.

Saving Money on Vacations With Friends

When planning vacations with friends there are plenty of ways for you to save money as long as you have the same goals in mind. Make sure to plan ahead and try to come up with a budget that you can all stick to.

Whether you’re looking for deals on attractions, trying to relax or just explore a new city, there are plenty of ways that you and your friends can save money while on vacation.

Make sure to bookmark our page for the latest lifestyle or tech advice.

neoAdviser

[td_block_11 category_id=”3″ limit=”1″ td_filter_default_txt=”” tdc_css=””][td_block_ad_box spot_id=”custom_ad_3″ tdc_css=””]
Aston Martin Vantage V12 Zagato Heritage Twins

Aston Martin Vantage V12 Zagato Heritage Twins Revealed

Aston Martin returns to the stage the sporty model almost a decade later

In order to mark the 50th anniversary of the DB4 GT Zagato model, Aston Martin and Italian manufacturer Zagato in 2011 introduced the sports model called Aston Martin Vantage 12 Zagato, which was available to consumers from mid-2012.

[td_block_ad_box spot_id=”custom_ad_2″]

At the time, the price of this sports model was 400,000 euros and it was said that it would be produced in a limited series of 150 units.

Almost a decade later, the Aston Martin Vantage V12 Zagato is returning to the stage to mark the 100th anniversary of the Zagato. The new, handmade model is called the Aston Martin Vantage V12 Zagato Heritage Twins, which will be available in a limited series of only 38 units (19 in the Coupe version and 19 in the Speedster version).

Zagato has implemented this project with the Swiss company AF Racing, which is traditionally a motorsport partner with Aston Martin, where on this occasion the Swiss have launched their own R-Reforged brand.

In terms of engine, the Aston Martin Vantage V12 Zagato Heritage Twins comes with a 5.9-liter V12 engine with a capacity of 600 horsepower, as well as a structure made of carbon fiber. Also, the new Vantage V12 Zagato is 4.4 meters long, 1.8 meters wide, has a 2.6-meter wheelbase, and comes with a 19-inch wheel set.

The price of this new sports model has not been revealed yet, but the first deliveries are expected to start in the fourth quarter of this year.

> Read Next: New 2020 Audi A3 Saloon Revealed: Will rival BMW 2 Series Gran Coupe

So what do you think of this? Let us know your thoughts in the comments section below, follow us on twitter and facebook for more news and updates.

neoAdviser

[td_block_11 category_id=”3″ limit=”1″ td_filter_default_txt=”” tdc_css=””][td_block_ad_box spot_id=”custom_ad_3″ tdc_css=””]
Surface Book 3

Microsoft will bring Surface Book 3 and Surface Go 2 next month

The latest leaks bring to attention Microsoft and recently beloved products for the user

Apparently Microsoft will use Intel’s latest generation 10 processors for the Surface Book 3, along with 32GB of RAM and 1TB of internal storage. Rumors also say that this time Nvidia Quadro graphics cards will be used in some Book 3 models.

[td_block_ad_box spot_id=”custom_ad_2″]

This is to focus on the demand of 3D animators, designers, or engineers who prefer optimized Quadro for some types of professional programs instead of video games.

As for the Go 2, in addition to the standard version with Intel Pentium Gold processor, there will also be a version with Intel Core i3. The latter is known to come with 8GB of RAM and 128GB of internal storage as well as LTE capability.

The Surface Go 2 will have a 10.5-inch screen and thinner frames. The design will be the same as the first Go series, so the new generation’s exterior accessories will work best with the new product.

Microsoft plans to release them next month, things may change from pandemic but it has been a long time since the company is working on these products.

> Read Next: Will LG’s new smartphone design change its fate?

So what do you think about this? Let us know your thoughts in the comments section below, follow us on twitter and facebook for more news and updates.

neoAdviser

[td_block_11 category_id=”3″ limit=”1″ td_filter_default_txt=”” tdc_css=””][td_block_ad_box spot_id=”custom_ad_3″ tdc_css=””]

New 2020 Audi A3 Saloon Revealed: Will rival BMW 2 Series Gran Coupe

Audi has confirmed the two engines that will be offered with it, one with diesel and the other with gasoline

Audi has unveiled a new A3 Saloon (Sedan), the second model in the shape of the A3 Saloon, which directly rivals the Mercedes A-Class Saloon and the BMW Series 2 Gran Coupe.

[td_block_ad_box spot_id=”custom_ad_2″]

Unlike the previous A3 Saloon model, this four-door model is 40mm longer, 22mm wider and 10mm higher. In other words, in a 4.5-meter-long sedan, the space on board improves while the luggage retains the same capacity as the previous model, but still protects well with 425 liters of volume. Inside, the new Audi A3 Saloon has a 10.25-inch display that shows speed, engine revs and other like that.

The Design 

The design of the 2020 A3 sedan seems a step ahead of the previous model. Where the old model gave a sense of effort to create the traditional model on the basis of a hatchback model, the current model has overcome this stage. It seems that 4cm more in length and 2 cm less in height have enabled optimization in lines and ratios and the new model looks more like a small A4. From the inside there is no difference with the five-door version.

The Engines 

In terms of engines we will find a wide range of choices that includes what is currently offered by Audi. The A3 Sedan will be offered with 2.0 hp diesel engines with 150 horsepower and two turbocharged versions with 1,500 cc petrol with 150 hp, one of which will be the Mild Hybrid, aided by a 48 Volt battery that helps the engine with petrol at times when more power is required. The electric generator-battery system offers 12 horsepower and 50Nm of extra torque, which helps performance and consumption.

The New 2020 Audi A3 Sedan is scheduled to arrive in concessionaire starting in July this year.

> Read Next: 2021 VW Golf R spied during testing at Nurburgring

So what do you think of this? Let us know your thoughts in the comments section below, follow us on twitter and facebook for more news and updates.

neoAdviser

[td_block_11 category_id=”3″ limit=”1″ td_filter_default_txt=””][td_block_ad_box spot_id=”custom_ad_3″]
LG Velvet

Will LG’s new smartphone design change its fate?

The company revealed more than the final design but also key aspects that shape the phone

LG has embarked on a new adventure in hopes of re-imagining the company’s image. For the first time it will not only change the design of smartphones but also their designations. These changes will be materialized for the first time in LG Velvet, the next generation smartphone. 

[td_block_ad_box spot_id=”custom_ad_2″]

But LG Velvet resembles more of an LG attempt to capture the latest trends than a new design philosophy. What LG advertises as a “3D Arc” design is something other manufacturers have been doing for a long time, bending the screens toward the edges and creating an ergonomic design.

On the other side, the Waterdrop camera is a nice visual element. The published video shows in which segment LG Velvet will be placed. The company calls it “mass premium” which means it can be mid-range with processors like the Snapdragon 765 and 5G.

LG Velvet
LG Velvet

What this phone will have unlike today’s flagships is the 3.5mm headphone port.

Overall LG Velvet will be a charming smartphone for the masses but will it be enough to change the fate of the company in this industry?

> Read Next: Facebook’s latest move, a warning to YouTube and Twitch

So what do you think about this? Let us know your thoughts in the comments section below, follow us on twitter and facebook for more news and updates.

neoAdviser

[td_block_11 category_id=”3″ limit=”1″ td_filter_default_txt=”” tdc_css=””][td_block_ad_box spot_id=”custom_ad_3″ tdc_css=””]
Facebook Gaming

Facebook’s latest move, a warning to YouTube and Twitch

Facebook will launch today an app for gaming fans called Facebook Gaming

A strong move from the social network, Facebook Gaming would be Facebook’s first attempt to confront the dominators of this market like Google YouTube and Amazon Twitch.

[td_block_ad_box spot_id=”custom_ad_2″]

The app will be free and comes years after investments that make 700 million of the 2.5 billion users per month engage in gaming content on the platform. The application is designed to view and record video game recordings, a growing sector in recent years.

While most of the world is isolated at home due to coronavirus, the $160 billion global video game business is marking a boom.

The company has tested Facebook Gaming in Southeast Asia and Latin America for the past 18 months and plans to launch it on Google Play on Monday while the iOS version when will be approved form Apple.

In the video game market, Facebook ranks third after YouTube and Twitch in terms of hours watched. Currently gaming content users see in it the main app. The new app includes games, access to player communities but the real success will be how much will be used to watch and broadcast live video games.

> Check Out: Google is building its own processors for Pixel and Chromebook devices

So what do you think about this? Let us know your thoughts in the comments section below, follow us on twitter and facebook for more news and updates.

neoAdviser

[td_block_11 category_id=”3″ limit=”1″ td_filter_default_txt=””][td_block_ad_box spot_id=”custom_ad_3″]
iPhone 12 Render

iPhone 12 Video Render, it shows flat sides and less screen frames

Although the next iPhone will hit the market in fall, there are already images of what it might look like

If the information released is correct, Apple will take a few steps back in designing the next generation of iPhone. Rumors are growing that the iPhone 12 is based on the angular model of the iPhone 5, which was introduced 8 years ago.

[td_block_ad_box spot_id=”custom_ad_2″]

Accordingly, the iPhone 12 should have flat edges with stainless steel and rounded corners. Apparently, Apple is also saying goodbye to a screen that is slightly rounded at the edges. The iPhone 12 Pro Max’s screen diagonal seems to increase from 6.5 to 6.7 inches. The device is said to be slightly wider. The screen itself should now also have a refresh rate of 120 Hz.

All other latest iPhone 12 leaks

The spring period is usually the hottest area where leaks and predictions for the next iPhone become more accurate. This is because June is officially the month where their mass production begins, but also the physical details are distributed to the production companies of the protective cases, so according to new info, here is what the iPhone 12 Pro Max will look like from next week.

It is believed that this generation will be different from the others as the sides of the apartments will be flat and not arched as before, more or less like the version of iPhone 5 and 4, aesthetics also introduced to the new iPad.

The screen will be 6.7-inch OLED but overall the smartphone will be wider and longer. Meanwhile, the screen frame will be much thinner up to 40% on all four sides, which would be a real beauty to see.

As for the camera set, the new LIDAR sensor will certainly take fourth place in a bump that will stay the same in size especially in terms of thickness, but considering that the body itself will be thinner it remains to be seen how it will look. Sensor diameters are expected to be larger which invites allusions to hardware improvements, super!

Changes will also come to the front of the screen, where the camera footprint and FaceID sensors will be different in design but also smaller. The antenna lines on the side are expected to be wider and closer, as needed for 5G. 

A strange change has to do with the SIM card slot, which has an immigrant on the other side. Where the SIM was, a Smart Connector trail is suspected. Aspect has been discussed for years but has never seen sunlight.

In total there will be 4 versions and it is expected to be launched sometime by the end of 2020.

> Read Next: Oppo Reno Ace 2 has the world’s fastest wireless charging technology

So what do you think about this? Let us know your thoughts in the comments section below, follow us on twitter and facebook for more news and updates.

neoAdviser

[td_block_11 category_id=”3″ limit=”1″ td_filter_default_txt=””][td_block_ad_box spot_id=”custom_ad_3″]
2021 VW Golf R new spy photos

2021 VW Golf R spied during testing at Nurburgring

The Golf R comes with a refreshed look, four active wheels and super motor power

The Volkwagen Golf R was spied on during testing in Nurburgring, Germany. Looking at the GTI, the GTE of the GTD, even the R model comes with almost the same design, the only difference being the LED lights from the front.

[td_block_ad_box spot_id=”custom_ad_2″]

According to reports, VW wanted to use the RS3 Sportback’s 2.5-liter turbo engine, but Audi did not allow the use of their iconic engine. This has left the Golf R with its old 2.0-liter but up-to-date engine, which now produces close to 330 horsepower.

VW has already confirmed that it will introduce the new Golf R this year, but due to the coronavirus, which has invaded the world, it is not known when it will be launched.

> Check Next: 2021 Aston Martin DBX SUV: Price, Specs and other Details

So what do you think of this? Let us know your thoughts in the comments section below, follow us on twitter and facebook for more news and updates.

neoAdviser

[td_block_11 category_id=”3″ limit=”1″ td_filter_default_txt=”” tdc_css=””][td_block_ad_box spot_id=”custom_ad_3″ tdc_css=””]